To install a roof vent for a bathroom fan, start by selecting the appropriate location on the roof and marking it accordingly. Then, cut a hole in the roof using a reciprocating saw.
Finally, attach the vent hood to the roof and connect the fan duct to the vent. This will allow proper ventilation in your bathroom and prevent moisture buildup.
Understand The Importance Of Proper Ventilation
Importance of Proper Ventilation for Bathroom Spaces
One often underestimated aspect of a bathroom renovation is the installation of a roof vent for a bathroom fan. Proper ventilation is crucial for any bathroom space, as it helps to maintain indoor air quality, control humidity levels, and prevent the growth of mold and mildew. Without adequate ventilation, your bathroom can easily become a breeding ground for these unwanted issues.
Effects of Inadequate Ventilation
Insufficient ventilation in a bathroom can lead to a range of problems that can compromise not only the aesthetics but also the health and well-being of your household. Here are a few reasons why proper ventilation is of utmost importance:
- Poor indoor air quality: Without proper ventilation, the bathroom air becomes stagnant, trapping odors, fumes, and bacteria. This can create an unpleasant atmosphere for you and your guests.
- Excessive humidity: Showers, baths, and even regular use of the sink can generate moisture, leading to high humidity levels in the bathroom. Without ventilation, this excess moisture can promote the growth of mold, mildew, and other bacteria, compromising not only your bathroom’s integrity but also your health.
- Structural damage: Lingering moisture and condensation caused by insufficient ventilation can seep into walls, ceilings, and other structural components, eventually leading to cracks, paint peeling, and even structural damage.
- Health hazards: Mold and mildew growth due to inadequate ventilation can trigger respiratory issues, allergies, and other health problems. These pollutants can exacerbate existing conditions or cause new ones, posing a threat to the well-being of your family.
Proper ventilation in your bathroom is essential to combat all these issues and create a safe, healthy, and comfortable environment. Installing a roof vent for your bathroom fan is a practical solution to ensure adequate airflow and minimize these potential problems.
Determine The Type And Size Of Vent Needed
When it comes to installing a roof vent for your bathroom fan, one of the first steps is to determine the type and size of vent needed. This is an important consideration as it will ensure that your bathroom remains properly ventilated and free from excess humidity, odors, and potential mold or mildew growth.
Consider the size of your bathroom
To determine the type and size of vent needed, it is important to consider the size of your bathroom. Larger bathrooms typically require stronger ventilation to effectively remove moisture and odors. On the other hand, if you have a smaller bathroom, a smaller vent may be sufficient.
Take measurements of your bathroom to determine the square footage. This will give you a better idea of what type of vent is needed to provide adequate ventilation for your space.
Evaluate the location of your bathroom fan
Another important factor to consider is the location of your bathroom fan. Ideally, the fan should be positioned near the shower or bath area to effectively remove humidity from the source. This also helps prevent moisture from spreading throughout the bathroom, which can lead to the development of mold and mildew.
Inspect your bathroom to identify the current location of your fan. If the fan is not ideally placed, you may need to consider relocating it. Moving the fan closer to the source of moisture will improve its functionality and ensure efficient ventilation.
Additionally, you’ll want to determine if your fan is currently vented to the outside or if it is venting into the attic space. If the latter is the case, it is crucial to redirect the ventilation to the outside to prevent potential damage to your home’s structure.
Once you have determined the type and size of vent needed based on the size of your bathroom and the location of your fan, you can move on to the next steps of the installation process. Remember to utilize proper safety measures and consult with a professional if you are unsure about any aspect of the installation.

Research Different Types Of Roof Vents
Roof Vents for Bathroom Fans
When it comes to installing a roof vent for your bathroom fan, it’s important to research the different types of roof vents available. The right roof vent can make a significant difference in the efficiency and effectiveness of your bathroom fan, so taking the time to understand the various options is essential.
If you’re unfamiliar with roof vents, they are specially designed to let air escape from your home while preventing moisture and debris from entering. Choosing the right type of roof vent for your bathroom fan will ensure proper ventilation and prevent any potential damage caused by condensation.
Understanding Various Options Available
There are several different types of roof vents that you can choose from for your bathroom fan installation. Each type has its own unique features and advantages, so it’s essential to understand their differences before making a decision.
Here are some of the most common types of roof vents for bathroom fans:
| Type of Roof Vent | Description |
|---|---|
| Ridge Vent | A continuous vent installed along the ridge of the roof, allowing for maximum airflow. |
| Static Vent | A basic, non-moving vent that allows air to escape without the need for electricity or mechanical parts. |
| Turbine Vent | A vent with a spinning turbine that helps to draw air out of the bathroom and ventilate the attic. |
| Power Vent | An electrically powered vent that uses a motor to expel air from the bathroom and improve ventilation. |
These are just a few examples of the roof vents available for bathroom fans. Each type has its own benefits and drawbacks, so it’s important to consider factors such as your home’s architecture, climate, and personal preferences when making a decision.
With a better understanding of the various options available, you can now move forward confidently in choosing the right roof vent for your bathroom fan installation. In the next sections, we will explore the installation process and provide step-by-step instructions to help you get the job done effectively and efficiently.
Inspecting Your Roof For Potential Issues
Before installing a roof vent for your bathroom fan, it’s crucial to conduct a thorough inspection of your roof to identify any potential issues. This helps ensure that the installation process goes smoothly and that your roof remains in good condition. By taking the time to inspect your roof, you can catch any damaged or deteriorated areas that may need attention.
Conduct a thorough roof inspection
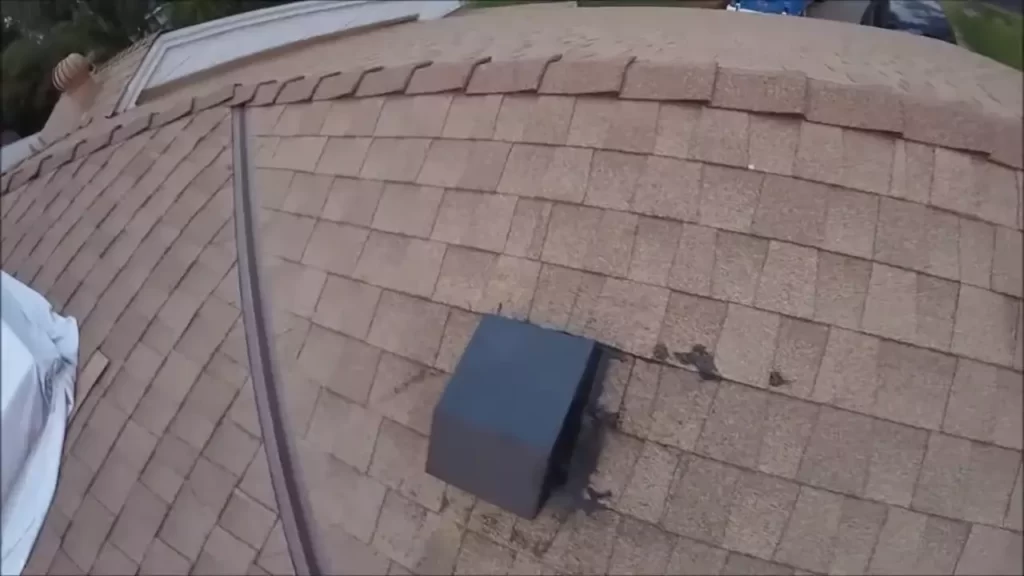
To start, carefully inspect your roof for any signs of damage or wear. Begin by visually examining the surface of your roof, keeping an eye out for missing or damaged shingles, cracked tiles, or any other areas that appear to be deteriorating. Pay close attention to areas around vents, chimneys, and skylights, as these are common entry points for water.
Next, check for any signs of water stains on your ceiling or walls near the bathroom. These can indicate potential leaks and should be addressed before installing a roof vent.
It’s also important to check for any signs of sagging or unevenness in your roof. This can be a sign of structural issues and may require professional attention.
Identify any damaged or deteriorated areas
During your inspection, make a note of any damaged or deteriorated areas you encounter. This can include missing or broken shingles, cracked flashing, or deteriorated seals around vents and chimneys. Identifying these issues allows you to address them before installing a roof vent, preventing any further damage or leaks.
If you notice any damaged or deteriorated areas that require repair, consider engaging a professional roofing contractor to complete the necessary repairs. They will have the expertise to properly fix the issues, ensuring the longevity and effectiveness of your roof vent installation.
By thoroughly inspecting your roof and identifying any potential issues before installing a roof vent for your bathroom fan, you can address any necessary repairs or maintenance in a timely manner. This not only ensures a successful installation but also helps protect the integrity of your roof and prevents future problems.
Gathering The Necessary Tools And Materials
Gathering the necessary tools and materials is an essential first step when it comes to installing a roof vent for your bathroom fan. By ensuring you have all the tools and materials on hand, you can streamline the installation process and avoid any unwanted delays or complications. In this section, we will outline the tools needed for roof vent installation as well as the required materials for a successful installation.
Tools needed for roof vent installation
- Safety goggles
- Gloves
- Tape measure
- Pencil or marker
- Chalk line
- Roofing nails or screws
- Power drill
- Roofer’s knife or utility knife
- Hacksaw or reciprocating saw
- Caulking gun
- Silicone sealant
- Roofing cement
- Roofing adhesive or tape
- Flat pry bar
- Roofing tar or asphalt
- Roofing underlayment
- Staple gun
- Roofing shingles or tiles
Required materials for a successful installation
- Roof vent
- Roof flashing
- Vent pipe or duct
- Vent cap or cover
- Vent collar or connector
- Vent hose or tubing
- Screws or nails for securing the vent
- Ridge vent (if applicable)
- Roofing sealant or caulk
- Roofing nails or screws
- Roofing adhesive or tape
- Roofing shingles or tiles (matching your roof)
- Roofing underlayment
- Insulation (if necessary)
- Electrical connectors
- Wire nuts
- Wire strippers
- Electrical tape
- Clamps or fasteners for securing the vent hose
By ensuring you have all the necessary tools and materials, you can proceed with confidence knowing that you are fully prepared for the roof vent installation. Having the right tools at hand will make the process smoother and safer, while the required materials will ensure a successful and efficient installation. In the next section, we will delve into the step-by-step process of installing a roof vent for your bathroom fan.
Preparing The Roof For Vent Installation
Before you can install a roof vent for your bathroom fan, it is important to properly prepare the roof. This process involves identifying the ideal location for the vent, measuring and marking the area. By following these steps, you can ensure a successful and efficient installation.
Identifying the ideal location for the vent
The first step in preparing the roof for vent installation is to identify the ideal location for the vent. The location should be strategically chosen to optimize the extraction of moisture and odors from the bathroom. One common practice is to position the vent near the bathroom exhaust fan, ensuring a direct path for ventilation.
Measuring and marking the area
Once you have identified the ideal location for the vent, it is important to measure and mark the area. This will ensure that the vent is properly centered and aligned on the roof. Start by measuring the dimensions of the vent, including its width and length.
Next, use these measurements to mark the area on the roof where the vent will be installed. Make sure to use a trusted marker or pencil that is visible on the roof surface. Take your time and double-check the accuracy of your measurements and markings to avoid any unnecessary mistakes.
If you’re unsure about the exact placement, it’s recommended to consult a professional to ensure proper alignment and functionality of the vent.
Conclusion
Preparing the roof for vent installation is a crucial step in ensuring the proper functioning and efficiency of your bathroom fan. By carefully identifying the ideal location for the vent and accurately measuring and marking the area, you can ensure a seamless installation process. Always remember, if you’re uncertain or uncomfortable with the installation process it’s best to consult a professional for expert guidance.
Installing The Vent Pipe
Cutting a hole in the roof
Before you can connect the vent pipe to the bathroom fan, you’ll need to cut a hole in the roof. This step is crucial, as it will provide the necessary opening for the vent pipe to pass through and expel the moist air from your bathroom.
Here’s a step-by-step guide on how to cut a hole in the roof:
- Start by finding the ideal location for the vent pipe on the roof. It’s best to choose a spot that is away from any obstacles such as chimneys or overhanging tree branches.
- Measure the diameter of the vent pipe to determine the size of the hole you need to cut. Use a marker or chalk to mark the outline of the hole on the roof.
- Put on safety goggles and work gloves to protect yourself during this step.
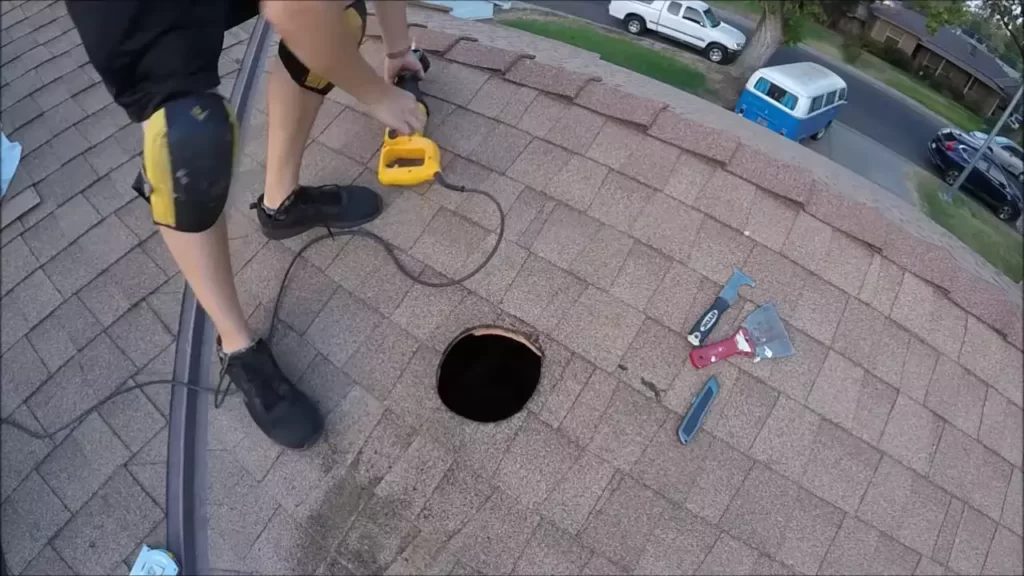
- Use a reciprocating saw or a circular saw to carefully cut along the marked outline. Take your time and make precise cuts to ensure a clean hole.
- Once you’ve cut through the roof, remove any debris and check the hole for any sharp edges. Sand down any rough areas to prevent injury and ensure a smooth opening.
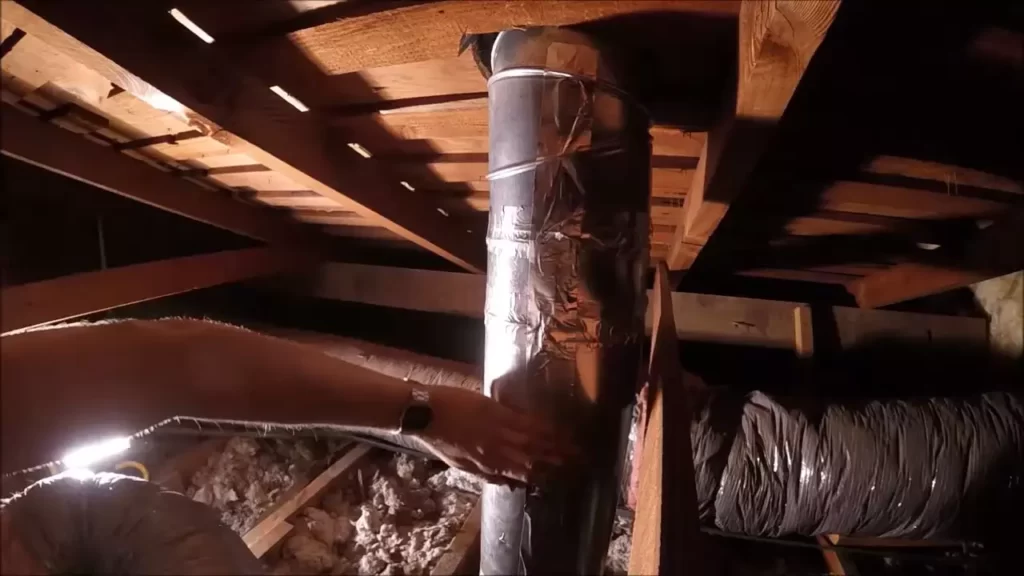
Connecting the vent pipe to the bathroom fan
Now that the hole has been cut, it’s time to connect the vent pipe to the bathroom fan. This step is crucial in ensuring proper ventilation and preventing moisture build-up in your bathroom. Follow these instructions to successfully connect the vent pipe:
- Place the bathroom fan near the hole in the roof. Ensure that the fan is positioned securely and will not move during the installation process.
- Attach the vent pipe to the fan’s exhaust outlet. Use duct tape or clamps to create a secure connection between the two.
- Feed the other end of the vent pipe through the hole in the roof. Make sure it extends a few inches past the roof to prevent any water infiltration.
- Secure the vent pipe to the roof using roof sealant or screws. This will prevent any leaks and ensure a sturdy installation.
- Inspect the connection between the vent pipe and the fan for any gaps or loose ends. Seal any openings with duct tape or roof sealant to ensure an airtight connection.
Congratulations! You’ve successfully installed the vent pipe for your bathroom fan. With proper ventilation in place, you can enjoy a clean and fresh bathroom environment, free from excess moisture and its accompanying problems.
Securing The Vent Flange To The Roof
Attaching the Vent Flange to the Roof
Securing the vent flange to the roof is a crucial step in the installation process of a roof vent for a bathroom fan. This step ensures that the vent is properly anchored and prevents any water leakage. Properly securing the vent flange requires attention to detail and careful execution. Follow these steps to ensure a successful installation.
Ensuring a Watertight Seal
Ensuring a watertight seal is essential to keep your roof and bathroom protected from any potential water damage. Failure to achieve a proper seal can result in leaks and costly repairs down the line. To ensure a watertight seal, follow these guidelines.
1. Clean the Roof Surface: Before attaching the vent flange, make sure to clean the roof surface thoroughly. Remove any debris, dirt, or loose shingles. This will ensure a clean and smooth surface for proper adhesion.
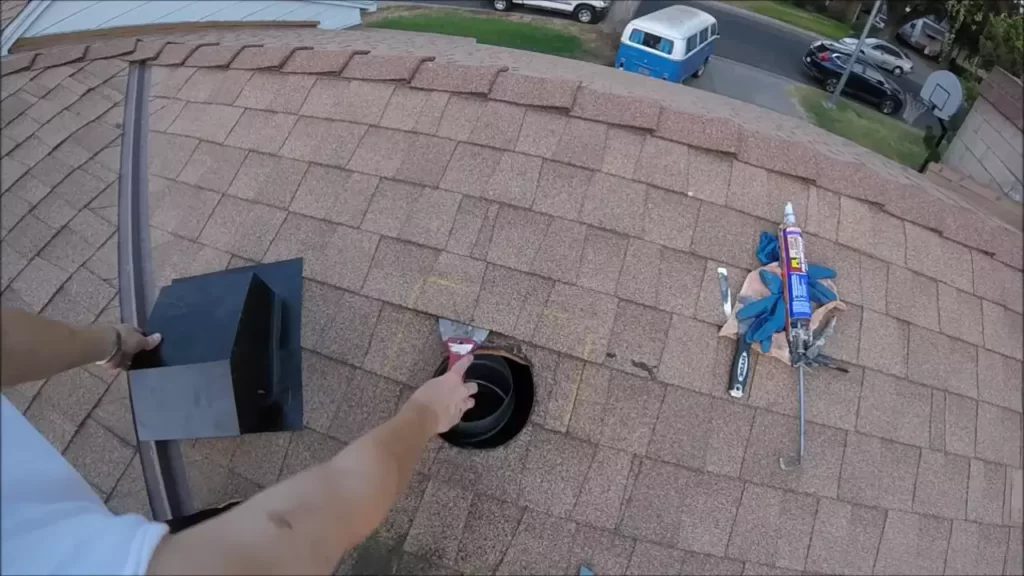
2. Apply Roofing Sealant: Apply a layer of roofing sealant around the perimeter of the vent flange. This sealant will create a barrier against water penetration. Use a caulking gun to apply the sealant evenly, ensuring complete coverage.
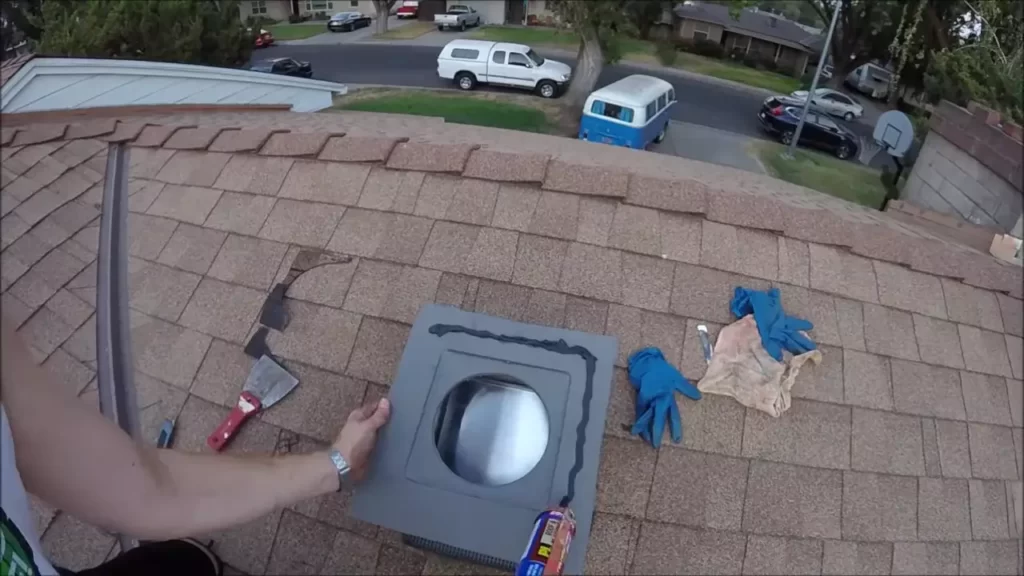
3. Position and Secure the Vent Flange: Carefully position the vent flange over the designated spot on the roof. Make sure it is centered and aligned properly. Once in position, secure the flange to the roof by screwing it down. Use roofing screws to securely attach the flange, ensuring it is tightly fastened.
4. Add an Extra Layer of Sealant: After securing the vent flange, apply an additional layer of roofing sealant around the edges of the flange. This extra layer will further enhance the watertight seal and provide additional protection against leaks.
5. Inspect for Proper Seal: After the installation is complete, visually inspect the vent flange and the surrounding area for any gaps or openings. Ensure that the sealant has formed a complete seal around the flange. This step is crucial to avoid any potential water infiltration.
By following these steps, you can secure the vent flange to the roof and ensure a watertight seal. This will provide you with peace of mind knowing that your bathroom fan is properly installed and protected against water damage. Remember to periodically check the seal and reapply the sealant if necessary to maintain the integrity of the installation.
Connecting The Vent Pipe To The Flange
Connecting the vent pipe to the flange is a crucial step in the process of installing a roof vent for a bathroom fan. This step ensures that the fan exhaust is properly directed outside, preventing moisture buildup and potential damage to your home. By following the right technique, you can create a secure and airtight connection that will effectively channel the odors and humidity outdoors.
Attaching the Vent Pipe to the Vent Flange
Attaching the vent pipe to the vent flange is the first step in connecting the bathroom fan to the outside. The vent flange is a metal or plastic piece attached to the roof that acts as an entry point for the vent pipe. Here’s a step-by-step guide on how to attach the vent pipe to the vent flange:
- First, make sure that the vent flange and the vent pipe are the correct sizes. The vent flange should match the diameter of the vent pipe for a secure fit.
- Slide the open end of the vent pipe over the vent flange, ensuring a snug fit. The vent pipe should extend a few inches above the roof’s surface to prevent rainwater from entering.
- If the vent pipe is longer than required, use a hacksaw or tin snips to trim it to the desired length. Make sure to wear protective gloves and eyewear while cutting.
- Smooth out any rough edges or burrs using sandpaper or a file to ensure a clean connection.
Securing the Connection with Screws or Clamps
Securing the connection between the vent pipe and the vent flange is essential to prevent leaks and maintain a tight seal. There are two common methods to secure this connection: using screws or clamps. Here’s how to do it:
Using Screws:
- Position the vent pipe in place over the vent flange.
- Hold the pipe firmly in place, ensuring it is centered and aligned with the flange.
- Using a drill, screw the pipe onto the flange by driving screws through the pre-drilled holes on the flange. Make sure to choose screws that are suitable for the material of the flange (e.g., metal screws for a metal flange).
- Tighten the screws until the pipe is securely fastened to the flange, but be careful not to over-tighten and damage the pipe or flange.
Using Clamps:
- Place a clamp around the vent pipe where it meets the vent flange.
- Tighten the clamp using a screwdriver or a wrench until it securely holds the pipe in place.
- Ensure that the clamp is evenly tightened, creating a tight seal around the connection.
- Test the connection by gently tugging on the vent pipe to ensure it is sturdy and properly attached.
By following these steps and securing the connection between the vent pipe and the vent flange, you can ensure a well-functioning ventilation system for your bathroom. Taking the time to properly connect these two components will not only maintain the integrity of your roof but also help to keep your bathroom fresh and free from excess humidity.
Testing The Ventilation System
Checking for Proper Air Flow
After installing a roof vent for your bathroom fan, it is crucial to test the ventilation system to ensure it is functioning properly. Checking for proper air flow is the first step in this process. Here are some easy steps to follow:
- Turn on the bathroom fan and wait for a few minutes to allow the system to circulate the air.
- Place your hand near the vent opening on the roof. You should feel a strong and steady stream of air coming out. This indicates that the fan is effectively removing moisture and odors from your bathroom.
- If you do not feel any air coming out or if the air flow is weak, there may be an issue with the ventilation system. Double-check if the vent damper is fully open and not blocked by any debris or obstructions. Additionally, ensure that the fan is functioning properly and installed correctly.
- It is also essential to inspect the bathroom for any signs of condensation or moisture buildup. If you notice excessive humidity or dampness, it suggests that the ventilation is insufficient. In such cases, you may need to consult a professional to address any underlying issues.
Listening for any Strange Noises
In addition to checking for proper air flow, it is important to listen for any strange noises coming from the ventilation system. Here’s what you need to do:
- Turn on the bathroom fan and pay close attention to any unusual sounds coming from the ventilation system.
- A properly installed and functional roof vent should operate quietly, with minimal noise. The absence of any strange noises indicates that the fan is in good condition.
- If you hear any rattling, banging, or grinding noises, it may suggest a problem with the fan or the vent. In such cases, it is recommended to turn off the fan immediately and conduct a thorough inspection to identify the source of the noise.
- Keep in mind that irregular noises can be signs of worn-out parts, loose connections, or debris in the vent. Addressing these issues promptly will prevent further damage to the ventilation system and ensure its longevity.
Sealing And Insulating The Installation
Properly sealing and insulating the installation of a roof vent for your bathroom fan is essential to ensure the longevity and efficiency of your ventilation system. In this section, we will discuss two key steps: applying roof sealant to ensure water tightness and adding insulation to prevent energy loss.
Applying roof sealant to ensure water tightness
One of the crucial steps in installing a roof vent for your bathroom fan is applying roof sealant to create a water-tight seal. Roof sealant acts as a protective barrier, preventing water from seeping into your attic and causing damage. Here’s a step-by-step guide on how to apply roof sealant:
- Clean the area around the vent opening. Remove any debris, dirt, or old sealant that may hinder proper adhesion.
- Apply a generous amount of roof sealant around the edges of the vent opening. Make sure to cover the entire perimeter.
- Using a putty knife or your fingers, spread the sealant evenly, ensuring that it forms a complete seal between the vent and the roof surface.
- Inspect the seal for any gaps or areas that may need additional sealant. Apply more as necessary.
By following these steps, you can effectively prevent water leaks and maintain the integrity of your roof vent installation.
Adding insulation to prevent energy loss
In addition to sealing the vent for water tightness, it’s important to address energy efficiency by adding insulation. Insulation helps to prevent temperature transfer between your bathroom and the attic, reducing energy loss and lowering your heating or cooling costs. Here’s how you can add insulation to your roof vent:
- Measure the dimensions of the vent opening to determine the amount of insulation needed.
- Cut the insulation material to fit the opening, ensuring a snug and proper fit.
- Place the insulation around the vent pipe, making sure to cover all sides.
- Secure the insulation in place using adhesive or tape, ensuring it remains in position.
Adding insulation around your roof vent not only improves energy efficiency but also minimizes the potential for condensation and moisture buildup. This, in turn, helps to prevent mold and mildew growth, maintaining a healthy environment in your bathroom.
Properly sealing and insulating the installation of your bathroom fan’s roof vent is a crucial step to ensure optimal performance and energy efficiency. By applying roof sealant and adding insulation, you can enjoy a water-tight and energy-efficient ventilation system for years to come.
Maintaining And Cleaning Your Roof Vent
Maintaining and Cleaning Your Roof Vent
Regular maintenance and cleaning of your roof vent are essential to ensure that it functions efficiently and effectively. By properly maintaining your roof vent, you can prevent issues such as clogging and damage, ultimately prolonging its lifespan. In this section, we will discuss the regular maintenance tasks and the cleaning process for your roof vent.
Regular Maintenance Tasks
Performing regular maintenance tasks on your roof vent can help prevent any problems from arising. These tasks are relatively simple and can be done without professional assistance. Here are a few maintenance tasks you should regularly carry out:
- Inspect the roof vent for any signs of damage, such as cracks or loose parts. Address any issues immediately to avoid further damage.
- Check for any debris, bird nests, or leaves that might have accumulated around the vent. Clearing these obstructions will ensure proper airflow.
- Ensure that the vent is securely fastened to the roof to prevent any leaks or water damage.
- Inspect the vent pipe and make sure it is properly connected and free from any blockages.
- Check the fan blades for any dirt or dust accumulation. Clean them if necessary.
Cleaning the Vent and Removing Debris
Over time, your roof vent can become clogged with debris and dirt, hindering its performance. Regular cleaning is necessary to maintain its efficiency. When it comes to cleaning your roof vent, follow these steps:
- First, ensure your safety by using a ladder and appropriate protective gear.
- Carefully remove the vent cover to access the interior of the vent. Use a screwdriver or other suitable tools.
- Inspect the vent for any debris, such as leaves, twigs, or dirt. Use a brush or vacuum cleaner to remove it.
- Cleanse the vent cover and the surrounding area using mild soap and water. Ensure that all dirt and grime are thoroughly removed.
- Once clean, dry the vent cover and reattach it securely to the vent.
Regular maintenance and cleaning of your roof vent will keep it in optimal condition and ensure the proper functioning of your bathroom fan. By following these simple steps, you can effectively prevent any potential problems and enjoy a well-ventilated bathroom.
Frequently Asked Questions For How To Install A Roof Vent For Bathroom Fan
Can You Vent A Bathroom Fan Through A Roof Vent?
Yes, you can vent a bathroom fan through a roof vent.
How Much Does It Cost To Vent A Bathroom Fan Through The Roof?
Venting a bathroom fan through the roof can cost around $200 to $500, depending on the complexity of the job and any additional materials needed. Hiring a professional is recommended to ensure proper installation and adherence to building codes.
What Is The Proper Way To Vent A Bathroom Fan?
Properly venting a bathroom fan involves following these steps:
1) Connect the fan to an exterior exhaust vent.
2) Ensure the vent is positioned away from windows and doors to prevent moisture and odors from reentering the bathroom.
3) Use a duct with the correct diameter for optimal airflow.
4) Insulate the duct to prevent condensation.
5) Regularly clean and maintain the vent to ensure efficient operation.
What Is the Code For Venting A Bathroom Fan?
The code for venting a bathroom fan depends on local building codes. It typically requires venting to the outside, not attic or crawlspaces, and meeting certain specifications for air flow and noise levels. Seek guidance from your local building authority to ensure compliance.
Conclusion
Installing a roof vent for your bathroom fan is a crucial step in maintaining proper ventilation and preventing issues like mold and excessive moisture. With the guidance provided in this blog post, you can confidently tackle this project on your own.
Remember to choose the right vent type, measure accurately, and follow the installation steps to ensure success. By giving your bathroom the ventilation it needs, you’ll be creating a healthier and more comfortable living environment for you and your family.