To install corrugated metal on interior walls, first measure and cut the metal sheets to fit the wall dimensions, then attach the metal to the wall using screws or adhesive. Corrugated metal can add an industrial and modern look to any interior space.
With its durability and unique texture, it is becoming a popular choice for homeowners and designers looking to add character and style to their walls. Whether you want to create an accent wall or cover an entire room, the installation process is relatively straightforward and can be completed with basic tools and materials.
We will guide you through the steps of installing corrugated metal on interior walls for a stunning and distinctive finish.
Materials Needed For Installing Corrugated Metal On Interior Walls
When it comes to adding an industrial touch to your interior design, installing corrugated metal on the walls is a popular choice. Not only does it instantly create a modern and sleek look, but it also adds texture and depth to the space. Before you start this DIY project, it’s important to gather all the necessary materials. Here is a list of items you will need:
List of Materials Required
| Materials | Importance |
|---|---|
| Corrugated Metal Sheets | These sheets are the main component that will be installed on the interior walls. They provide the desired industrial look and durability. |
| Measuring Tape | Accurate measurements are crucial when cutting the metal sheets to fit the wall dimensions properly. |
| Angle Grinder | The angle grinder helps in cutting the metal sheets to the required size. It ensures smooth edges and precise cuts for a professional finish. |
| Drill | This tool is essential for creating holes in the metal sheets to attach them securely to the walls. |
| Screws or Rivets | These fasteners are used to attach the corrugated metal sheets to the interior walls. They ensure a strong and secure installation. |
| Safety Gloves and Goggles | When working with metal sheets and power tools, it’s important to prioritize safety. Gloves and goggles protect you from possible cuts and injuries. |
| Marker or Chalk | To mark the measurements accurately on the metal sheets, a marker or chalk can be used. This helps in cutting the sheets with precision. |
Tips for Selecting the Right Materials
- Choose corrugated metal sheets that are suitable for interior use. They should have a protective coating to prevent corrosion and enhance their lifespan.
- Ensure the measuring tape is of good quality and easy to read. Accuracy is key when determining the dimensions of the metal sheets.
- When selecting an angle grinder, opt for a model with adjustable speed and a high-quality cutting disc. This will ensure smooth and precise cuts on the metal sheets.
- Invest in a reliable drill with enough power and torque to easily create holes in the metal sheets. Different sizes of drill bits may be required for various purposes.
- Choose screws or rivets that are specifically designed for metal-to-wall applications. They should be sturdy and corrosion-resistant for a secure and long-lasting installation.
- Prioritize safety when selecting gloves and goggles. Look for gloves that offer a good grip and goggles that provide clear vision and protect against flying debris.
- Opt for a marker or chalk that is easily visible on metal surfaces. This will help ensure accurate markings for precise cuts.
By gathering the necessary materials and selecting the right ones for your project, you can ensure a successful and visually appealing installation of corrugated metal on your interior walls. Now that you are equipped with the knowledge of what you’ll need, it’s time to get started!
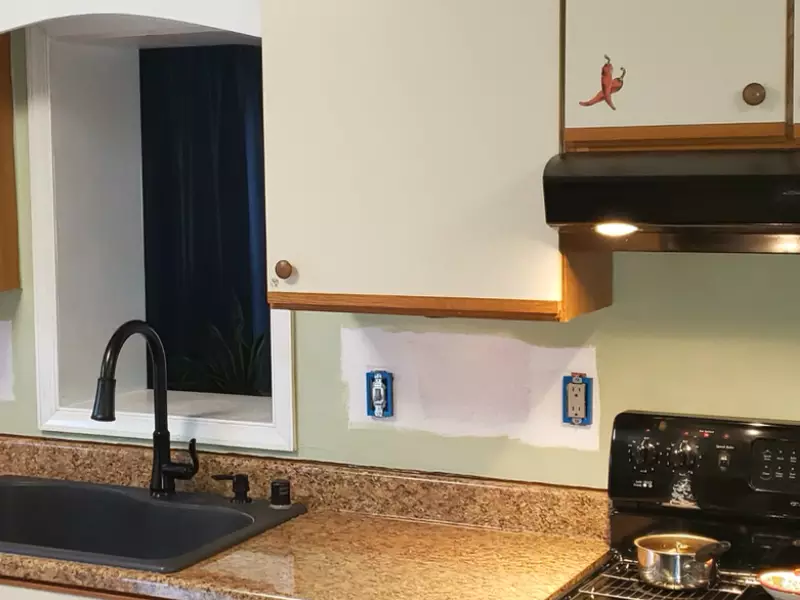
Preparing The Interior Walls For Corrugated Metal Installation
Before you can start installing corrugated metal on your interior walls, it’s crucial to properly prepare the surface. This will ensure a smooth and successful installation, as well as enhance the overall durability and appearance of the finished project. In this article, we will guide you through the essential steps of assessing the condition of the walls, cleaning them, repairing any damages or imperfections, and priming them for better adhesion.
Assessing the condition of the walls
The first step in preparing your interior walls for corrugated metal installation is to assess their condition. Carefully inspect the walls for any signs of moisture, mold, or mildew. These issues can compromise the integrity of both the walls and the metal installation.
If you notice any signs of moisture, it is crucial to address the underlying cause and repair it before proceeding with the installation. This may involve fixing leaky pipes, sealing cracks, or improving ventilation in the room.
Cleaning the walls
Once you have assessed the condition of the walls and ensured there are no moisture issues, it’s time to thoroughly clean them. Cleaning the walls will help remove dirt, dust, grease, and other contaminants that could affect the adhesion of the corrugated metal.
Start by dusting the walls with a soft cloth or vacuuming them with a brush attachment. This will remove loose debris and make the cleaning process more effective. Then, mix a mild detergent with warm water and use a sponge or a soft-bristled brush to gently scrub the walls in a circular motion.
Rinse the walls thoroughly with clean water to remove any residue from the detergent. It’s essential to let the walls dry completely before proceeding to the next step.
Repairing any damages or imperfections
After cleaning, carefully inspect the walls for any damages or imperfections that need to be repaired. These can include cracks, holes, dents, or uneven surfaces. Repairing these issues will ensure a smooth and flat surface for the corrugated metal installation.
If you notice any cracks or holes, use a spackle or filler compound to fill them. Use a putty knife to apply the compound, ensuring it is level with the surrounding wall surface. Once the compound is dry, sand it lightly to achieve a smooth finish.
For dents or uneven surfaces, consider using a joint compound to fill and level them. You can apply the joint compound with a putty knife, and once it dries, sand it until it is even with the surrounding wall.
Priming the walls for better adhesion
Before installing the corrugated metal, it’s recommended to prime the walls to enhance adhesion and ensure a long-lasting installation. The primer creates a b bond between the wall surface and the metal, improving the overall stability and preventing peeling or detachment.
Choose a primer suitable for the type of wall material you have, such as drywall or plaster. Apply the primer using a paintbrush or roller, following the manufacturer’s instructions regarding drying time and coverage.
Allow the primer to dry completely before proceeding with the installation. This may take several hours, so ensure you have enough time for the primer to set before moving forward.
By properly assessing the condition of your walls, cleaning them, repairing any damages or imperfections, and priming them for better adhesion, you are now ready to install corrugated metal on your interior walls. Following these essential preliminary steps will not only ensure a smoother installation process but also guarantee a high-quality and long-lasting finished project.
Installing Corrugated Metal On Interior Walls
Corrugated metal is a popular choice for adding an industrial, modern look to interior spaces. Whether you’re transforming a living room, bedroom, or office, installing corrugated metal on interior walls can create a unique and eye-catching feature. In this guide, we’ll walk you through the step-by-step process of installing corrugated metal on your interior walls, ensuring precise measurements, clean cuts, and a secure installation. Let’s get started!
Measuring and marking the walls for precise installation
Before you begin the installation process, it’s crucial to measure and mark your walls accurately. This will ensure a precise and professional-looking installation. To get started, follow these steps:
- Using a tape measure, measure the height and width of the wall area where you plan to install corrugated metal.
- Mark the measurements on the walls with a pencil, ensuring straight and level lines for a clean installation.
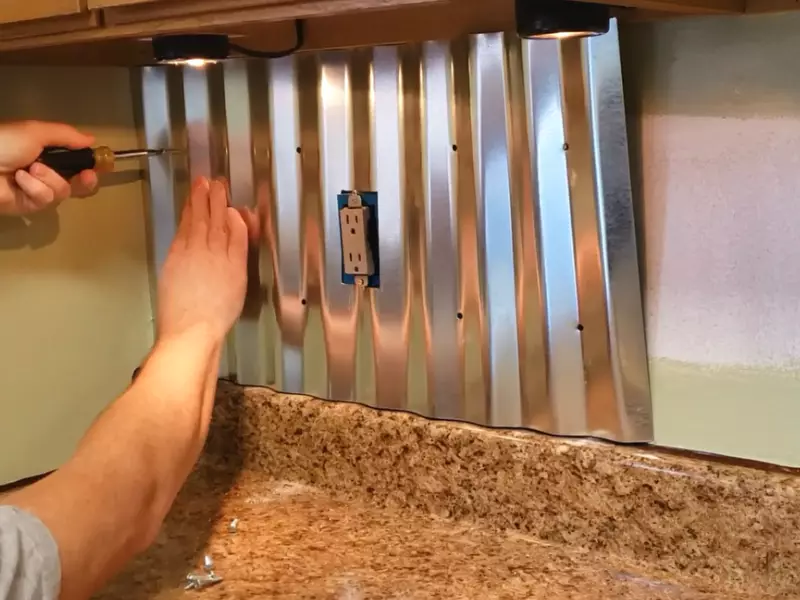
- Identify any obstacles on the wall, such as electrical outlets or switches, and mark their locations accordingly. This will help you plan where to cut the corrugated metal panels.
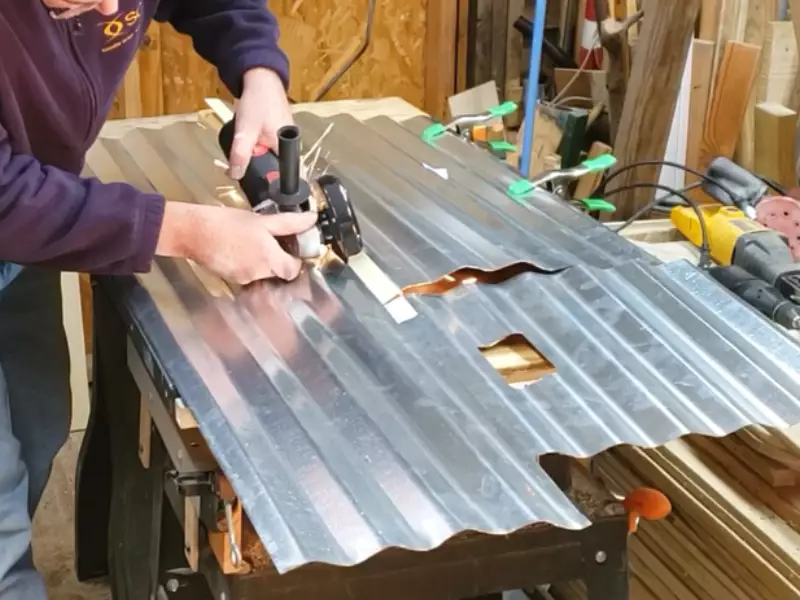
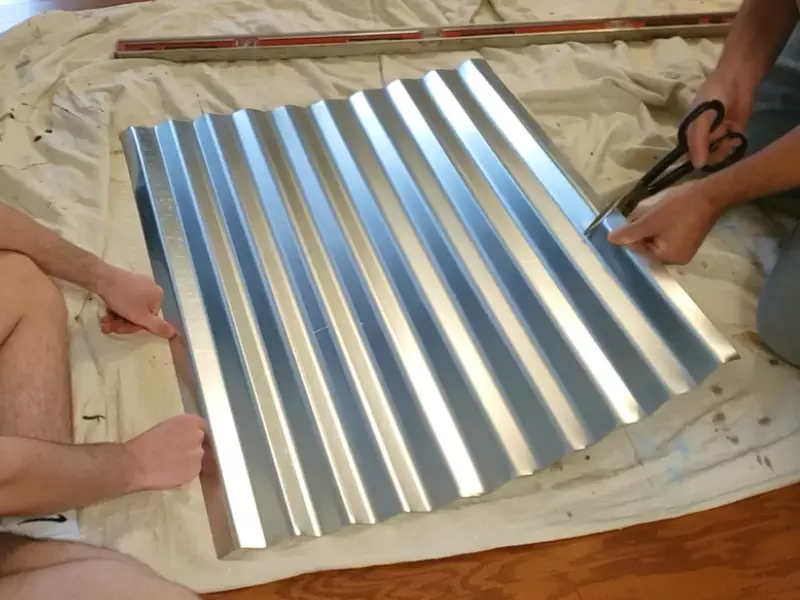
Cutting the corrugated metal panels to size
Once you have your measurements and markings in place, it’s time to cut the corrugated metal panels to fit your wall. Follow these steps for precise and clean cuts:
- Place the corrugated metal panel on a sturdy work surface, such as sawhorses or a workbench.
- Measure and mark the dimensions of the panel using a tape measure and a pencil.
- Using metal snips or a circular saw with a metal-cutting blade, carefully cut along the marked lines. Ensure your cuts are straight and accurate.
- Repeat this process for each corrugated metal panel you plan to install.
Pre-drilling holes in the metal panels for easier installation
Pre-drilling holes in the corrugated metal panels will make the installation process much smoother and prevent the metal from distorting or cracking. Follow these steps to pre-drill holes:
- Place the corrugated metal panel on a sturdy work surface.
- Using a drill with a bit suitable for metal, mark and drill holes at regular intervals along the edges and corners of the panel.
- Ensure the holes are large enough to accommodate the screws or adhesive you plan to use for installation.
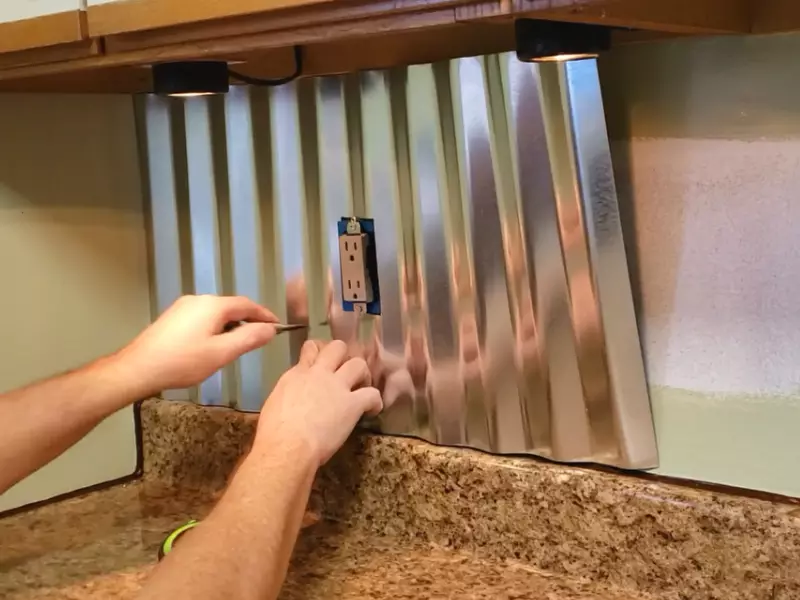
Installing the metal panels onto the walls
With your measurements, cuts, and pre-drilled holes in place, it’s time to install the corrugated metal panels onto your walls. Follow these steps for a secure and professional installation:
- Starting at one corner of the wall, place the first corrugated metal panel against the wall, ensuring it aligns with your markings.
- If using screws, insert them into the pre-drilled holes and use a screwdriver or drill to secure the panel to the wall. If using adhesive, apply it to the back of the panel according to the manufacturer’s instructions.
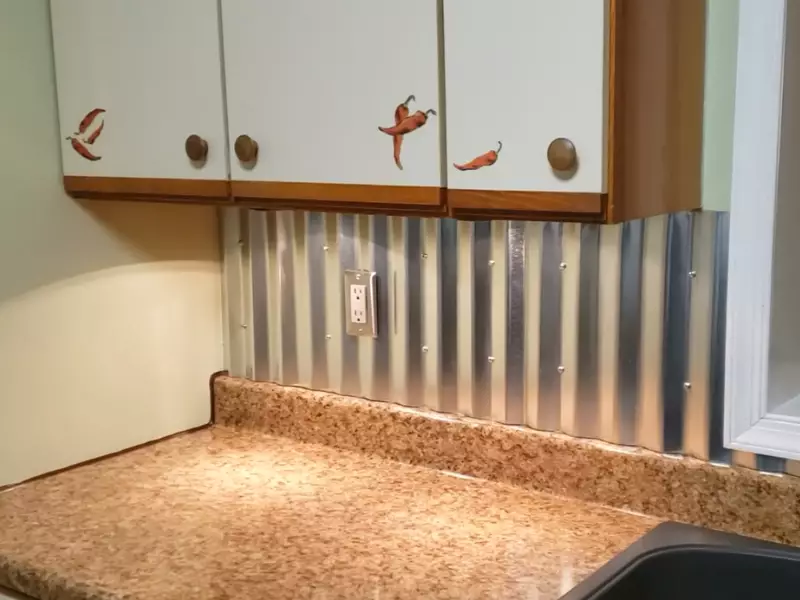
- Continue installing the remaining panels, making sure each panel aligns with the previous one, creating a seamless and symmetrical look.
Securing the panels with screws or adhesive
Once all the corrugated metal panels are in place, it’s essential to secure them properly for long-lasting durability. Choose one of the following methods:
- If using screws, ensure each panel is securely fastened by tightening the screws and ensuring they are flush with the metal surface.
- If using adhesive, press firmly on each panel to ensure proper adhesion to the wall.
Ensuring proper alignment and symmetry
As you install each corrugated metal panel, carefully check for proper alignment and symmetry. This will help create a visually appealing and professional-looking installation. Use a level and tape measure to ensure each panel is straight and aligned with the markings on your wall.
Handling corners and edges effectively
When it comes to corners and edges, it’s crucial to handle them effectively to maintain a clean and seamless installation. Follow these tips:
- When reaching a corner, measure and mark the corrugated metal panel to fit precisely against the adjacent wall.
- Use metal snips or a circular saw to make the necessary cuts, ensuring accuracy and a snug fit.
- Apply adhesive or use screws to secure the corner piece in place, ensuring it aligns properly with the adjacent panels.
- Repeat this process for each corner and edge as needed.
By following these steps and tips, you can confidently install corrugated metal on your interior walls, transforming your space with an industrial and modern look. Remember to take accurate measurements, make clean cuts, and ensure secure installation for a polished finish. Happy installing!
Adding Finishing Touches To The Corrugated Metal Walls
After successfully installing the corrugated metal panels on your interior walls, it’s time to add the finishing touches to enhance the look and durability of the walls. This final step will not only provide a smooth finish but also protect the metal panels from damage. Let’s explore the different ways to add those important finishing touches:
Sanding the metal panels for a smooth finish
Sanding the metal panels is an essential step to create a smooth and sleek surface. This process will not only remove any imperfections or rough spots on the metal surface but also help the paint to adhere better. To sand the panels, follow these steps:
- Gently clean the metal panels using a damp cloth to remove any dust or debris.
- Use a fine-grit sandpaper, such as 120 or 150 grit, to sand the surface in a circular motion. Be sure to apply even pressure, focusing on any rough areas.
- Once the sanding is complete, wipe away any remaining dust with a clean cloth or sponge.
Priming and painting the metal panels
Primed and painted metal panels not only add a pop of color but also provide an extra layer of protection against rust and corrosion. Follow these steps to prime and paint the metal panels:
- Start by applying a metal primer to ensure better adhesion of the paint. Use a brush or a roller to apply an even coat of primer on the metal panels.
- Allow the primer to dry completely according to the manufacturer’s instructions.
- Next, choose a high-quality metal paint in your desired color. Apply the paint using a brush or roller, following the grain of the metal.
- Apply multiple coats, allowing sufficient drying time between each coat. This will ensure a smooth and even finish.
Applying a protective coating or sealant
Adding a protective coating or sealant on the metal panels will prolong their lifespan and make them more resistant to stains, scratches, and other damages. Here’s how you can apply a protective coating or sealant:
- Ensure the painted surface is completely dry before applying the protective coating.
- Choose a suitable metal sealer or clear coat that is compatible with the paint you have used. Follow the manufacturer’s instructions for the application.
- Apply the protective coating evenly using a brush or roller, covering the entire surface of the metal panels.
- Allow the coating to dry completely before exposing the walls to any moisture or heavy contact.
Adding additional design elements or accents
To truly elevate the look of your corrugated metal walls, consider adding unique design elements or accents. Here are some ideas to get you started:
- Attach reclaimed wood trim or molding around the edges of the panels for a rustic touch.
- Install metal or wood wall-mounted shelves to display decorative items or plants.
- Create an accent wall using contrasting colors or patterns of corrugated metal panels.
- Hang artwork or mirrors strategically to create focal points and add visual interest.
By following these steps and exploring additional design elements, you can transform your corrugated metal walls into a stunning feature in your interior space. Don’t be afraid to get creative and make it your own!
Tips And Tricks For A Successful Corrugated Metal Installation
Installing corrugated metal on interior walls can add a unique and industrial touch to your space. Whether you are going for a rustic farmhouse look, an urban loft feel, or simply want a durable and low-maintenance wall covering, corrugated metal is a great choice. However, to ensure a successful installation and achieve the desired aesthetic, it’s important to follow some tips and tricks. In this section, we will guide you through properly maintaining the metal panels, dealing with potential challenges or difficulties, maximizing the aesthetic appeal of the metal walls, and incorporating them into the overall interior design.
Properly maintaining the metal panels
Maintaining the corrugated metal panels is essential for their longevity and appearance. Here’s how you can keep them in optimal condition:
- Inspect the panels regularly to identify any signs of damage or corrosion. These can be addressed promptly to prevent further deterioration.
- Use a mild detergent and water solution to clean the metal walls periodically. Avoid abrasive cleaners or brushes that can scratch the surface.
- Apply a protective coating or paint designed for metal surfaces to prevent rusting. Choose a color that complements your overall interior design scheme.Dealing with potential challenges or difficulties
Like any home improvement project, installing corrugated metal on interior walls may present some challenges. Here are a few common difficulties and how to overcome them:
- Ensure the walls are properly prepared before installation. Fill any cracks or imperfections and make sure they are smooth and even.
- Measure and cut the panels accurately to fit the wall dimensions. Use appropriate tools such as metal shears or tin snips for a clean and precise cut.
- Address any electrical outlets, light switches, or other fixtures on the wall. Cut and fit the metal panels around these obstacles for a seamless finish.
- If the walls have curved or irregular shapes, consider using flexible corrugated metal sheets that can be bent or shaped to fit.
- Secure the panels properly to avoid sagging or warping. Use screws or nails designed for metal applications, and ensure they are evenly spaced for a secure attachment.
Maximizing the aesthetic appeal of the metal walls
While corrugated metal is often associated with an industrial or rustic aesthetic, there are various ways to enhance its appeal and make it blend seamlessly with your interior design:
- Consider adding a patina or distressed finish to create a vintage or weathered look. This can be achieved through chemical treatments, sanding, or applying specialized paint techniques.
- Play with the arrangement and pattern of the metal panels. You can alternate the direction of the corrugations or mix different widths and colors for a more unique and visually interesting design.
- Balance the ruggedness of the metal with softer elements, such as incorporating natural textures like reclaimed wood, plants, or textiles into the space.
- Use appropriate lighting to highlight and accentuate the metal walls. Spotlights or wall sconces can cast interesting shadows and create a dramatic effect.
Incorporating the metal walls into the overall interior design
To ensure a cohesive and harmonious interior design, consider these tips when incorporating corrugated metal walls:
- Choose complementary colors and materials for other elements in the room, such as flooring, furniture, and accessories. This will create a cohesive and well-designed space.
- Balance the textures in the room. If you have a lot of metal, incorporate softer textures like plush rugs, cozy fabrics, or natural materials to create warmth and visual interest.
- Embrace the industrial vibe by incorporating other elements commonly found in industrial settings, such as exposed brick, concrete, or metal accents on furniture and lighting fixtures.
- Consider the acoustics of the room. Metal walls can sometimes create echo or reverberation. Soften the sound by adding acoustic panels, drapes, or carpeting to absorb sound waves.
By following these tips and tricks, you can ensure a successful and visually appealing corrugated metal installation on your interior walls. Embrace the uniqueness and character that corrugated metal brings to your space. Whether used in bedrooms, kitchens, living rooms, or offices, it’s an eye-catching and durable choice that can transform any room.
Frequently Asked Questions On How To Install Corrugated Metal On Interior Walls
How Do You Attach Corrugated Metal To The Wall?
To attach corrugated metal to the wall, follow these steps:
1. Measure and mark the desired installation area on the wall.
2. Drill pilot holes into the marked spots on the wall.
3. Place the corrugated metal sheets over the pilot holes and secure them using screws or nails.
4. Ensure the sheets are aligned properly and tighten the fasteners firmly.
5. Repeat the process for additional sheets if necessary.
How Do You Attach Corrugated Roofing To A Wall?
To attach corrugated roofing to a wall, follow these steps:
1. Start by measuring and marking the spots where you’ll secure the roofing panels. 2. Drill pilot holes into the marks using a power drill.
3. Align the first panel with the holes and use screws with rubber washers to attach it firmly.
4. Repeat the process for the remaining panels, ensuring they overlap for proper water drainage.
5. Remember to seal the holes and edges with a waterproof sealant for added protection.
Can You Put Metal Roofing On Walls?
Yes, you can use metal roofing on walls. Metal roofs are versatile and can be installed on both roofs and walls, providing durability and a modern aesthetic. Metal panels are lightweight, resistant to corrosion, and offer long-lasting protection for your walls.
How Do You Attach Corrugated Metal To Ceiling?
Attach corrugated metal to the ceiling by following these steps:
1. Ensure the ceiling is clean and dry.
2. Measure and cut the metal panels to fit.
3. Use screws or nails to secure the panels to the ceiling joists.
4. Install flashing to cover any gaps or joints.
5. Paint or finish the metal as desired.
Conclusion
Installing corrugated metal on interior walls is a great way to add a modern and industrial touch to your space. By following the steps outlined in this post, you can achieve a stylish and durable wall covering that is both functional and visually appealing.
Remember to properly measure, prepare the surface, and securely attach the metal panels. With a little patience and the right tools, anyone can successfully install corrugated metal on their interior walls. Find your style and transform your space today!