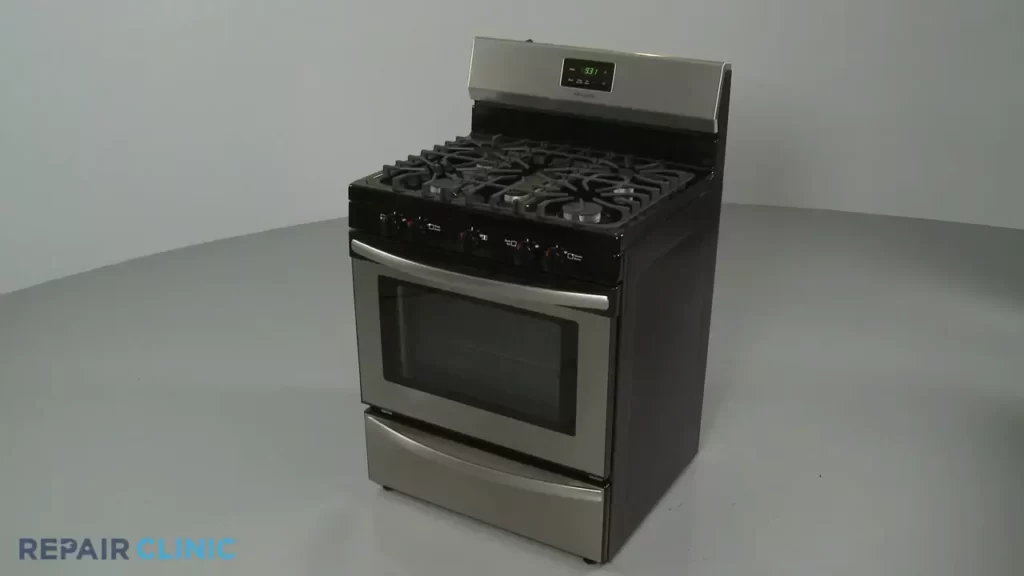
To install an igniter for a gas oven, disconnect the power, remove the oven door, locate and detach the old igniter, connect the new igniter, reinstall the oven door, and restore the power. Installing an igniter for your gas oven is a straightforward process that can be done with a few simple steps.
Whether you need to replace a faulty igniter or upgrade to a more efficient one, this guide will walk you through the installation process. By following these instructions, you’ll have your gas oven up and running in no time, ensuring that it ignites properly for all your culinary creations.
Let’s dive into the details and get started with the installation of an igniter for your gas oven.
Understanding The Role Of An Igniter In A Gas Oven
In order to fully comprehend the importance of an igniter in a gas oven, it is essential to understand its function. An igniter plays a critical role in the oven’s operation by initiating the combustion process that produces the heat necessary for cooking. It is responsible for creating a spark or heating up to a high temperature, which then ignites the gas and allows it to burn and produce the necessary heat for cooking. Without a properly functioning igniter, the gas oven would be unable to reach the desired temperature, rendering it ineffective for cooking.
Explanation of the igniter’s function in a gas oven
The function of an igniter in a gas oven is to create a spark or generate enough heat to ignite the gas and start the combustion process. This is achieved through the use of an electrical current or a heating element. When electricity flows through the igniter, it heats up to a high temperature, causing it to glow brightly. This glowing igniter then ignites the gas, allowing it to burn and produce the heat necessary for cooking. It’s important to note that the specific design and mechanism of the igniter may vary depending on the model of the gas oven, but the fundamental function remains the same.
Importance of a properly functioning igniter for efficient oven operation
A properly functioning igniter is essential for efficient oven operation. It ensures that the gas oven reaches and maintains the desired cooking temperature, allowing for precise and consistent cooking results. Without a functioning igniter, the gas flow remains unlit, resulting in the inability to generate the necessary heat. This can lead to undercooked or overcooked meals, inconsistent cooking times, and a frustrating cooking experience. A properly functioning igniter ensures that the oven operates at its optimal performance, allowing you to cook your favorite dishes with ease and confidence.
Potential hazards of a faulty igniter
A faulty igniter poses potential hazards in a gas oven. One of the main risks is gas leakage. If the igniter fails to ignite the gas, it can result in the accumulation of unignited gas within the oven, creating a potentially dangerous situation. In addition, a faulty igniter can lead to a partial ignition of the gas, causing uneven combustion and the release of carbon monoxide, a colorless and odorless gas that is harmful to human health. Regular inspection and replacement of a faulty igniter are crucial to prevent these hazards and ensure the safety of your household.
In conclusion, understanding the role of an igniter in a gas oven is crucial for ensuring efficient and safe oven operation. The igniter’s function in initiating the combustion process and producing the necessary heat cannot be understated. It is imperative to regularly inspect the igniter’s performance and address any faults or issues promptly. By doing so, you can enjoy a well-functioning gas oven that provides consistent and reliable cooking results.
Assessing The Safety Precautions Before Installation
In order to ensure a smooth and safe installation process, it is crucial to assess the safety precautions before installing an igniter for a gas oven. By taking the necessary steps to prevent accidents or injuries, you can have peace of mind knowing that you are working in a safe environment. This section will guide you through the important safety measures that need to be taken before starting the installation process.
Gathering the necessary tools and equipment
Before you proceed with the installation, it is important to gather all the necessary tools and equipment. This will help you to complete the job efficiently and effectively. Make sure you have the following items on hand:
- Screwdriver
- Pliers
- Adjustable wrench
- Gas leak detector
- Safety gloves
- Safety goggles
Ensuring the oven is disconnected from the power source
Before starting any work, it is crucial to ensure that the oven is properly disconnected from the power source. This will prevent any electrical hazards during the installation process. Follow these steps to ensure the oven is safely disconnected:
- Turn off the oven and unplug it from the wall outlet.
- Locate the circuit breaker or fuse box and turn off the power supply to the oven.
Taking safety measures to prevent accidents or injuries during installation
Safety should always be a top priority when working with gas appliances. Here are some important safety measures to take before installing the igniter:
- Wear safety gloves and goggles to protect your hands and eyes from any potential hazards.
- Ensure that the work area is well-ventilated to prevent the buildup of gas fumes.
- Keep flammable materials and objects away from the work area.
Checking for gas leaks before starting the installation process
Before you start the installation process, it is crucial to check for any gas leaks. This will help prevent any potential dangers that could arise during the installation. Follow these steps to check for gas leaks:
- Mix a solution of water and dish soap to create a soapy solution.
- Apply the soapy solution to the gas connections, including the supply line and the gas valve.
- Observe for any bubbles forming. If you notice bubbles, it indicates a gas leak. In this case, turn off the gas supply and contact a professional for assistance.
By thoroughly assessing these safety precautions before starting the installation process, you can ensure a safe and successful installation of the igniter for your gas oven. Remember, safety should always come first.
Removing The Oven Door And Cooktop
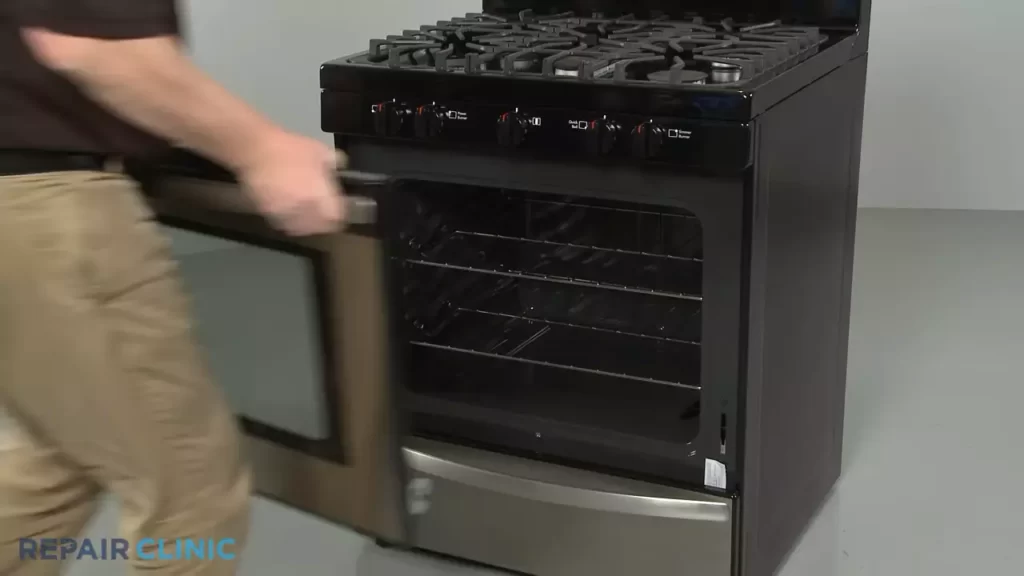
Properly opening the oven door to access the igniter
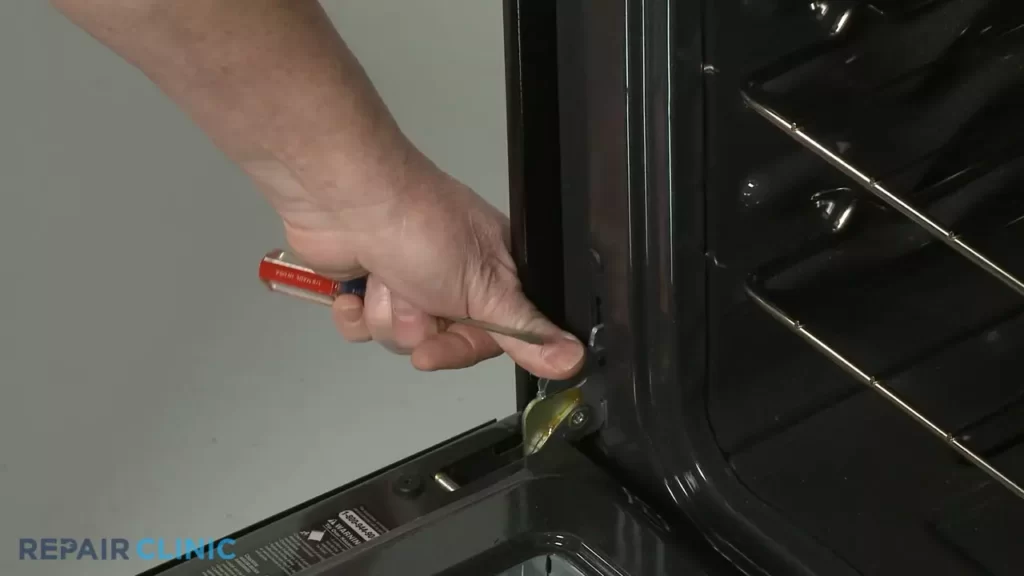
When it comes to installing an igniter for a gas oven, the first step is to properly open the oven door to gain access to the igniter. Follow these simple steps to ensure a smooth process:
- Turn off the gas supply: Before starting any work on the oven, make sure to turn off the gas supply to avoid any potential hazards. Safety should always be the top priority.
- Locate the oven door latch: Look for the oven door latch, usually positioned on the top of the oven door. Pull the latch towards you to release it and open the oven door.
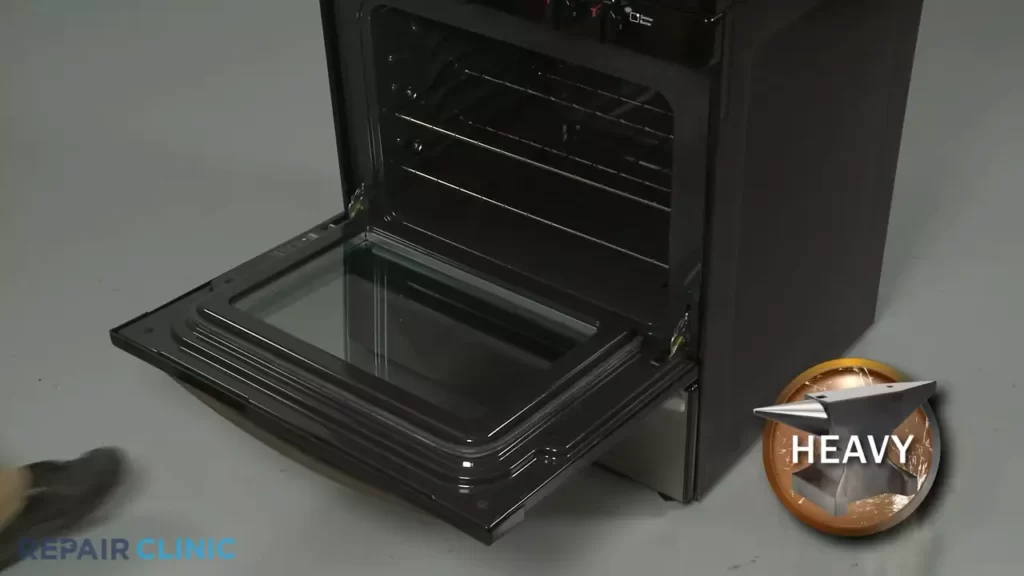
- Gently pull the oven door downwards: With the latch released, gently pull the oven door downwards to detach it from the hinges. Be cautious while doing this to avoid any damage to the oven glass or injury to yourself.
- Place the oven door in a safe location: Once the oven door is detached, carefully place it in a secure location where it won’t be in the way during the installation process. This will ensure that you have enough space to work without any obstructions.
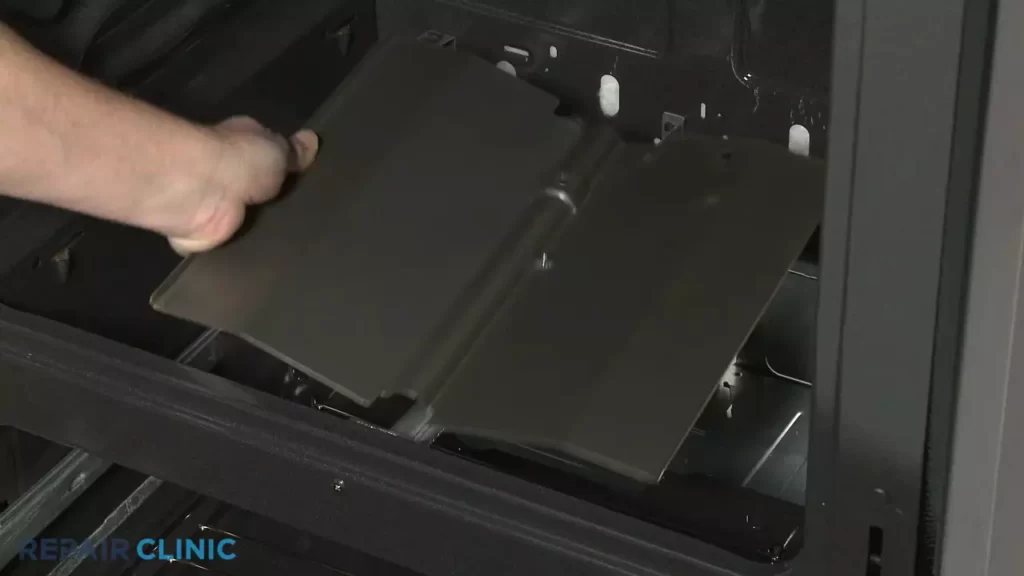
Removing any components that may obstruct the installation process, such as the cooktop
In order to install the igniter properly, it may be necessary to remove certain components that obstruct access. Follow these steps to remove the cooktop:
- Locate the screws holding the cooktop in place: In most gas ovens, the cooktop is secured by screws. Look for these screws around the edges of the cooktop.
- Use a screwdriver to remove the screws: With the appropriate screwdriver, carefully remove the screws that secure the cooktop. Be sure to keep the screws in a safe place for reinstallation later.
- Gently lift the cooktop off the oven: Once the screws are removed, gently lift the cooktop off the oven. Take care not to force it or damage any wires or connections underneath.
- Set the cooktop aside in a secure location: Once the cooktop is removed, set it aside in a safe and secure location where it won’t be damaged. This will allow you to access the igniter and install it without any obstructions.
Now that the oven door and cooktop have been removed, you can proceed with the next steps of installing the igniter. Stay tuned for the next section of this blog post, where we will guide you through the installation process in detail.
Locating The Igniter
When it comes to installing an igniter for a gas oven, the first step is to locate the igniter itself. Understanding the position of the igniter is essential to ensure a successful installation. In this section, we will discuss how to identify the position of the igniter in your oven and the different types of igniters commonly used.
Identifying the position of the igniter in the oven
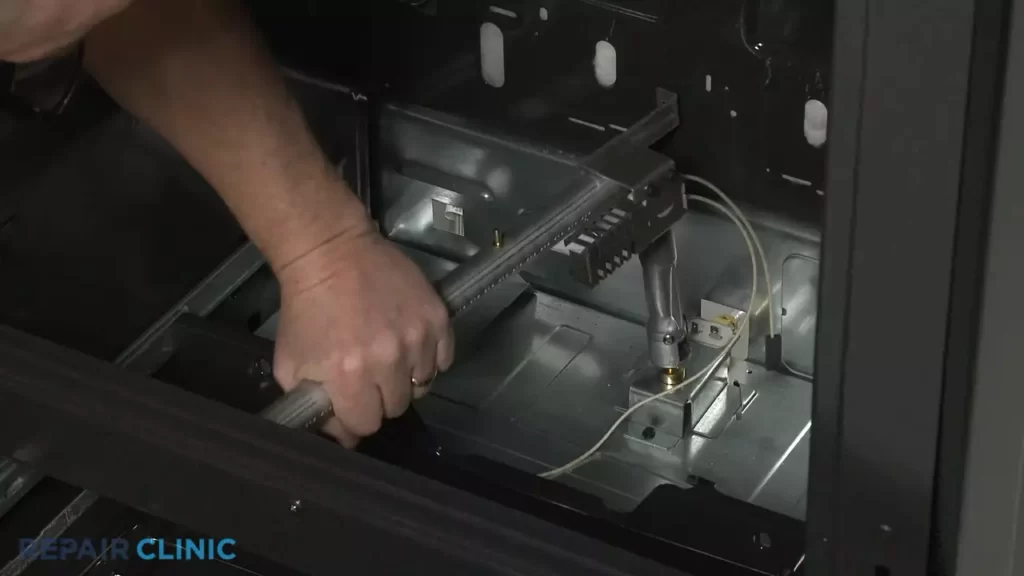
The exact position of the igniter may vary depending on the make and model of your gas oven. However, there are a few common locations where you can usually find the igniter. Typically, the igniter is located near the bottom of the oven, either on the side or at the back.
Here are a few steps to help you identify the position of the igniter:
- Start by turning off the gas supply to the oven for safety purposes.
- Open the oven door and remove any racks or trays that may obstruct your view.
- Inspect the bottom of the oven. Look for a small rectangular or round component with wires attached to it.
- If you cannot locate the igniter in the oven itself, you may need to remove the bottom panel of the oven to access it.
Remember to refer to the user manual of your specific oven model for more precise instructions on locating the igniter.
Knowing the different types of igniters commonly used in gas ovens
Gas ovens can come with different types of igniters, each with its own unique characteristics and installation requirements. Being aware of the different types will help you choose the right replacement igniter, should you need to replace the existing one.
Here are the two most commonly used types of igniters in gas ovens:
| Type | Description |
|---|---|
| Glow bar igniters | Glow bar igniters are made of silicon carbide or silicon nitride and emit a constant glow to ignite the gas. They are typically found in newer gas ovens and are more durable than their older counterparts. |
| Flat igniters | Flat igniters are made of ceramic and have a rectangular shape. They heat up and ignite the gas when the oven is turned on. Flat igniters are commonly used in older gas ovens but can still be found in some newer models. |
Understanding the type of igniter in your oven will help you identify the correct replacement part.
Now that you know how to identify the position of the igniter in your oven and understand the different types commonly used, you are ready to move on to the next step of installing the igniter for your gas oven.
Disconnecting The Old Igniter
Turning off the gas supply to the oven
Before disconnecting the old igniter, it is crucial to ensure the gas supply to the oven is turned off. This step is essential for your safety as it prevents any accidental gas leaks or potential hazards. To turn off the gas supply:
- Locate the gas shut-off valve near the oven.
- Rotate the valve handle clockwise until it is perpendicular to the gas pipe. This position ensures that the gas flow is completely shut off.
- Confirm that the gas supply to the oven has been successfully turned off by attempting to ignite the stove or checking for any hissing sounds indicating gas leakage, which should not be present if the gas supply is off.
Disconnecting the wires connected to the old igniter
Once you have turned off the gas supply, the next step is to disconnect the wires connected to the old igniter. This process may vary depending on the model of your gas oven, but the general steps are as follows:
- First, ensure the oven is unplugged or the power is turned off from the circuit breaker for additional safety measures.
- Locate the wires connected to the old igniter. These wires are typically found near the rear of the oven cavity.
- Identify the wire connectors. They could be attached directly to the igniter or connected via screw terminals.
- Gently pull the wire connectors apart to disconnect them from the old igniter. Take note of the wire colors and their respective positions to facilitate the installation of the new igniter.
Removing any mounting screws or brackets holding the igniter in place
With the wires disconnected, the next step is to remove any mounting screws or brackets that are holding the igniter in place. This will allow you to take out the old igniter and proceed with installing the new one. Follow these steps:
- Using a screwdriver or the appropriate tool, locate and remove any screws that secure the igniter to the oven wall or bracket.
- Keep track of the number of screws you remove and their respective locations. This will ensure easier reinstallation of the new igniter.
- If the igniter is held in place by brackets, carefully maneuver the igniter until it is free from the brackets.
- Once all screws or brackets have been removed, you can gently pull the old igniter away from the oven wall, completely detaching it.
With the old igniter safely disconnected and removed, you are now ready to proceed with the next steps of installing the new igniter for your gas oven.
Installing The New Igniter
After removing the old igniter from your gas oven, it’s time to install the new one. Follow these steps to ensure a smooth and successful installation.
Attaching the new igniter to the oven
Begin by carefully attaching the new igniter to the oven. Start by locating the mounting bracket on the oven. This is typically located near the burner tube.
Note: Refer to the oven’s user manual or the manufacturer’s instructions for the exact location of the mounting bracket.
Once you’ve located the mounting bracket, position the new igniter over it. Align the screw holes on the igniter with the holes on the mounting bracket.
Tip: Use a flashlight to guide you if needed, ensuring proper alignment.
Once aligned, take the mounting screws or brackets that came with the new igniter and secure the igniter to the oven. Tighten the screws or secure the brackets until the igniter is firmly in place.
Reconnecting the wires to the new igniter
Now that the new igniter is attached to the oven, it’s time to reconnect the wires. Locate the wire harness that connects the igniter to the oven’s electrical system.
Tip: The wire harness is typically a plastic connector with two or more wires coming out of it.
Carefully align the wires from the new igniter with the corresponding wires on the wire harness. Ensure that each wire is properly seated in its designated slot.
Caution: Take extra care not to force the wires into place or bend them excessively, as this could damage the connection.
Once the wires are properly aligned, gently push the wire harness connector onto the igniter’s connection terminals. You should feel a satisfying click when the connector is fully seated.
Securing the igniter in place with mounting screws or brackets
With the wires successfully connected, it’s time to secure the igniter in place using the mounting screws or brackets.
If your new igniter came with mounting screws, take them and carefully insert them through the designated holes on the igniter.
Important: Ensure that the screws are fully inserted and tightened securely, but be careful not to overtighten as this could damage the igniter or the mounting bracket.
If your new igniter came with brackets, position them over the igniter and align them with the mounting bracket. Once aligned, secure the brackets in place using the appropriate screws or fasteners.
Congratulations! You have successfully installed the new igniter in your gas oven. Now you can move on to testing it to ensure it’s functioning correctly.
Testing The Installation
After completing the installation of the new igniter for your gas oven, it is crucial to properly test the functionality to ensure everything is working as it should. This testing process involves three main steps: turning on the gas supply to the oven, checking for proper functionality of the new igniter, and ensuring the oven heats up correctly.
Turning on the gas supply to the oven
To turn on the gas supply to your oven, follow these simple steps:
- Locate the gas valve that controls the flow of gas to your oven.
- Turn the gas valve to the “ON” position.
- Listen for the sound of gas flowing into the oven.
- Check for any gas leaks by carefully inspecting the gas line fittings. If you detect the smell of gas or notice any signs of leakage, immediately turn off the gas supply and consult a professional.
Checking for proper functionality of the new igniter
Once the gas supply is turned on, it’s time to check if the new igniter is functioning correctly. Follow these steps:
- Set the oven to the desired temperature using the control knob or panel.
- Observe the igniter. It should start glowing within a few seconds.
- Watch the igniter carefully. If it fails to glow or if the glow is weak, it may indicate a problem.
- If the igniter does not glow or the glow is weak, double-check the connections between the igniter and the wiring harness. Ensure they are securely connected.
- Consider repositioning the igniter closer to the burner if necessary.
Ensuring the oven heats up correctly
Finally, it’s important to ensure that the oven heats up properly and reaches the desired temperature. Follow these steps:
- Leave the oven door closed and allow it to preheat for about 15 minutes.
- Using an oven thermometer, check the actual temperature inside the oven. Compare it to the set temperature to verify accuracy.
- If there is a significant difference between the set temperature and the actual temperature, you may need to recalibrate the oven or consult a professional.
By following the steps above, you can effectively test the new igniter installation, ensuring the proper functionality and performance of your gas oven. Enjoy cooking with confidence knowing that your oven is in excellent working condition.
Understanding The Different Igniter Types
Brief Explanation of the Various Types of Igniters Available on the Market
When it comes to gas ovens, ignition is a crucial step in the cooking process. The igniter is responsible for lighting the gas and initiating the heating process. Understanding the different types of igniters available on the market can help you make an informed decision when it comes to installing or replacing one in your gas oven. Here, we will provide a brief explanation of the various igniter types commonly found in gas ovens today.
- Glow Bar Igniters: Glow bar igniters, also known as hot surface igniters, are the most common type of igniters used in modern gas ovens. These igniters consist of a ceramic element that heats up when an electric current is passed through it. As the element glows red-hot, it ignites the gas, allowing the oven to reach the desired temperature.
- Flat Igniters: Flat igniters work similarly to glow bar igniters but have a different shape. Instead of a cylindrical shape, flat igniters have a rectangular shape, which allows for a larger heating surface area. These igniters are often used in commercial gas ovens or high-end residential ovens that require a higher heat output.
- Round Igniters: Round igniters are the traditional type of igniters used in older gas ovens. These igniters have a round shape and use a coiled wire element to generate heat. Although they are less common in modern ovens, they can still be found in some older models.
- Direct Spark Igniters: Direct spark igniters are a more advanced type of igniters used in some high-end gas ovens. Instead of using a heating element, these igniters produce sparks directly to ignite the gas. They are faster and more reliable compared to traditional igniters, but they are also more expensive.
Factors to Consider When Choosing the Right Igniter for Your Gas Oven
Choosing the right igniter for your gas oven is essential for ensuring optimal performance and safety. Here are some factors to consider when making your decision:
- Compatibility: Ensure that the igniter you choose is compatible with your specific oven model and brand. Refer to the manufacturer’s guidelines or consult a professional if you are unsure.
- Quality: Look for igniters made from high-quality materials that are durable and long-lasting.
- Price: Consider your budget and compare prices from different suppliers to find the best option that meets your needs.
- Reviews: Read online reviews or seek recommendations from trusted sources to gauge the performance and reliability of a particular igniter.
- Installation: Determine whether you are comfortable installing the igniter yourself or if you need to hire a professional to do it for you.
By taking these factors into account, you can confidently choose the right igniter for your gas oven that will serve you well for years to come.
Handling Gas And Electrical Connections Safely
Importance of Following Safety Procedures when Dealing with Gas and Electrical Connections
When it comes to installing an igniter for a gas oven, it is crucial to prioritize safety throughout the process, especially when handling gas and electrical connections. Neglecting safety procedures can lead to potential hazards, including gas leaks, electrical shocks, or even fire. Therefore, it is essential to understand the importance of following safety procedures to ensure a smooth and secure installation.
Handling gas and electrical connections safely should always be the topmost priority when working with any gas appliance. By adhering to safety procedures, you minimize the risk of accidents and ensure the longevity of your gas oven’s functionality. To help you avoid potential hazards, here are some tips to keep in mind during the installation process:
Tips on Avoiding Potential Hazards during the Installation Process
- Familiarize yourself with your gas oven’s manual: Before attempting the installation, carefully study the manufacturer’s instructions and safety guidelines provided in the manual. This will help you understand the specific requirements and precautions for handling gas and electrical connections for your particular oven model.
- Turn off the gas supply: Before starting any work on your oven, make sure to shut off the gas supply. Locate the gas shutoff valve, typically found behind the appliance, and turn it clockwise to close it. This step is crucial to prevent any gas leaks or accidental ignition during the installation process.
- Disconnect the power source: To ensure your safety, disconnect the power supply by turning off the circuit breaker that controls your oven’s electrical connection. This step will help prevent electrical shocks or accidents while working on the igniter installation.
- Use proper tools and protective equipment: Always use the appropriate tools, such as insulated gloves and safety goggles, to protect yourself during the installation. Additionally, using a gas leak detector can help identify any potential leaks, ensuring a safer working environment.
- Inspect connections and fittings: Before proceeding with the installation, inspect all gas and electrical connections, ensuring that they are in good condition. Look for any signs of wear or damage, such as loose fittings or frayed wires. If you notice any issues, consult a professional to address and repair them before continuing.
- Secure connections tightly: When attaching the igniter, make sure to securely tighten all connections. Loose connections pose a significant risk, as they can lead to gas leaks or electrical malfunctions. Double-check all connections to ensure they are snug and secure.
By following these safety procedures and tips, you can ensure a safe and successful installation of the igniter for your gas oven. Remember, the safety of yourself and your household should always be the utmost priority when dealing with gas and electrical connections.
Common Issues And Troubleshooting
Installing an igniter for a gas oven can be a straightforward process, but as with any installation, common issues may arise during or after the procedure. These issues can range from minor hiccups to more significant problems that require troubleshooting. In this section, we will explore the identification of common issues and provide effective troubleshooting tips to ensure a successful igniter installation.
Identifying common issues that may arise during or after installation
Even when following instructions carefully, a few common issues can occur during or after the installation of an igniter for a gas oven. Identifying these issues early on can help in addressing them promptly. Here are a few common issues you may encounter:
- Igniter not glowing or not lighting up
- Weak or inconsistent flame
- Igniter sparking but not lighting
- Smell of gas without ignition
- Delayed ignition or slow heating
To troubleshoot these issues effectively, let’s explore some tips:
Troubleshooting tips for addressing these issues effectively
1. Igniter not glowing or not lighting up:
If the igniter is not glowing or failing to light up, it could indicate a faulty igniter or a problem with the electrical connection. Consider the following troubleshooting steps:
- Check if the igniter wires are securely connected to the electrical terminals.
- Inspect the igniter for any visible signs of damage or wear and tear.
- Measure the continuity of the igniter using a multimeter. If no continuity is detected, replace the igniter.
2. Weak or inconsistent flame:
If you notice a weak or inconsistent flame, it may signify a clogged burner or a problem with the gas supply. Follow these troubleshooting steps to resolve the issue:
- Carefully remove the burner and clean it thoroughly to remove any debris or blockages.
- Ensure the gas supply valves are fully open and functioning correctly.
- If the issue persists, it may be necessary to consult a professional to check for any underlying problems with the gas supply or burner components.
3. Igniter sparking but not lighting:
If the igniter is sparking but the oven is not lighting up, it could indicate an issue with the gas flow or an incorrectly positioned igniter. Try the following troubleshooting steps:
- Inspect the gas supply valves and ensure they are fully open.
- Make sure the igniter is positioned correctly, with the tip close to the burner and aligned properly.
- Check for any blockages or clogs in the gas lines that may be hindering the flow.
4. Smell of gas without ignition:
If you smell gas without igniting the oven, it is essential to address this issue promptly to avoid potential hazards. Follow these troubleshooting steps:
- Double-check that the gas supply valves are fully closed to prevent any further gas leakage.
- Inspect the igniter for any damage or wear and tear.
- If the igniter appears to be in good condition, contact a professional technician to examine the oven’s gas safety mechanisms.
5. Delayed ignition or slow heating:
A delayed ignition or slow heating can be frustrating, but it may indicate a simple problem that can often be resolved with the following troubleshooting tips:
- Ensure the gas supply valves are fully open and functioning correctly.
- Inspect the igniter for any signs of damage or uneven heating patterns.
- Consider adjusting the igniter position to optimize the heat distribution.
By following these troubleshooting tips, you can address common issues that may arise during or after installing an igniter for a gas oven. Remember, if the problem persists or you are unsure about any aspect of the installation or troubleshooting process, it is always best to consult a professional technician for further assistance.
Recap Of The Installation Process
Installing an igniter for a gas oven is an essential step in maintaining the functionality and efficiency of your appliance. Safety is of utmost importance when working with gas, so it is crucial to follow a step-by-step guide to ensure a safe and proper installation. In this recap, we will briefly summarize the installation process, highlighting the key steps you need to take to install an igniter for your gas oven.
Brief Summary of the Step-by-Step Guide for Installing an Igniter for a Gas Oven
To install an igniter for a gas oven, you need to follow these steps:
- Turn off the gas supply: Before you begin, make sure to turn off the gas supply to your oven. This ensures your safety during the installation process.
- Access the igniter: Remove the oven racks and unscrew any fasteners or screws that hold the bottom panel in place. This will give you access to the igniter.
- Disconnect the old igniter: Carefully disconnect the wires connected to the old igniter. Take note of the wire connections, as you will need to reconnect them later.
- Remove the old igniter: Unscrew and remove the old igniter from the oven. Discard it properly as per local regulations.
- Install the new igniter: Take the new igniter and align it with the mounting bracket. Secure it in place by tightening the screws.
- Reconnect the wires: Connect the wires to the new igniter, ensuring that each wire is securely attached as per the labeled indications.
- Reassemble and test: Put the bottom panel back in place and reattach any fasteners. Turn the gas supply back on and test the functionality of the new igniter by starting your oven.
Importance of Ensuring a Safe and Proper Installation for Efficient Oven Functionality
A safe and proper installation is crucial to ensure the efficient functionality of your gas oven. By following the correct installation process, you can prevent potential gas leaks, malfunctions, and hazards that may arise due to improper installation. Here’s why a safe and proper installation is important:
- Enhanced safety: By correctly installing the igniter, you minimize the risk of gas leaks and potential accidents.
- Efficient oven performance: A properly installed igniter ensures a consistent and reliable flow of gas, resulting in optimal oven performance and accurate temperature control.
- Prolonged appliance lifespan: By taking the time to safely install the igniter, you can extend the lifespan of your gas oven, saving you time and money on repairs or replacements.
Remember, if you are unsure about any step of the installation process, it is always advisable to seek professional help or consult the manufacturer’s instructions for your specific oven model. By prioritizing safety and following the proper installation guidelines, you can enjoy the benefits of a fully functional and efficient gas oven for years to come.
Frequently Asked Questions Of How To Install An Igniter For A Gas Oven
How Much Does It Cost To Replace The Igniter In A Gas Oven?
The cost to replace the igniter in a gas oven varies, but it typically ranges between $150 to $300.
How Do I Install A New Igniter?
To install a new igniter, follow these steps:
1. Turn off the power supply to the appliance.
2. Locate the old igniter and remove it carefully.
3. Connect the wires of the new igniter to the appropriate terminals.
4. Secure the igniter in place using screws or clips.
5. Test the igniter to ensure it is working correctly before turning the power back on.
Can You Light A Gas Oven If The Igniter Is Broken?
No, you cannot light a gas oven if the igniter is broken. The igniter is responsible for creating the spark needed to ignite the gas. If it is not functioning properly, you should have it repaired by a professional technician to ensure your safety.
Why Is My Gas Oven Spark Igniter Not Working?
A gas oven’s spark igniter may not work if it’s dirty or damaged. Clean the igniter and check for any loose connections or worn-out parts. If the issue persists, it’s best to call a professional technician for a thorough inspection and repair.
Conclusion
Installing an igniter for a gas oven is a relatively simple task that can be done by following a few steps. By carefully disconnecting and removing the old igniter, and then installing the new one, you can ensure the proper functioning of your oven.
Remember to take necessary safety precautions and consult the manufacturer’s instructions for your specific model. With a little patience and the right tools, you’ll have a fully operational gas oven in no time. Happy cooking!