To install a heating element, first turn off the power supply and disconnect the old element. Then, connect the new element, secure it in place, and restore the power.
Whether you’re experiencing a malfunctioning heating element in your oven or water heater, learning how to install a new one can save you time and money. Replacing a heating element is a relatively simple process that can be done with a few basic tools and a little know-how.
By following proper safety precautions and using the correct techniques, you can have your heating element up and running in no time. We will provide you with a step-by-step guide on how to install a heating element, allowing you to restore the functionality of your appliance and avoid the need for a costly repair service.
Understanding The Basics Of Heating Elements
What is a heating element?
A heating element is a crucial component of various electrical appliances, such as ovens, coffee makers, and water heaters, that rely on heat to function effectively. Essentially, it is an electrical resistor that converts electrical energy into heat energy. The element is usually made from materials with high resistance, such as nichrome or tungsten, that can withstand the high temperatures required for heating.
Importance of a properly functioning heating element
A properly functioning heating element is vital for the efficient operation of electrical appliances that rely on heat. Understanding the importance of maintaining a heating element can help prevent potential issues and ensure optimal performance. Here are a few reasons why a properly functioning heating element is crucial:
- Consistent Heating: A heating element that is working correctly provides consistent and even heating, allowing your appliance to perform its intended function efficiently.
- Energy Efficiency: When a heating element is in good condition, it consumes less energy, resulting in reduced electricity bills.
- Longevity of Appliances: By maintaining a properly functioning heating element, you can extend the lifespan of your appliances, saving you money on frequent repairs or replacements.
- Safety: Faulty heating elements can pose safety hazards, such as electrical shorts or fire risks, so it is essential to ensure they are functioning correctly to keep your home and family safe.
Common types of heating elements
Heating elements come in various types, each suitable for specific applications. Here are some common types of heating elements:
| Type | Features |
|---|---|
| Nichrome | High resistance, excellent durability, and corrosion resistance. |
| Tungsten | Extreme heat resistance, ideal for heating applications that require very high temperatures. |
| Ceramic | Good thermal shock resistance, suitable for applications with rapid temperature changes. |
| Mica | Flexible and lightweight, commonly used in hair dryers and toasters. |
Factors to consider when choosing a heating element
When selecting a heating element for your appliance, it is important to consider various factors to ensure you choose the most suitable option. Some key factors to keep in mind include:
- Electrical requirements: Ensure the heating element is compatible with the electrical system of your appliance.
- Temperature range: Determine the maximum and minimum temperatures required for your application and choose a heating element that can operate within that range.
- Material compatibility: Consider the material you will be heating and choose a heating element that is compatible with it to avoid corrosion or contamination issues.
- Size and shape: Select a heating element that fits the available space within your appliance and matches the required shape for efficient heat distribution.
- Longevity: Look for a heating element with a reputation for durability and longevity to minimize the need for frequent replacements.
By understanding the basics of heating elements and considering these factors, you can make an informed decision when installing or replacing a heating element, ensuring optimal performance and efficiency for your electrical appliances.
Preparing For Installation
Gathering the necessary tools and materials
Before you begin installing a heating element, it is crucial to gather all the necessary tools and materials. Here is a list of items you will need:
- Screwdriver (Phillips or flathead, depending on your heating element)
- Adjustable wrench
- Wire cutters
- Electrical tape
- New heating element (compatible with your heating system)
Safety precautions to take before starting
Prioritizing safety is essential when working with any electrical appliance. Here are a few safety precautions you should take before starting the installation process:
- Ensure the power supply is turned off to avoid any electrical mishaps.
- Wear protective gloves to protect your hands from any sharp edges or hot surfaces.
- Keep a fire extinguisher nearby, just in case.
- Work in a well-ventilated area to prevent the buildup of any noxious fumes.
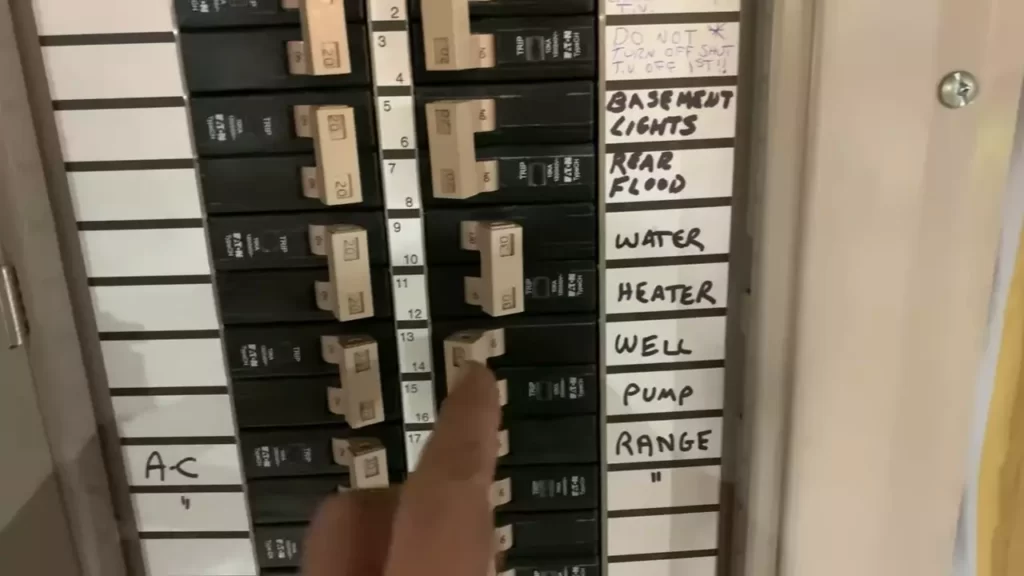
Turning off the power supply
Before you start disconnecting the old heating element or installing the new one, it is vital to turn off the power supply to your heating system. Follow these steps:
- Locate the main circuit breaker panel in your home.
- Identify the breaker that controls the power to your heating system.
- Switch off the breaker by moving the switch to the “off” position.
- Use a voltage tester to ensure there is no electrical current flowing to the heating system.
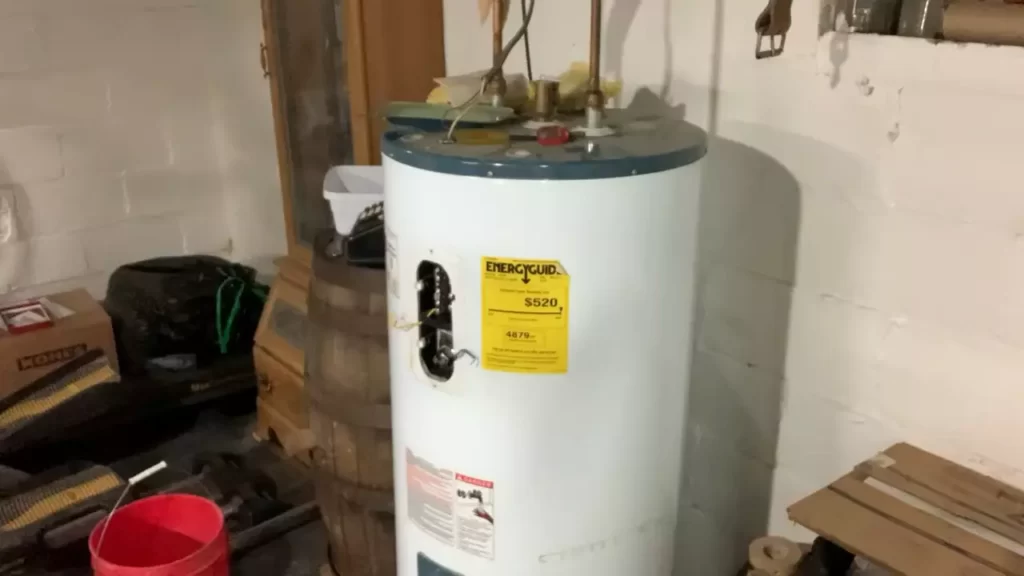
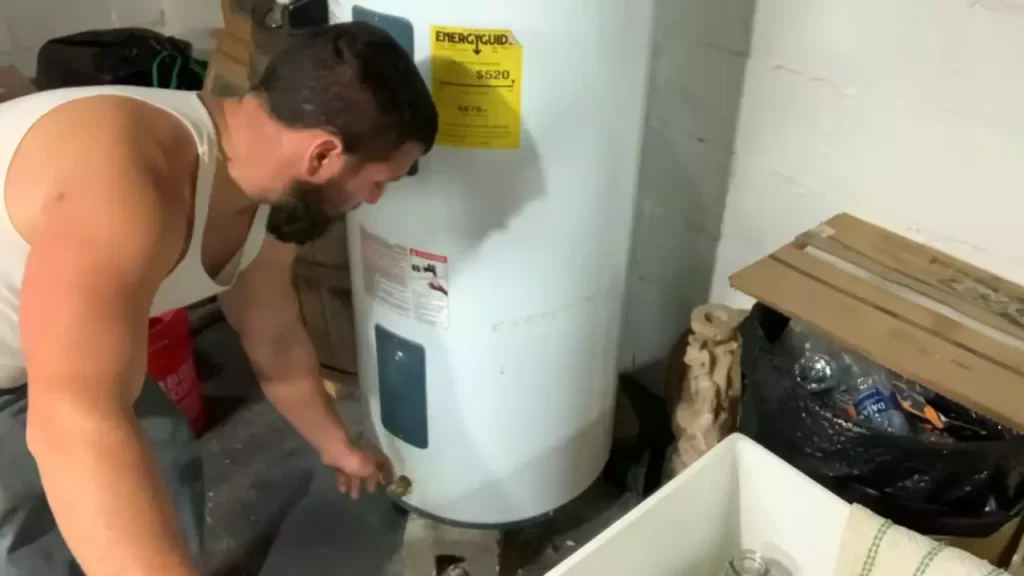
Disconnecting the old heating element (if applicable)
If you are replacing an old heating element, you will need to disconnect it first. Follow these steps:
- Refer to the user manual or documentation for your specific heating system to locate the old heating element.
- Use a screwdriver or adjustable wrench to loosen any screws or bolts securing the element in place.
- Carefully disconnect the electrical wires attached to the heating element by using wire cutters to cut the wires (if necessary).
- Take note of the position and placement of each wire to ensure correct reconnection later.
Installing The New Heating Element
When it comes to installing a new heating element, there are a few important steps to follow. In this guide, we will walk you through each step, ensuring a smooth and successful installation. Here’s how to compare, position, connect, secure, and test your new heating element.
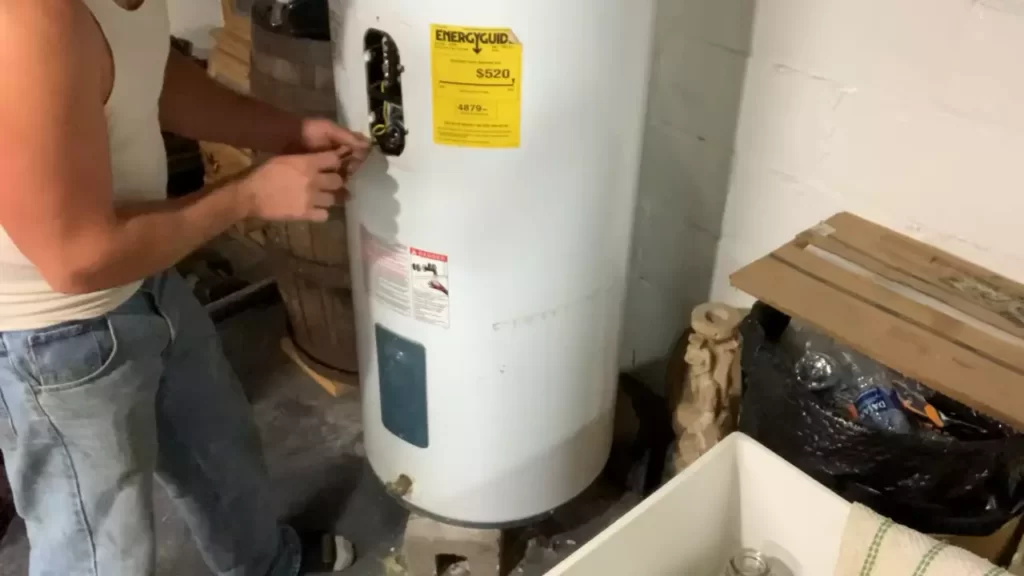
Comparing the new heating element with the old one
Before getting started, it’s essential to compare the new heating element with the old one. Make sure the new element is compatible in terms of size and power rating. Inspect both elements, looking for any visible differences or discrepancies. This step will help you ensure that you have the correct replacement for your specific heating system.
Properly positioning the new heating element
Once you have verified that the new heating element matches the old one, it’s time to position it correctly. Begin by turning off the power to your heating system and ensuring it is safely disconnected. Carefully remove the old heating element, taking note of its position and orientation. Position the new heating element in the same manner, making sure it aligns perfectly with the surrounding components.
Connecting the wires and ensuring proper connections
With the new heating element in place, it’s crucial to connect the wires correctly. Refer to the wiring diagram provided by the manufacturer of your heating system. Identify the corresponding wires on the heating element and carefully connect them to the appropriate terminals. Take care to ensure secure and proper connections, as any loose or faulty connections can cause performance issues or even electrical hazards.
Securing the heating element in place
After the wires are connected, it’s essential to secure the new heating element firmly in place. Use any mounting brackets or screws provided by the manufacturer to ensure a tight and stable fit. Double-check the element’s positioning, ensuring it remains aligned with the surrounding components. A secure installation will help prevent any unnecessary movement or damage to the heating element.
Testing the installation
Finally, after completing the installation, it’s time to test the new heating element. Restore power to your heating system and turn it on. Monitor the element’s performance for any unusual sounds, smells, or malfunctions. Let the system run for a while to ensure that the new heating element is functioning correctly. If everything appears to be in working order, congratulations, you have successfully installed your new heating element!
In conclusion, installing a new heating element involves comparing it with the old one, positioning it correctly, connecting the wires securely, and ensuring a stable installation. By following these steps and testing the installation, you can ensure a safe and efficient heating system for your home.
Troubleshooting And Maintenance Tips
In order to ensure your heating element functions optimally and lasts for a long time, regular maintenance and troubleshooting are essential. This section will cover common issues with heating elements, signs of a faulty heating element, best practices for maintenance, and safety tips for handling and maintaining a heating element.
Common issues with heating elements and how to fix them
Heating elements, like any other appliance, can encounter issues over time. Here are some common problems you might face with your heating element and how to fix them:
| Issue | Fix |
|---|---|
| The heating element is not producing heat | – Check the power supply to ensure it is connected – Inspect the heating element for any visible damage – Replace the heating element if necessary. |
| The heating element is producing insufficient heat | – Check the temperature settings and adjust if needed – Clean any dirt or debris on the heating element surface – If the problem persists, consider replacing the heating element. |
| The heating element is overheating | – Ensure proper ventilation around the heating element – Check the thermostat settings and adjust as required – Clean any accumulated dust or debris that may be causing the overheating. – If the problem continues, consult a professional for further investigation. |
Signs of a faulty heating element
It is important to recognize the signs of a faulty heating element to address the issue promptly. Here are some indicators that your heating element might be faulty:
- The appliance takes longer than usual to heat up.
- There is an unusual smell coming from the heating element.
- The appliance’s performance has significantly decreased.
- Visible signs of damage, such as cracks or burns, on the heating element.
Best practices for maintaining a heating element
Maintaining your heating element regularly can extend its lifespan and ensure efficient performance. Consider following these best practices:
- Regularly clean the heating element to remove any dirt or debris.
- Check the temperature settings periodically and adjust if necessary.
- Inspect the power supply and connections for any signs of damage.
- Perform regular inspections for any visible damage on the heating element, such as cracks or burns.
- Follow the manufacturer’s guidelines for recommended maintenance procedures.
Safety tips for handling and maintaining a heating element
Working with heating elements requires caution to ensure your safety. Here are some safety tips to keep in mind when handling and maintaining a heating element:
- Always disconnect the power supply before performing any maintenance or troubleshooting.
- Ensure the heating element is cool before attempting any repairs.
- Use appropriate protective gear, such as gloves and safety glasses, when working with the heating element.
- Avoid touching the heating element directly to prevent burns.
- If you are unsure about any maintenance or repair procedures, it is best to seek professional assistance.
By following these troubleshooting and maintenance tips, you can effectively address and prevent issues with your heating element, ensuring it operates efficiently and safely for years to come.
Frequently Asked Questions Of How To Install A Heating Element
How Do You Install A Heating Element In A Dryer?
Installing a heating element in a dryer involves several steps. First, unplug the dryer and locate the element, usually at the back or bottom. Then, disconnect the wires attached to the old element and remove it. Next, connect the wires to the new element and secure it in place.
Finally, plug the dryer back in and test it to ensure it’s working properly.
Does It Matter Which Way You Hook Up A Heating Element?
It does matter which way you hook up a heating element. The correct wiring ensures proper functionality and prevents damage or hazards. Always refer to the manufacturer’s instructions or consult a professional to ensure correct installation.
How Do You Wire A Hot Water Heater Element?
To wire a hot water heater element, follow these steps:
1. Turn off the power supply and water source.
2. Locate the element terminals and disconnect the wires.
3. Remove the old element and install the new one.
4. Connect the wires to the new element.
5. Restore power and water supply, then test the heater. Remember to always exercise caution when working with electrical components.
Is A Heating Element Easy To Fix?
Repairing a heating element is relatively easy. It can be fixed by following simple steps or with the help of a professional technician.
Conclusion
Installing a heating element may seem daunting, but with the right guidance, it can be a straightforward process. By following the step-by-step instructions provided in this blog post, you can successfully install a heating element and enjoy a warm and cozy environment in your home.
Remember to always prioritize safety and consult a professional if you encounter any difficulties. Now, go ahead and take on this DIY project with confidence!