To install a Harbor Breeze ceiling fan with a remote, follow the manufacturer’s instructions for mounting and wiring the fan, then sync the remote with the fan. Installing a Harbor Breeze ceiling fan with a remote is a straightforward process that can provide convenience and comfort to your space.
We will guide you through the steps necessary to successfully install a Harbor Breeze ceiling fan with a remote control. With proper installation and setup, you will be able to enjoy the benefits of a ceiling fan in your home or office.
So let’s get started and learn how to install your Harbor Breeze ceiling fan with a remote.
Gathering The Necessary Tools And Materials
Installing a Harbor Breeze ceiling fan with a remote can greatly enhance the comfort and aesthetics of your room. Before getting started, gather all the tools and materials needed for a smooth installation process. This will ensure that you have everything at hand and minimize any interruptions or delays during the installation. Here is a comprehensive list of the essential tools required:
List of tools required for installation
Having the right tools will make the installation process more efficient and hassle-free. Make sure you have the following items ready before you begin:
- Screwdriver (standard and Phillips head)
- Wire stripper
- Socket wrench set
- Step ladder or sturdy stool
- Pliers
- Voltage tester
- Electrician’s tape
- Wire nuts
- Electrical connectors
- Harbor Breeze ceiling fan kit (including the fan, remote control, and installation manual)
Preparing the workspace and ensuring safety measures
Before you start the installation, it is crucial to set up a safe and organized workspace. Safety should always be a top priority when working with electrical components. Follow these steps to prepare your workspace and ensure safety:
- Turn off the power: Locate the circuit breaker or fuse box that controls the electricity supply to the room where you plan to install the ceiling fan. Switch off the power to eliminate the risk of electric shock.
- Clear the area: Remove any furniture or obstructions from the installation area. This will provide you with ample space to work and prevent any accidents or damage.
- Secure the ladder: If you’re using a step ladder or stool, ensure it is stable and securely placed on a level surface. This will prevent falls and injuries during the installation process.
- Follow safety guidelines: Wear protective gear such as safety glasses and gloves. Avoid wearing loose clothing that could get caught in moving parts. Additionally, refer to the manufacturer’s safety guidelines provided in the installation manual.
- Test the wiring: Use a voltage tester to ensure that the power supply is indeed turned off. This step is crucial as it confirms that there is no electrical current running through the wires you’ll be working with.
By gathering the necessary tools and materials and preparing the workspace with safety measures in mind, you’ll be well-prepared and confident to proceed with the installation of your Harbor Breeze ceiling fan with a remote. This will make the installation process smoother and more enjoyable while ensuring the safety of yourself and your space.
Assembling The Harbor Breeze Ceiling Fan
Installing a Harbor Breeze ceiling fan with remote can help add comfort and style to any room. To ensure a smooth installation process, it is important to assemble the fan correctly. In this article, we will guide you through the step-by-step instructions on assembling your Harbor Breeze ceiling fan, so you can enjoy its benefits in no time.
Identifying and Organizing the Fan Components
Before beginning the assembly process, it is essential to identify and organize all the fan components. This will help prevent confusion and make the installation process much easier. Here are the main components you will find in your Harbor Breeze ceiling fan kit:
| Component | Quantity |
|---|---|
| Fan blades | 3-5 |
| Mounting bracket | 1 |
| Motor housing | 1 |
| Downrod | 1 |
| Hanging ball | 1 |
| Canopy | 1 |
| Wire nuts | 2 |
| Remote control | 1 |
Be sure to open the fan kit carefully and inspect each component. If you find any damaged or missing parts, reach out to the manufacturer for replacements or assistance. Once you have organized all the components, you are ready to proceed with the assembly process.
Step-by-Step Instructions for Assembling the Fan
Follow these step-by-step instructions to correctly assemble your Harbor Breeze ceiling fan:
- Start by attaching the fan blades to the motor housing. Align each blade with the designated slots and secure them using the provided screws. Make sure the blades are evenly spaced and firmly attached.
- Next, install the mounting bracket onto the ceiling. Use the provided screws and a screwdriver to securely fasten the bracket in place. Ensure that the bracket is level and aligned with the electrical box.
- Once the bracket is in place, attach the motor housing to the bracket. Connect the wiring from the motor housing to the electrical box, following the manufacturer’s instructions. Use the included wire nuts to secure the connections, ensuring there are no loose wires.
- After the motor housing is securely attached, install the downrod by sliding it into the motor housing. Use the provided screws to secure the downrod, making sure it is stable and aligned straight.
- Then, attach the hanging ball to the downrod by screwing it on tightly. This will allow the fan to be stable and hang securely from the ceiling.
- Finally, attach the canopy to the motor housing, covering the wiring and mounting bracket. Secure it using the provided screws, ensuring it is firmly in place.
- Now that your Harbor Breeze ceiling fan is fully assembled, you can install the remote control and configure the fan settings as desired. Refer to the manufacturer’s instructions for programming the remote control.
By following these step-by-step instructions, you can assemble your Harbor Breeze ceiling fan with ease. Remember to exercise caution and seek professional assistance if needed, especially when dealing with electrical connections. Once assembled, your ceiling fan will be ready to provide you with both comfort and style.
Mounting The Ceiling Fan To The Ceiling
Choosing the best location for the ceiling fan
Before installing your Harbor Breeze ceiling fan with a remote, it is important to choose the best location for it. By choosing the right spot, you can ensure optimal air circulation throughout the room. Here are a few things to consider when selecting the location:
- Measure the ceiling height: Make sure your ceiling is high enough to accommodate the fan and its blades without any obstructions. Ideally, the distance between the fan blades and the floor should be at least 7 feet.
- Room size and shape: Consider the size and shape of the room. For larger rooms, you may need to install multiple fans to ensure proper air circulation.
- Positioning in the room: Determine the ideal placement of the fan in the room. Typically, the fan should be installed in the center of the room for maximum effectiveness.
Installation of the mounting bracket and securing it to the ceiling
Once you’ve chosen the perfect location for your ceiling fan, the next step is to install the mounting bracket. The mounting bracket provides the necessary support for the fan and ensures its stability. Follow these steps to install the bracket:
- Locate a suitable electrical box: Ensure that the electrical box in the ceiling is rated to support the weight of the ceiling fan. If needed, replace the existing box with a fan-rated box.
- Attach the mounting bracket: Securely attach the mounting bracket to the electrical box using the provided screws. Make sure the bracket is level and aligned with the desired position of the fan.
- Tighten the screws: Use a screwdriver to tighten the screws of the mounting bracket, ensuring that it is firmly secured to the ceiling.
Attaching the fan motor to the mounting bracket
Now that the mounting bracket is securely in place, you can proceed with attaching the fan motor to it. Follow these steps for a successful installation:
- Preparation: Gather the necessary tools such as a screwdriver and wire connectors. Make sure the fan’s wires are properly aligned and ready to be connected.
- Align the fan motor: Carefully align the holes in the fan motor with the corresponding holes in the mounting bracket.
- Secure the fan motor: Insert the provided screws into the holes and use a screwdriver to tighten them, ensuring that the fan motor is securely attached to the mounting bracket. Double-check for stability.
- Connect the wires: Connect the wires from the fan motor to the corresponding wires in the ceiling, following the manufacturer’s instructions. Use wire connectors to secure the connections.
By following these steps, you can successfully mount your Harbor Breeze ceiling fan with remote to the ceiling. Now, you’re one step closer to enjoying a cool and comfortable environment in your home.
Wiring The Ceiling Fan With Remote Control
Installing a ceiling fan with a remote control not only adds convenience but also makes it easier to operate the fan from anywhere in the room. However, before you start enjoying the cool breeze, it’s important to wire the ceiling fan correctly with the remote control. In this section, we will walk you through the process of wiring the ceiling fan with a remote control, ensuring a safe and efficient installation.
Understanding the electrical connections and wiring diagrams
Before you begin the installation process, it’s crucial to understand the electrical connections involved. Each ceiling fan model may have slightly different wiring requirements, so it’s essential to refer to the wiring diagram provided by the manufacturer. The wiring diagram will guide you through the process, indicating which wires need to be connected for proper functioning. Take the time to familiarize yourself with the wiring diagram and ensure you have all the necessary tools and materials before proceeding.
Connecting the wires from the ceiling to the fan
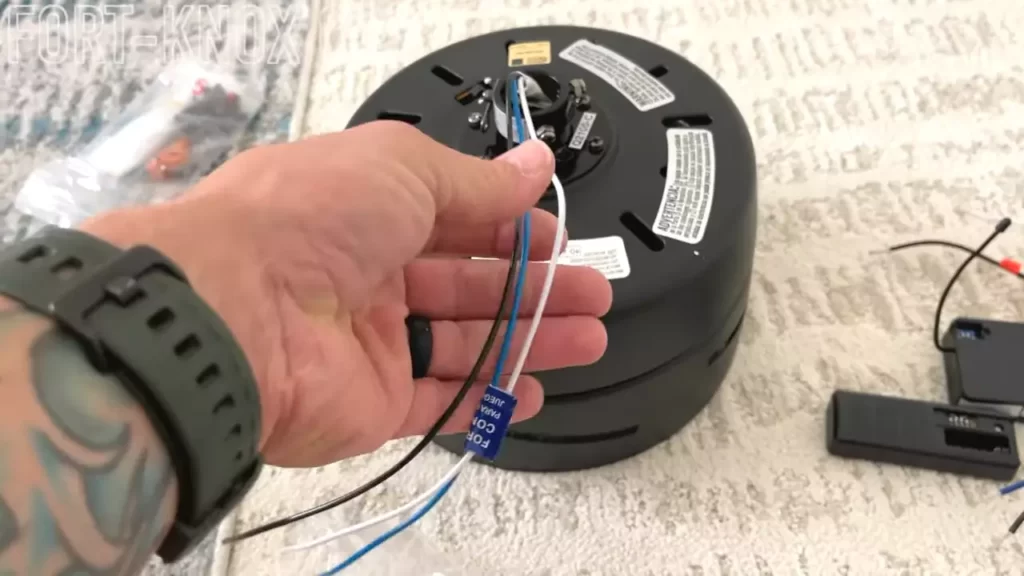
Now that you understand the electrical connections, let’s move on to connecting the wires from the ceiling to the fan. Start by turning off the power to the existing ceiling fan or light fixture at the circuit breaker. Once the power is off, remove the existing fixture and expose the electrical box. Inside the electrical box, you will find several wires – typically black, white, and bare copper or green. These wires will be your guide for connecting the new ceiling fan.
The first step is to connect the green or bare copper wire from the ceiling to the grounding wire of the fan. The grounding wire is usually green or has a green screw, which you can connect the wire to. This step is crucial for ensuring the fan is properly grounded and safe to use.
Next, you’ll need to connect the white wire from the ceiling to the white or neutral wire on the fan. Use wire nuts to secure the connection, ensuring a tight and secure fit. Similarly, connect the black wire from the ceiling to the black or hot wire on the fan. Again, use wire nuts to make a secure connection. If there is an additional blue wire on the fan, this is usually for the light kit. You can connect it to the blue wire from the ceiling using wire nuts.
Properly grounding the fan for safety
Proper grounding is essential to ensure the safety of your ceiling fan installation. In addition to connecting the green or bare copper wire to the grounding wire, you should also secure the other end of the grounding wire to a properly grounded surface, such as a metal electrical box or a grounding screw. This will help prevent electrical shock and protect both you and your ceiling fan.
Once you have connected all the wires and properly grounded the fan, it’s time to test the installation. Turn on the power again and use the remote control to check if the fan and its functions are working correctly. If everything is operating as it should, you can proceed with installing any additional components, such as the light kit or fan blades, following the manufacturer’s instructions.
By following these steps and paying attention to the wiring diagrams, you can ensure a safe and successful installation of your Harbor Breeze ceiling fan with a remote control. Enjoy the comfort and convenience of a properly wired ceiling fan in your home!
Attaching The Fan Blades And Light Kit
When it comes to installing a Harbor Breeze ceiling fan with a remote, one of the most important steps is attaching the fan blades and light kit. This is where the fan comes together, providing both functionality and aesthetics to any room. In this guide, we will walk you through the process of aligning and attaching the fan blades, as well as installing the light kit according to the manufacturer’s instructions.
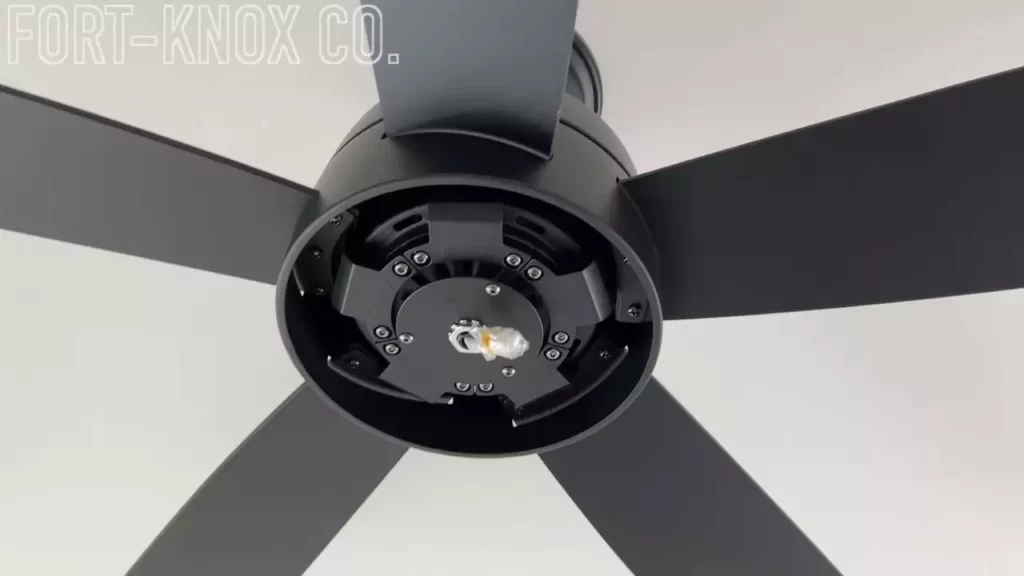
Aligning and Attaching the Fan Blades to the Fan Motor
Attaching the fan blades to the fan motor requires careful alignment and secure fastening to ensure smooth and efficient operation. To align and attach the fan blades:
- Start by placing the fan blades next to the fan motor, ensuring that the holes on the blades align with the holes on the motor. It’s important to ensure that each blade is in the correct position according to the fan’s user manual.
- Once the blades are properly aligned, insert the screws provided into the holes and tighten them securely. Use a screwdriver or the appropriate tool to avoid any damage to the blades or motor.
- After attaching all the blades, give them a gentle tug to make sure they are securely fastened. If any blades feel loose, recheck the alignment and tighten the screws as needed.
Installing the Light Kit According to the Manufacturer’s Instructions
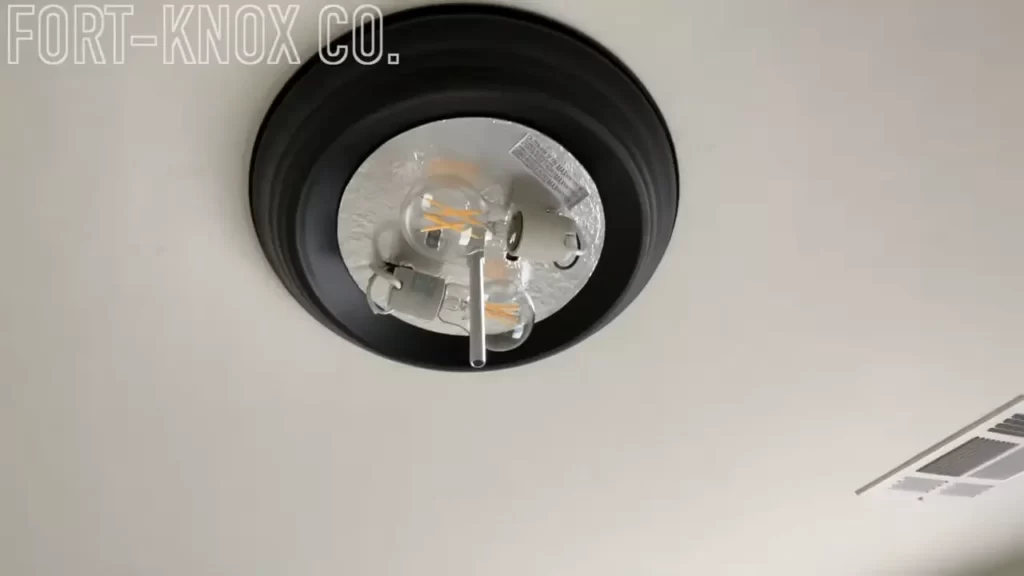
The light kit is an optional feature for Harbor Breeze ceiling fans, adding both illumination and style to the room. To install the light kit:
- Refer to the manufacturer’s instructions for the specific light kit model you have. Each light kit may have slightly different installation steps.
- Gather all the components and parts required for the installation, ensuring that you have everything before starting.
- Follow the step-by-step instructions provided. This may involve connecting wires, securing the light kit to the fan, and installing light bulbs.
- Make sure to double-check all connections and tighten any screws or fasteners to ensure a secure and stable installation.
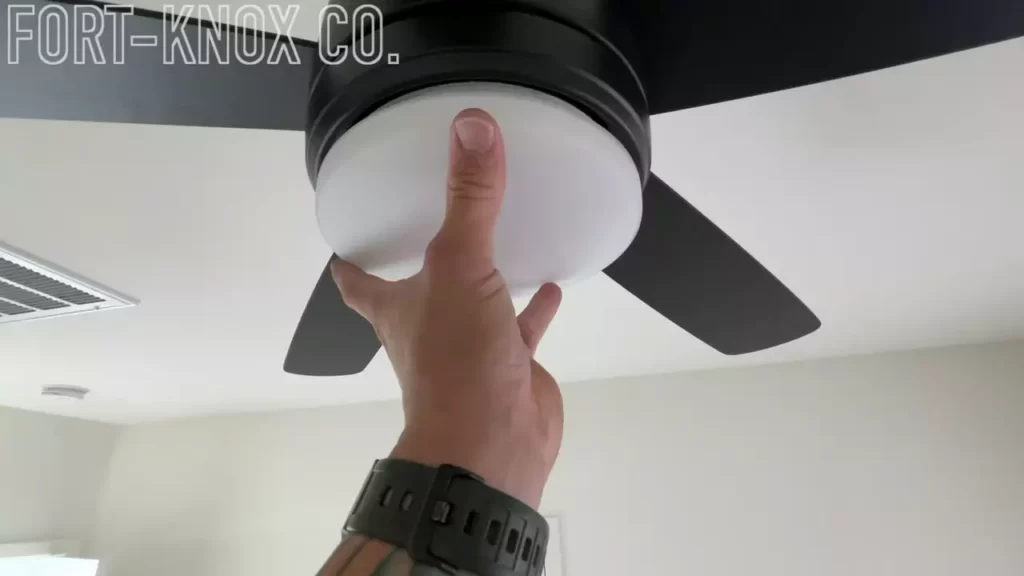
- Once the light kit is installed, test it by turning on the power and using the remote to control the fan and lights. If any issues occur, refer back to the manufacturer’s guide or consult a professional for assistance.
With the fan blades and light kit securely attached, your Harbor Breeze ceiling fan is now ready to use. Enjoy the cool breeze and pleasant lighting that your new fan provides.
Installing The Remote Control Receiver
When it comes to convenience and ease of use, installing a remote control receiver for your Harbor Breeze ceiling fan can make a world of difference. With a remote control, you can effortlessly adjust the fan’s speed and direction without having to get up from your seat. In this guide, we will take you through the process of installing the remote control receiver step by step. Let’s get started!
Identifying the Receiver Unit and its Wiring Requirements
Before you begin the installation process, make sure you have all the necessary tools and equipment handy. Additionally, it’s important to understand the receiver unit and its wiring requirements to ensure a successful installation.
| Receiver Unit | Wiring Requirements |
|---|---|
| The remote control receiver typically comes as a compact unit, usually with an antenna. | The receiver unit requires a power source, usually supplied by connecting it to the fan’s electrical system. It also needs to be “paired” or synchronized with the remote control. |
Mounting the Receiver and Connecting it to the Fan’s Electrical System
Once you have identified the receiver unit and its wiring requirements, it’s time to mount the receiver and connect it to the fan’s electrical system. Follow these steps:
- Locate an appropriate spot to mount the receiver unit, preferably in a location that is easily accessible but not visible.
- Using screws or the provided mounting hardware, secure the receiver unit to the chosen spot.
- Next, identify the power supply wires from the fan’s electrical system. These wires are usually color-coded, with the black wire representing the “hot” or live wire, and the white wire representing the neutral wire.
- Carefully connect the corresponding wires from the receiver unit to the fan’s electrical system, ensuring a tight and secure connection.
- Once the connections are made, you may need to consult the manufacturer’s instructions on how to pair or synchronize the receiver unit with the remote control.
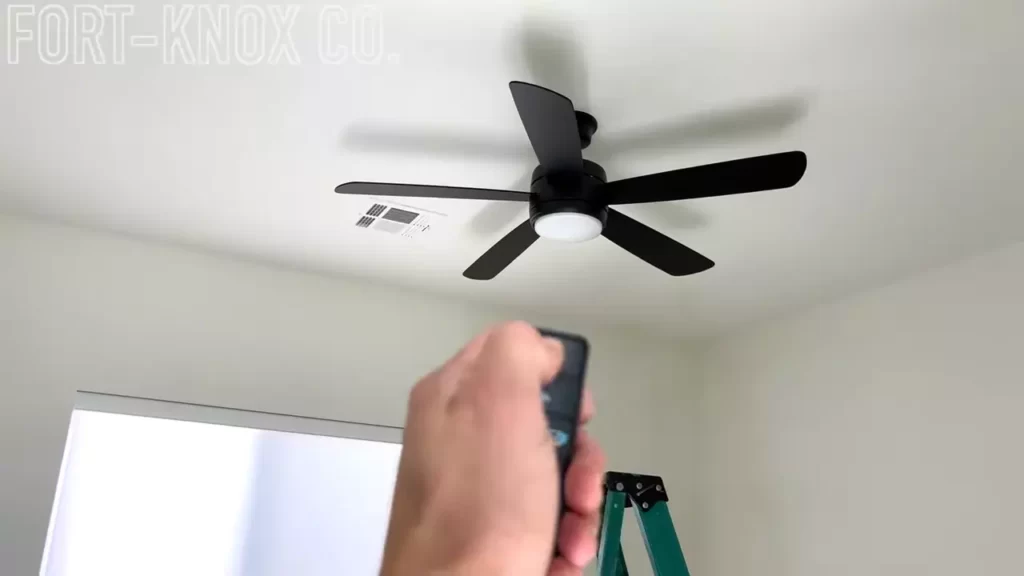
- After completing the installation, test the remote control to ensure that it is functioning properly and that you can control the fan’s speed and direction effortlessly.
By following these steps, you will successfully install the remote control receiver for your Harbor Breeze ceiling fan. Enjoy the convenience and comfort that a remote control brings to your fan experience!
Testing And Troubleshooting
Verifying the fan and remote control functionality
Once you have successfully installed your Harbor Breeze ceiling fan with remote, the next step is to verify its functionality. Before proceeding, ensure that the fan is securely mounted and all electrical connections have been properly made. Now, let’s dive into the process of testing and troubleshooting.
Troubleshooting common installation issues
If you encounter any issues during the installation process, troubleshooting can help you identify and resolve them. Here are some common installation issues you may come across:
- Fan not turning on: If the fan doesn’t turn on, double-check the power source and ensure that the circuit breaker is not tripped. Additionally, make sure the remote control’s batteries are properly inserted and functioning.
- Inconsistent fan speed: If the fan speed is not consistent or the fan operates only at one speed, check the remote control settings to ensure it is not set to a specific speed setting. Also, verify that the fan’s pull chains are not interfering with the remote control.
- Unresponsive remote control: If the remote control is unresponsive, start by replacing the batteries with fresh ones. Ensure that there are no obstructions between the remote control and the fan, as this can affect the signal transmission.
- Incompatible fan and remote: In some cases, the fan and remote control may not be compatible. Refer to the manufacturer’s instructions to confirm that the remote is designed to work with your specific model of Harbor Breeze ceiling fan.
- Noisy fan operation: If the fan produces excessive noise during operation, check for any loose screws or mounting hardware. Tighten them as needed to reduce the noise. Additionally, ensure that the fan blades are properly balanced.
By troubleshooting these common installation issues, you can ensure that your Harbor Breeze ceiling fan with remote operates smoothly and efficiently. If you are unable to resolve the issue on your own, consider consulting a professional electrician or contacting customer support for further assistance.
Finalizing The Installation
Finalizing the installation of your Harbor Breeze ceiling fan with remote is an important step to ensure proper operation and longevity. Once you have successfully installed the fan and remote, it’s essential to secure all loose connections and components, clean up the workspace, and verify the fan’s functionality. By following these tasks, you can ensure that your ceiling fan will provide you with comfort and style for years to come.
Securing all loose connections and components
Once the fan has been installed and all wiring connections have been made, it’s crucial to go through and double-check that everything is properly secured. Loose connections can not only affect the performance of the fan but can also pose safety risks. Here are some steps you can follow to ensure that all connections and components are secure:
- Inspect all wire connections, making sure they are tight and properly fastened. Use a screwdriver or pliers if necessary to tighten any loose screws or nuts.
- Check the blades and blade brackets. Ensure that each blade is securely attached to its respective bracket and that the brackets are properly fastened to the motor housing.
- Look for any loose screws or bolts on the motor housing, downrod, and mounting bracket. Tighten them as needed to eliminate any wobbling or instability.
By taking the time to secure all loose connections and components, you can minimize the risk of any accidents or damage that may arise from inadequate installation.
Cleaning up the workspace and ensuring proper fan operation
With the connections secured, it’s time to tidy up your workspace and conduct a final check to verify the correct operation of the fan. Cleaning up ensures that your installation appears neat and professional while ensuring proper fan operation guarantees that you will experience reliable performance and comfort. Here’s what you should do:
- Remove any leftover packaging materials, boxes, or tools from the installation area. A clutter-free space not only looks better but also reduces the risk of tripping or damaging fan components.
- Wipe down the fan blades, motor housing, and remote control with a clean, damp cloth to remove any dirt or debris that may have accumulated during installation.
- Turn the fan on using the remote control and observe its operation. Ensure that it rotates smoothly and quietly, with no excessive wobbling or vibrations. If you notice any issues, refer to the instruction manual or contact customer support for assistance.
With a clean workspace and a well-functioning fan, you have successfully finalized the installation of your Harbor Breeze ceiling fan with remote. You can now enjoy the comfort and breeze it provides, all while enhancing the overall aesthetics of your living space.
Additional Tips And Considerations
Installing a Harbor Breeze ceiling fan with a remote control can greatly improve your comfort and convenience. However, there are some additional tips and considerations to keep in mind to ensure optimal performance and longevity of your fan.
Maintenance and Cleaning of the Harbor Breeze Ceiling Fan
Maintaining and cleaning your Harbor Breeze ceiling fan regularly is essential to keep it running smoothly and looking great. Here are some steps to follow:
- Dust the fan blades with a soft cloth or use a vacuum cleaner with a soft brush attachment to remove any accumulated dirt and dust.
- Wipe down the surface of the fan housing and remote control with a damp cloth. Avoid using harsh chemicals or abrasive cleaners that may damage the finish.
- Check the tightness of the screws and bolts on the fan regularly. Over time, they may loosen due to vibrations, so it’s important to tighten them to ensure the fan is secure and stable.
- Inspect the fan’s motor housing for any signs of wear or damage. If you notice any issues, contact a professional for repair or replacement.
By regularly maintaining and cleaning your Harbor Breeze ceiling fan, you can extend its lifespan and enjoy a more efficient and reliable cooling experience.
Exploring Advanced Features and Customization Options
The Harbor Breeze ceiling fan comes with a range of advanced features and customization options that allow you to personalize your fan settings according to your preferences. Here’s a closer look at some of the key features:
| Feature | Description |
|---|---|
| Remote Control | Allows you to control the fan’s speed, direction, and lighting from anywhere in the room. |
| Timer Function | Enables you to set the fan to automatically turn on or off at specific times, helping to conserve energy. |
| Reverse Airflow | Allows you to change the direction of the fan blades, which can help distribute warm air during colder months and improve energy efficiency. |
| Light Dimming | Some models come with dimmable lights, allowing you to adjust the brightness to create the desired ambiance. |
Experimenting with these advanced features can enhance your overall fan experience. Don’t be afraid to customize the settings to find the perfect balance of comfort and energy efficiency.
Frequently Asked Questions Of How To Install Harbor Breeze Ceiling Fan With Remote
How Do I Connect My Harbor Breeze Ceiling Fan Remote?
To connect your Harbor Breeze ceiling fan remote:
1. Turn off the fan’s power source.
2. Open the battery compartment on the back of the remote.
3. Slide the dip switch positions on both the remote and the receiver to match each other.
4. Close the battery compartment and turn on the fan’s power source.
5. Test the remote by pressing buttons to control the fan.
What Do I Do With The Red Wire When Installing A Ceiling Fan With Remote?
The red wire in your ceiling fan installation with a remote should be connected to the corresponding red wire in your electrical box. This wire controls the fan’s light; ensure a secure connection with wire connectors. Always follow safety guidelines and consult a professional if needed.
Where Is The Remote Receiver In A Harbor Breeze Ceiling Fan?
The remote receiver in a Harbor Breeze ceiling fan is usually located in the ceiling fan canopy or the top of the motor housing. Look for a rectangular box with wires connected to it.
How Do You Wire A Ceiling Fan With A Remote?
To wire a ceiling fan with a remote, first turn off the power supply. Then, follow the manufacturer’s instructions to connect the remote receiver to the fan’s wiring. Make sure to match the wires correctly and secure them tightly using wire nuts.
Finally, mount the ceiling fan and test the remote to ensure proper functioning.
Conclusion
Installing a Harbor Breeze ceiling fan with a remote doesn’t have to be a daunting task. By following the step-by-step instructions and using the right tools, you can enjoy the comfort and convenience of a remote-controlled ceiling fan in no time.
Remember to turn off the power, properly mount the fan, connect the wires, and test the remote for functionality. With this guide, you’ll be able to enhance your home’s ambiance and stay cool effortlessly.