To install a water heater timer, first, ensure the power is disconnected. Then, follow the manufacturer’s instructions for connecting and programming the timer.
A water heater timer can help save energy and reduce utility costs. A water heater timer is an innovative device that can significantly contribute to energy conservation and cost reduction. By allowing you to control when your water heater operates, a timer helps you optimize its usage and minimize unnecessary energy consumption.
This practical installation guide will walk you through the necessary steps to install a water heater timer successfully. Following these instructions will not only enable you to save money but also contribute to a greener and more sustainable lifestyle. So, let’s dive right in and learn how to install a water heater timer effectively, ensuring you enjoy the benefits of reduced energy consumption and lower utility bills.
Understanding The Benefits Of Installing A Water Heater Timer
Energy and Cost Savings
One of the primary benefits of installing a water heater timer is the potential for energy and cost savings. By programming your water heater to only run during specific times of the day when hot water is needed the most, you can significantly reduce energy consumption and lower your utility bills. This is particularly beneficial for households that have peak hot water usage in the mornings or evenings.
Increased Efficiency and Performance
A water heater timer can also contribute to increased efficiency and performance of your water heater. By scheduling the heating cycles more strategically, you can ensure that the water is heated to the desired temperature just in time for usage. This eliminates the need for the water heater to continuously run, reducing wear and tear on the appliance and its components. Additionally, a timer allows you to preheat the water before peak usage times, ensuring that there is always a sufficient supply of hot water available.
Overall, installing a water heater timer offers a range of benefits that can positively impact both your energy consumption and household budget. The two main advantages include:
- Energy and Cost Savings
- Increased Efficiency and Performance
By taking advantage of these benefits, you not only reduce your environmental footprint but also improve the functionality of your water heater. So, why wait? Start enjoying the cost savings and efficient operation of a water heater timer today!
Evaluating Your Water Heater And Timer Options
Installing a water heater timer can offer several benefits, such as increased energy efficiency and cost savings. But before diving into the installation process, it’s important to evaluate your water heater and timer options to ensure compatibility and choose the right timer for your needs.
Compatibility with Your Current Water Heater
Not all water heaters are compatible with timers, so it’s crucial to determine whether your current water heater can accommodate this device. The first step is to check the type of water heater you have. There are two common types: tankless and tank-style heaters.
If you have a tank-style water heater, it will likely have a dedicated electrical circuit, making it relatively easy to install a timer. However, it’s still essential to check the manufacturer’s specifications or consult a professional to ensure compatibility.
On the other hand, if you have a tankless water heater, the process can be a bit more complicated. Tankless heaters often have specific electrical requirements, and not all models support timers. It’s advisable to review the manufacturer’s guidelines or seek expert advice to determine if a timer can be installed.
Choosing the Right Timer for Your Needs
Once you’ve confirmed the compatibility of your water heater, the next step is to choose the right timer. Several factors should be considered when selecting a timer:
- Power Source: Determine whether you prefer a timer that operates on battery power or requires a direct electrical connection. Battery-powered timers offer easier installation but may need regular replacement.
- Programmability: Decide if you want a basic timer that allows for simple scheduling or a more advanced programmable timer that provides flexibility and customization.
- Display and Controls: Consider the readability and user-friendliness of the timer’s display and controls to ensure easy operation and programming.
- Features: Evaluate additional features such as backup battery, vacation mode, or manual override options that may enhance the functionality and convenience of the timer.
- Budget: Set a budget for your timer purchase to help narrow down the options and choose a timer that fits within your allocated funds.
Remember, each water heater and household has unique needs, so it’s important to carefully evaluate your options before making a decision. Doing proper research and seeking professional advice, if necessary, can help ensure a successful installation and maximize the benefits of a water heater timer.
Shutting Off Power And Preparing For Installation
Before you begin installing a water heater timer, it’s crucial to shut off power to the unit and properly prepare for the installation process. This will ensure your safety and allow for a smooth and efficient installation. In this section, we will guide you through the necessary steps to turn off the circuit breaker, drain the water heater, disconnect the electricity, and remove the access panel in a systematic manner.
Turning off the Circuit Breaker
To start, locate the circuit breaker panel in your home. It is typically located in the basement, utility room, or garage. Once you have located it, follow these steps:
- Open the circuit breaker panel cover carefully.
- Locate the circuit breaker that supplies power to your water heater. It is usually labeled and may be referred to as a ‘water heater’ or ‘electric water heater’.
- Flip the circuit breaker switch to the ‘off’ position. This will cut off the power supply to the water heater, ensuring your safety during the installation process.
- Use a non-contact voltage tester to confirm that the power is indeed turned off. Hold the tester near the electrical wires connected to the water heater. If the tester does not detect any voltage, it is safe to proceed
Draining the Water Heater
Before proceeding with the installation, it is important to drain the water heater to prevent any water leakage or damage. Follow these steps to drain the water heater:
- Find the drain valve located near the bottom of the water heater. It is usually a brass or plastic valve with a hose connection.
- Place a bucket or a large container underneath the drain valve to catch the water.
- Turn the valve counterclockwise to open it. This will allow the water to flow out of the heater and into the container.
- Wait until all the water has completely drained out of the water heater.
- Once the water has fully drained, close the drain valve by turning it clockwise.
Disconnecting Electricity and Removing the Access Panel
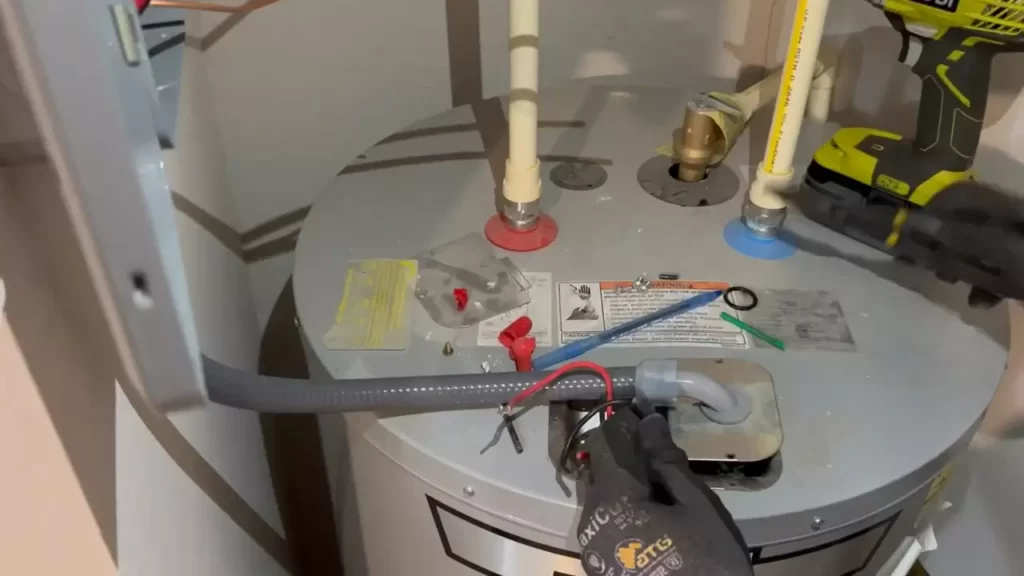
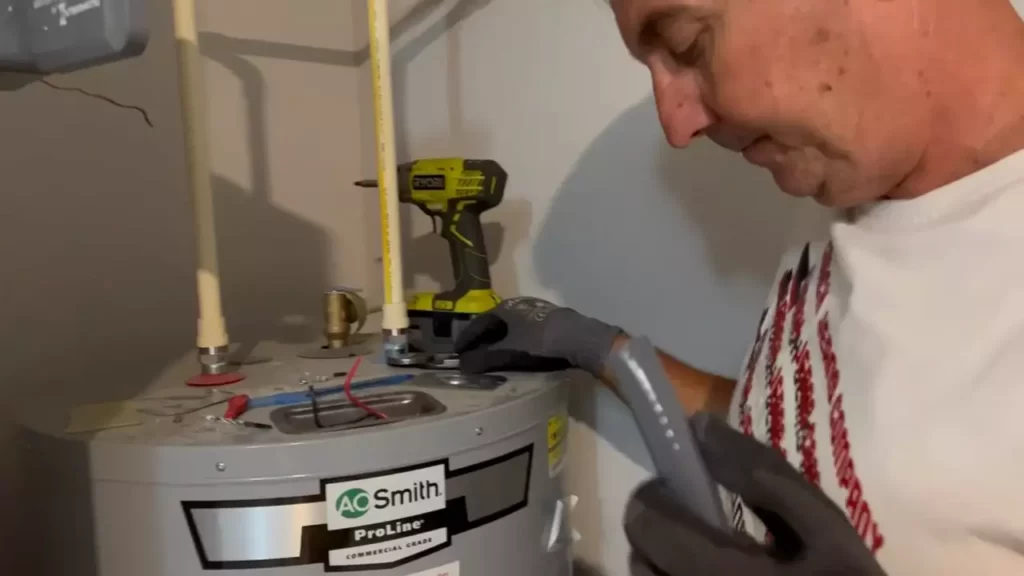
To ensure your safety during the installation process, it is essential to disconnect the electricity supply and remove the access panel. Follow these steps:
- Locate the access panel on the front of the water heater. It is typically held in place by screws.
- Use a screwdriver to remove the screws and carefully take off the access panel.
- Locate the electrical wires connected to the water heater and disconnect them. Take a picture or make a note of the wire connections to ensure proper reconnection later.
- Once the electrical wires are disconnected, set them aside safely and place the access panel in a secure location.
Now that you have successfully shut off power and prepared for the installation, you are ready to move on to the next steps of installing a water heater timer. Stay tuned for the upcoming section on wiring the timer and setting the schedule, as we continue to guide you through this process.
Wiring The Water Heater Timer
Installing a water heater timer can help save energy and money by providing better control over your water heating system. One essential step in the installation process is wiring the timer correctly. In this guide, we will walk you through the process of connecting the timer to the power source, establishing the wiring connection, and securing the wiring before reattaching the access panel. Follow these simple steps to successfully wire your water heater timer.
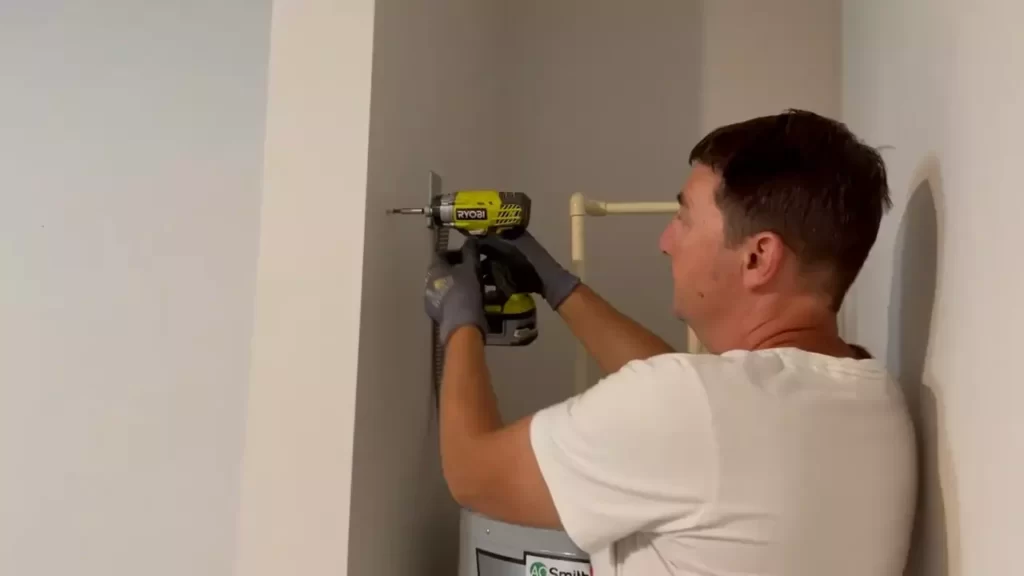
Connecting the Timer to the Power Source
The first step in wiring your water heater timer is to connect it to the power source. To do this, you will need to locate the electrical panel or service panel where the power supply for your water heater is located. This panel can usually be found near the main electrical panel of your home. Once you have located the panel, follow these steps:
- Turn off the power supply to the water heater by switching off the appropriate circuit breaker.
- Remove the panel cover to gain access to the wiring inside.
- Identify the wires connecting the power supply to the water heater. These wires are typically red and black in color.
- Using wire cutters, carefully cut the wires, ensuring that you leave enough length for easy connection to the timer.
- Strip the insulation off the ends of the wires to expose the bare conductors.
- Connect the red wire from the power supply to the load terminal on the timer and secure it with a wire nut.
- Connect the black wire from the power supply to the line terminal on the timer, also securing it with a wire nut.
Establishing the Wiring Connection
With the timer now connected to the power source, the next step is to establish the wiring connection between the timer and the water heater. Follow these steps to complete this process:
- Identify the wires coming from the water heater. These wires are typically white and green.
- Strip the insulation off the ends of the wires.
- Connect the white wire from the water heater to the neutral terminal on the timer, using a wire nut to secure it.
- Connect the green wire from the water heater to the ground terminal on the timer, also securing it with a wire nut.
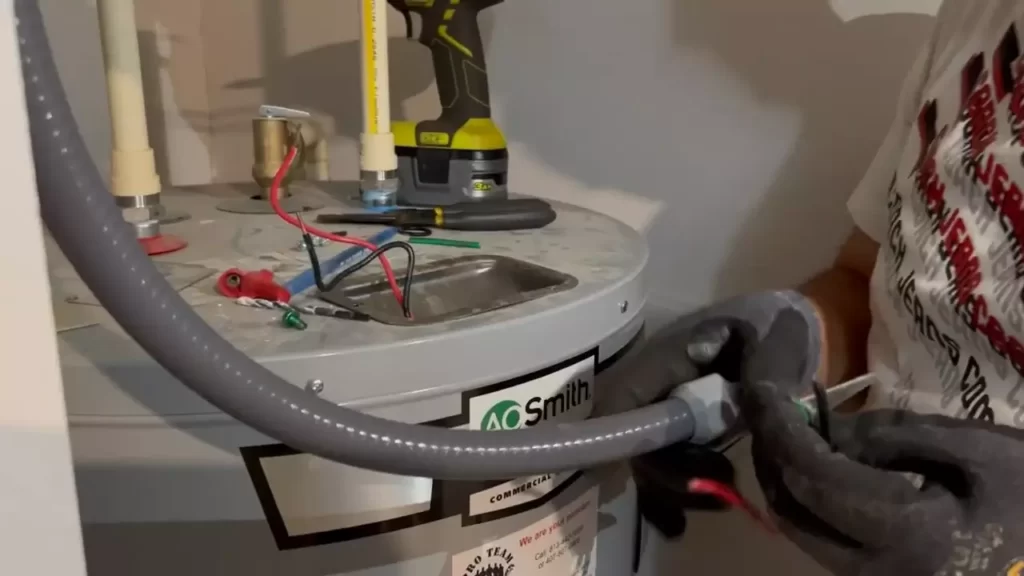
Securing the Wiring and Reconnecting the Access Panel
Now that the wiring connection has been established, the final step is to secure the wiring and reconnect the access panel. Follow these steps to complete the installation process:
- Double-check all of your connections to ensure they are secure and tight.
- Use zip ties or cable clips to neatly secure the wiring and prevent it from interfering with other components.
- Reattach the access panel to the electrical panel, ensuring it is properly aligned and securely fastened.
- Turn on the power supply to the water heater by switching on the circuit breaker.
- Verify that the timer is functioning correctly by setting it to the desired schedule and observing its operation.
By following these steps, you can successfully wire your water heater timer and enjoy the benefits of improved energy efficiency and cost savings. Remember to always prioritize safety by turning off the power supply before working with any electrical components. Now that your timer is installed and wired, you can have better control over when your water heater operates, resulting in a more efficient and eco-friendly home.
Setting The Timer And Finalizing The Installation
Once you have successfully installed your water heater timer, it’s time to set the timer and ensure its proper functionality. This is an important step that will help you save energy and reduce your utility bill. In this section, we will guide you through adjusting the timer settings, conducting initial tests, and ensuring your water heater timer is working effectively.
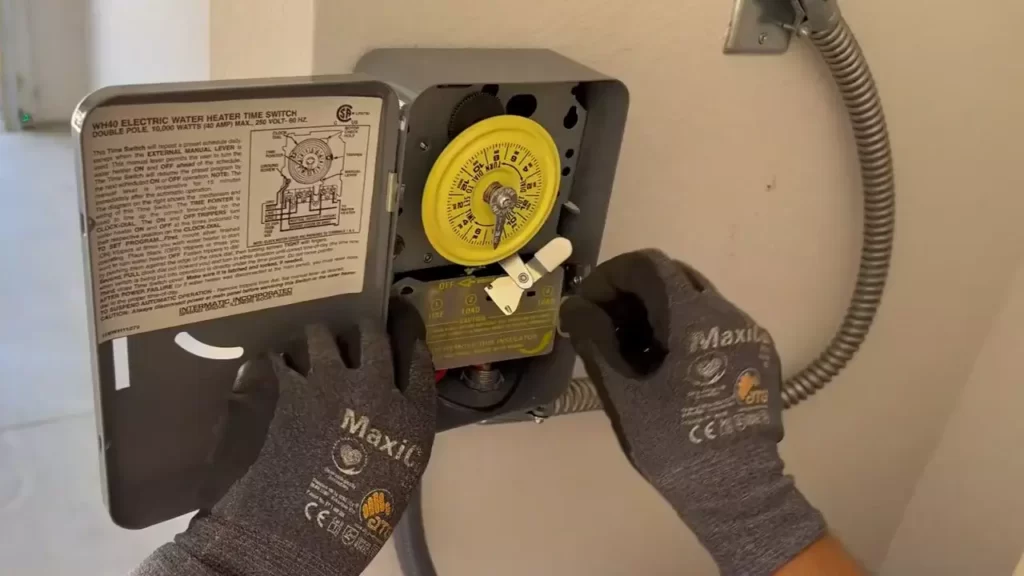
Adjusting the Timer Settings
When it comes to adjusting the timer settings, it’s essential to consider your household’s hot water needs and usage patterns. The goal is to optimize the timer’s schedule to correspond with your daily routines.
- Start by setting the current time on the timer. Refer to the manufacturer’s instructions to ensure you follow the correct steps for your specific timer model.
- Next, determine the desired periods when you typically need hot water the most such as early morning or evening showers. Adjust the timer accordingly, allowing it to turn on the water heater at those specific times.
- Consider the duration needed for the water heater to reach the desired temperature. This may vary depending on your specific model and preferences. Set the timer to allow sufficient time for the water to heat up.
- Remember to leave enough time for the tank to recover and heat more water if your household demands hot water throughout the day.
Conducting Initial Tests
After adjusting the timer settings, it’s important to conduct some initial tests to ensure everything is working as intended.
- Turn on a hot water faucet to check if hot water is being delivered at the designated times. If the water heater fails to provide hot water, double-check the timer settings. Make sure the power supply to the water heater is functional, and the timer is receiving power.
- Observe the water heater during its operation. Listen for any unusual noises or vibrations. Inspect the connections and components for leaks, corrosion or any signs of damage.
- If you encounter any issues, consult the manufacturer’s instructions or seek professional assistance to troubleshoot and resolve the problem.
Ensuring Proper Functionality
To ensure the water heater timer continues to function properly over time, there are a few important considerations:
- Regularly monitor the timer’s performance and adjust the settings as necessary. Pay attention to seasonal changes or modifications in your household’s hot water requirements.
- Keep the timer in a safe and accessible location. Avoid exposing it to excessive heat or moisture. Protect it from accidental damage or tampering.
- Periodically inspect and maintain your water heater to optimize its efficiency. This includes flushing the tank to remove sediment buildup and checking the temperature and pressure relief valve for proper operation.
By following these steps to set the timer and conduct initial tests, you can ensure the proper functionality of your water heater timer. Take advantage of this energy-saving device and enjoy the convenience of hot water when you need it the most.
Common Issues And How To Resolve Them
Installing a water heater timer can significantly improve energy efficiency, reduce utility bills, and extend the lifespan of your water heater. However, like any other appliance, a water heater timer can encounter a few common issues. In this section, we will discuss some of these issues and provide step-by-step solutions to help resolve them.
Timer Not Functioning
If you find that your water heater timer is not functioning properly, there are a few troubleshooting steps you can take to fix the problem:
- Double-check the power supply: Ensure that your water heater timer is receiving power by verifying the circuit breaker or fuse. If necessary, reset or replace them.
- Inspect the timer connections: Check the wiring connections from the water heater to the timer. Make sure they are secure and tightly connected. Loose connections can cause the timer to malfunction.
- Replace the batteries: If your water heater timer operates on batteries, it is essential to replace them periodically. A low battery can lead to erratic or non-functioning timer behavior. Refer to the manufacturer’s instructions on how to replace the batteries correctly.
- Reset the timer: Sometimes, a simple reset can resolve timer issues. Look for a reset button or switch on your water heater timer, and follow the manufacturer’s instructions to perform a reset.
Incorrect Timer Settings
Incorrect timer settings can lead to inefficient water heating or inconsistent hot water supply. Follow these steps to ensure your water heater timer settings are optimized:
- Refer to the manufacturer’s instructions: Read the user manual or installation guide that came with your water heater timer. It will provide specific details on how to set the timer for your particular model.
- Adjust the ON and OFF times: Determine the optimal time for your water heater to turn on and off based on your household’s hot water needs. Consider peak usage periods and adjust the timer accordingly.
- Regularly review and update settings: Periodically assess your water heater usage patterns and adjust the timer settings accordingly. Changes in weather, occupancy, or hot water requirements may warrant adjustments to ensure energy efficiency.
Wiring Problems
If you are experiencing wiring problems with your water heater timer, follow these steps to identify and address the issue:
- Inspect the wiring connections: Visually inspect the wiring connections to ensure they are properly installed and not damaged. Tighten any loose connections, and replace any frayed or worn-out wires.
- Consult a professional: If you are uncertain about the wiring or lack the necessary knowledge and experience, it is recommended to seek assistance from a qualified electrician. They can inspect the wiring, troubleshoot the problem, and make any necessary repairs or replacements.
By following these troubleshooting steps, you can resolve common issues with your water heater timer quickly and efficiently. If problems persist, it is always best to consult a professional for further assistance.
Maintenance Tips For Optimal Performance
Proper maintenance is essential to ensure that your water heater timer is working efficiently and providing the desired results. By following these maintenance tips, you can optimize the performance of your water heater timer and enjoy hot water whenever you need it.
Regular Inspections and Cleaning
Regular inspections and cleaning help keep your water heater timer in top condition. Over time, dust, dirt, and debris can accumulate on the timer, affecting its performance. To prevent this, follow these steps:
- Turn off the power supply to the water heater timer.
- Carefully remove the timer cover using a screwdriver.
- Inspect the timer for any visible signs of dirt or damage.
- Use a soft cloth or brush to gently clean the timer and remove any debris.
- Once clean, replace the timer cover and secure it with screws.
- Turn on the power supply and check if the timer is functioning properly.
Regular inspections and cleaning not only improve the performance of your water heater timer but also extend its lifespan, ensuring hot water is readily available when you need it.
Replacing Batteries
The water heater timer is powered by batteries, and the performance of the timer depends on the health of these batteries. To ensure optimal performance, it is crucial to replace the batteries periodically. Here’s how to replace the batteries in your water heater timer:
- Turn off the power supply to the timer.
- Locate the battery compartment on the back or bottom of the timer.
- Open the battery compartment and remove the old batteries.
- Insert new batteries, ensuring they are placed in the correct polarity (+ and -).
- Close the battery compartment securely.
- Turn on the power supply and check if the timer is functioning with the new batteries.
Replacing the batteries regularly ensures uninterrupted operation of your water heater timer and prevents any disruptions in the hot water supply.
Updating Timer Settings as Needed
As your needs change, it may be necessary to update the settings on your water heater timer. Whether you want hot water at specific times of the day or need to adjust the temperature setting, keeping the timer settings up to date is essential. Here’s how you can do it:
- Refer to the user manual to understand the process of updating the timer settings.
- Locate the control panel or display on your water heater timer.
- Follow the on-screen instructions or use the control buttons to modify the settings as desired.
- Ensure that the changes are saved or confirmed before exiting the settings menu.
By updating the timer settings as needed, you can customize your hot water supply to match your lifestyle and save energy by only heating water when necessary.
Enjoy The Benefits Of A Water Heater Timer
Are you tired of constantly heating water that you’re not using? Or do you find yourself dreading your monthly energy bill because your water heater is a major contributor? Installing a water heater timer might just be the solution you need. With a water heater timer, you can have more control over when your water heater is operating, resulting in increased energy efficiency, cost savings, and improved performance and convenience. Let’s explore the benefits of a water heater timer in more detail.
Increased Energy Efficiency
One of the key advantages of installing a water heater timer is the increased energy efficiency it offers. Rather than keeping the water heater running 24/7, a timer allows you to set specific operating hours. For example, you can set the timer to turn off the water heater during the night or when you’re away from home. By reducing the number of hours the heater operates, you can significantly decrease energy consumption, resulting in lower energy bills and a reduced carbon footprint. Not to mention, you’ll be contributing to a greener environment.
Cost Savings
By improving your water heater’s energy efficiency, a timer can lead to significant cost savings in the long run. Heating water accounts for a considerable portion of a household’s energy expenses. By reducing the hours of operation, you’ll be able to save money on your monthly energy bills. Additionally, if your electricity provider offers off-peak or reduced rates during certain hours, you can schedule your timer to coincide with these periods, maximizing your potential savings. With a water heater timer, you’ll have more control over your energy usage and expenses.
Improved Performance and Convenience
Installing a water heater timer not only benefits your wallet, but it also improves the overall performance and convenience of your water heater. With a timer, you can ensure that hot water is readily available when you need it the most. For example, you can set the timer to turn on the water heater an hour before you wake up in the morning, ensuring you have a plentiful supply of hot water for your shower. Additionally, you won’t have to wait for the water to heat up when you come home after a long day of work. The timer will have your water heater ready and waiting for you, providing instant hot water at your convenience.
Overall, a water heater timer offers numerous benefits, including increased energy efficiency, cost savings, and improved performance and convenience, making it a worthwhile addition to your home. Say goodbye to wasted energy and high utility bills, and enjoy the comfort and savings that a water heater timer can bring.
Frequently Asked Questions Of How To Install A Water Heater Timer
How Do You Install A Timer On A Hot Water Heater?
To install a timer on a hot water heater, follow these steps:
1. Turn off the power supply to the water heater.
2. Remove the old thermostat or control panel.
3. Install the timer in its place, making sure to connect the wires properly.
4. Set the timer according to the manufacturer’s instructions.
5. Turn the power back on and test the timer to ensure it’s working correctly.
Can You Add A Timer To Water Heater?
Yes, you can add a timer to your water heater. A timer allows you to control when the heater turns on and off, helping you save energy and money.
Do They Make Timers For Gas Water Heaters?
Yes, timers are available for gas water heaters. These timers can help regulate the timing and duration of hot water usage, allowing for energy savings and convenience.
How Long Does It Take To Install A Water Heater Timer?
Installing a water heater timer typically takes about 1-2 hours depending on your familiarity with electrical work. It’s important to follow the manufacturer’s instructions and ensure the power is turned off before beginning the installation process. Consider hiring a professional if you’re uncertain or uncomfortable with electrical tasks.
Conclusion
In short, installing a water heater timer is a practical and cost-effective solution to manage energy consumption and save on utility bills. By following the step-by-step instructions provided in this guide, you can easily set up a timer for your water heater, allowing you to customize the heating schedule according to your needs.
Remember, a well-timed water heater not only helps in reducing electricity usage but also contributes towards our collective efforts to conserve energy and protect the environment. Start maximizing energy efficiency today!