To install a tankless water heater in a mobile home, follow these steps: shut off the main water supply, drain the existing water heater, disconnect the electrical or gas connections, remove the old unit, mount the tankless water heater properly, connect the water lines, and finally, reconnect the electrical or gas connections. Are you looking to upgrade your mobile home’s water heating system?
Installing a tankless water heater can be a great option, providing you with an efficient and cost-effective solution. In this guide, we will walk you through the steps to install a tankless water heater in your mobile home. By following these steps, you will be able to enjoy continuous hot water while maximizing your space and energy savings.
So, let’s dive in and get started with the installation process.
Why Switching To A Tankless Water Heater Makes Sense
Are you a mobile homeowner looking to upgrade your water heating system? Consider installing a tankless water heater. Not only are tankless water heaters compact and efficient, but they also provide a continuous supply of hot water. In this blog post, we will explore the benefits of switching to a tankless water heater in a mobile home.

Space-Saving Design
One of the main advantages of a tankless water heater is its space-saving design. Unlike traditional water heaters that require a large tank to store hot water, a tankless water heater eliminates the need for additional storage space. Its compact size allows for flexible installation options, making it perfect for mobile homes with limited space.
Energy Efficiency and Cost Savings
Switching to a tankless water heater can significantly reduce your energy consumption and save you money in the long run. Tankless water heaters only heat water on demand, eliminating the standby energy loss associated with traditional water heaters. This means that you will only use energy when hot water is needed, resulting in lower utility bills. Additionally, tankless water heaters have a longer lifespan compared to traditional heaters, reducing the need for frequent replacements and saving you even more money over time.
Endless Hot Water Supply
Have you ever experienced running out of hot water in the middle of a shower? With a tankless water heater, this will become a thing of the past. Tankless water heaters provide an endless supply of hot water, as they heat water on demand. This ensures that you and your family will always have access to hot water whenever you need it, without the worry of running out.
Overall, switching to a tankless water heater in your mobile home is a wise investment. Its space-saving design, energy efficiency, cost savings, and endless hot water supply make it a practical choice for mobile homeowners. Upgrade your water heating system today and enjoy the benefits of a tankless water heater.
Factors To Consider Before Installing A Tankless Water Heater
Installing a tankless water heater in a mobile home can offer numerous benefits, such as energy efficiency, space-saving, and endless hot water. However, before you embark on this project, there are several factors you need to consider. Assessing the water demand, sizing the system adequately, checking gas/electrical requirements, and evaluating installation costs are crucial steps to ensure a successful installation. Let’s dive deeper into each of these factors.
Assessing the water demand
One of the first considerations you should make before installing a tankless water heater in your mobile home is assessing your household’s water demand. This involves determining how much hot water your appliances and fixtures require on a daily basis. To do this, you can create a list of all the hot water outlets in your home, such as showers, faucets, and washing machines, and estimate the flow rate of each. Keep in mind that different activities may occur simultaneously, so it’s important to factor in peak demand.
Sizing the system adequately
Once you have a clear understanding of your water demand, the next step is to size the tankless water heater system adequately. Proper sizing is essential to ensure that the system can meet your hot water requirements without any issues. Manufacturers typically provide guidelines and calculation methods to help determine the appropriate size based on your household’s specific needs. It’s crucial to follow these guidelines carefully to avoid undersizing, which may result in insufficient hot water, or oversizing, which can lead to wasted energy and unnecessary costs.

Checking gas/electrical requirements
Before proceeding with the installation, it’s vital to check the gas or electrical requirements of the tankless water heater you plan to install. The power source may vary depending on the model and brand you choose. Some tankless water heaters require a natural gas supply, while others run on propane or electricity. Ensure that your mobile home is equipped with the necessary gas line or electrical infrastructure to support the chosen system. It’s also important to know the voltage requirements and whether any modifications are needed to accommodate the new water heater.
Evaluating installation costs
Finally, it’s essential to evaluate the installation costs associated with installing a tankless water heater in your mobile home. While tankless systems generally have a higher upfront cost compared to traditional storage-tank water heaters, they can result in long-term savings through energy efficiency. Consider factors such as the cost of the unit, any necessary modifications to your existing plumbing or electrical systems, and the potential need for professional installation. It may be beneficial to obtain quotes from different contractors to compare prices and ensure that the installation fits within your budget.
By carefully considering these factors—assessing the water demand, sizing the system adequately, checking gas/electrical requirements, and evaluating installation costs—you can make an informed decision and ensure a seamless and successful installation of a tankless water heater in your mobile home.
Gathering The Necessary Tools And Materials
Before you begin installing a tankless water heater in your mobile home, it’s important to gather all the necessary tools and materials. Having everything you need on hand will make the installation process smoother and more efficient.
List of required tools:
- Tape Measure – This will be essential for measuring the space and ensuring a proper fit for the water heater.
- Adjustable Wrench – You’ll need this tool for tightening and loosening connections.
- Pipe Cutter – A pipe cutter will be necessary for cutting the pipes to the appropriate length.
- Pipe Wrench – This tool will come in handy for working with threaded pipes and fittings.
- Electric Drill – You’ll need a drill for mounting the water heater and creating holes for the connections.
- Screwdriver – A screwdriver will be necessary for securing screws and making adjustments.
- Level – To ensure the water heater is installed correctly and is level.
- Pliers – Pliers will be useful for gripping and turning nuts, bolts, and other small items.
Materials needed for installation:
| Material | Quantity |
|---|---|
| Tankless Water Heater | 1 |
| Pipes and Fittings | Depending on your setup |
| Hose Clamps | As needed |
| Gas Line | If using a gas-powered water heater |
| Electrical Wiring | If using an electric water heater |
| Teflon Tape | 1 roll |
| Sealant | 1 tube |
| Mounting Brackets | As needed |
| Screws | As needed |
Make sure you have all the necessary tools and materials before starting the installation process. This will save you time and ensure a successful installation of your tankless water heater in your mobile home.
Assessing The Current Water Heater Setup
Before you can install a tankless water heater in your mobile home, it’s important to assess the existing water heater setup. This will help you determine the necessary steps and any adjustments that need to be made in order to successfully install the new unit.
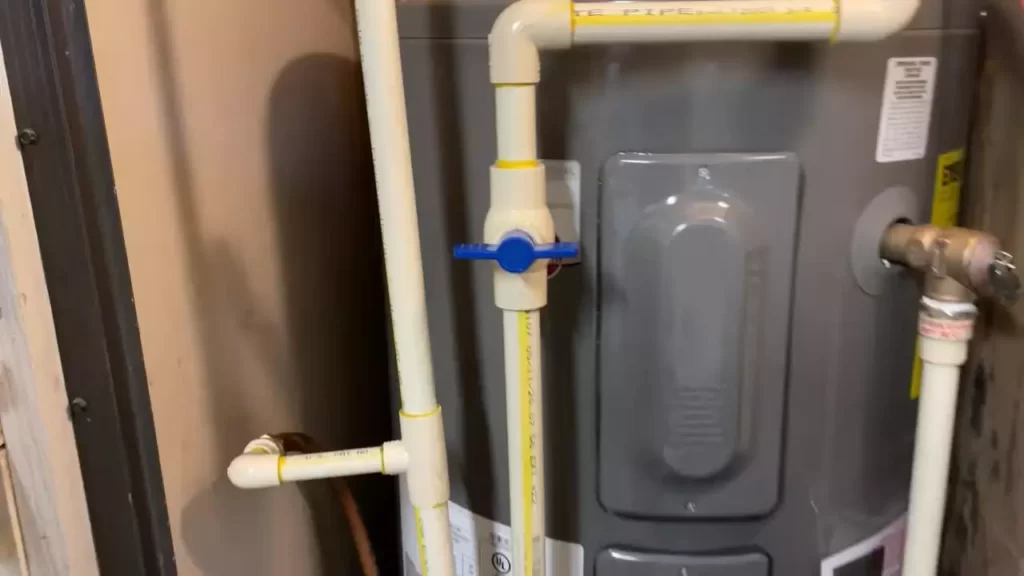
Locating the existing water heater
The first step in assessing the current water heater setup is to locate the existing unit. In most mobile homes, the water heater is typically located in a utility closet, basement, or crawlspace. Take note of its position and accessibility, as this will be important when it comes to installing the tankless water heater.
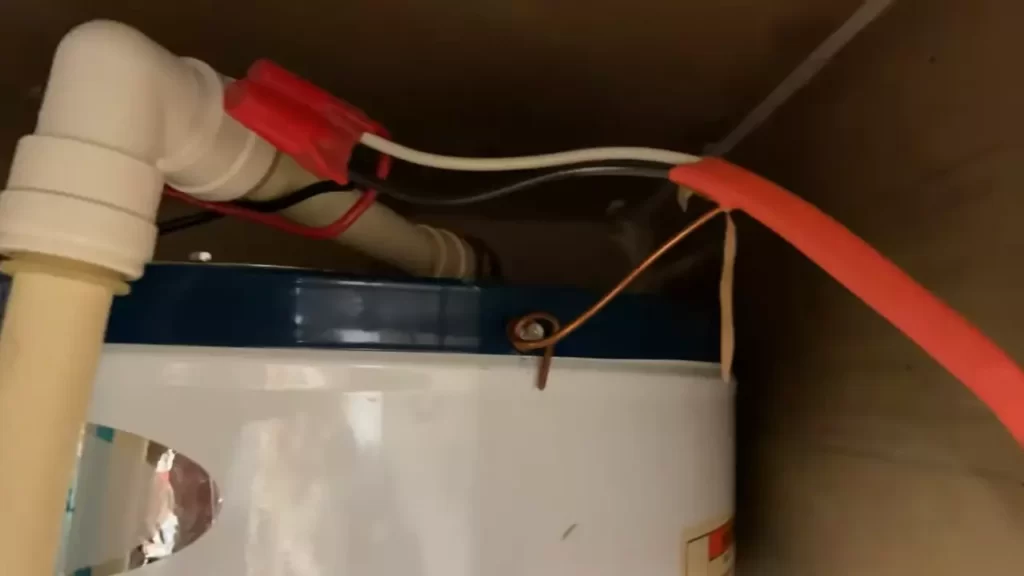
Checking the plumbing connections
Next, you’ll want to check the plumbing connections of the current water heater. This includes the inlet and outlet pipes, as well as the shut-off valves. Ensure that the plumbing connections are in good condition and that there are no leaks or signs of damage. It’s also important to note the size of the existing pipes, as this will determine if any adjustments need to be made to accommodate the tankless water heater.
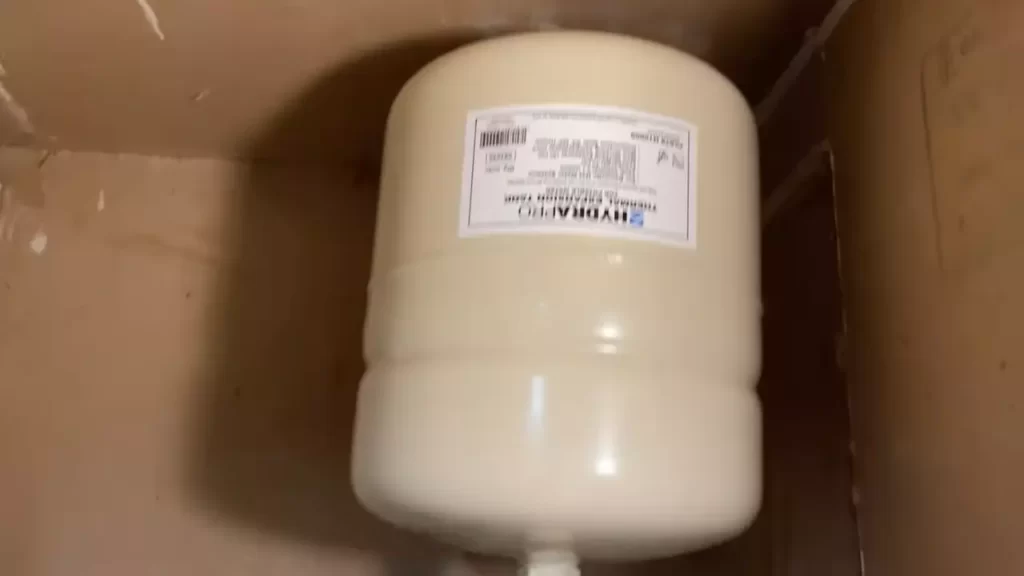
Determining the fuel source
Another crucial step in assessing the current water heater setup is determining the fuel source. Tankless water heaters can be powered by electricity, natural gas, or propane. Check the existing water heater to identify the fuel source it uses. This information will help you select a compatible tankless water heater and ensure that the necessary fuel supply lines and connections are in place.
Assessing the current water heater setup is essential before installing a tankless water heater in your mobile home. By locating the existing water heater, checking the plumbing connections, and determining the fuel source, you’ll be better prepared to make the necessary adjustments and ensure a smooth installation process for your new unit.
Shutting Off The Water And Preparing The Work Area
Installing a tankless water heater in a mobile home can provide you with endless hot water while saving space and energy. However, before you embark on this project, it’s crucial to understand the necessary steps to shut off the water and prepare your work area. Follow the steps outlined below to ensure a smooth and successful installation process.
Shutting off the main water supply
The first step in preparing to install a tankless water heater in your mobile home is to shut off the main water supply. This will prevent any leaks or accidents while working on the installation. Locate the main water shut-off valve, which is typically located near the water meter or where the water line enters your home. Carefully turn the valve clockwise until it is fully closed, stopping the flow of water to your house.
Draining the old water heater
Next, you need to drain the old water heater. This step is crucial to prevent any water spills or damage during the removal process. Start by turning off the power supply to the old water heater. Then, locate the drain valve on the bottom of the tank. Place a bucket or a suitable container below the valve to catch the water.
Once the container is in place, open the drain valve by turning it counter-clockwise. Allow the water to fully drain from the tank before proceeding with the installation process. Emptying the old water heater will make it easier to remove and replace without any unnecessary water-related troubles.
Clearing the work area for installation
After shutting off the water and draining the old water heater, it’s time to clear the work area to ensure a smooth installation. Remove any obstacles or debris around the old water heater, making sure there is enough space to maneuver during the installation process. Additionally, clean the surrounding area and remove any items that could potentially hinder the installation or cause damage to your new tankless water heater.
As you prepare the work area, it’s also important to gather all the necessary tools and materials for the installation. This will save you time and effort later on, ensuring you have everything you need to complete the project efficiently. Double-check your checklist to ensure you have all the required tools such as wrenches, pipes, connectors, and any additional components specific to your tankless water heater model.
By following these steps and properly shutting off the water supply and preparing the work area, you’ll be well on your way to successfully installing a tankless water heater in your mobile home. Remember to proceed with caution and consult the manufacturer’s instructions for your specific water heater model for any additional guidelines or safety precautions.
Choosing The Right Location
Choosing the right location for your tankless water heater in a mobile home is essential for optimal performance and safety. In this section, we will discuss two important considerations: ventilation requirements and suitable mounting options. Taking the time to properly address these factors will ensure that your tankless water heater operates efficiently and meets all necessary safety standards.
Considering Ventilation Requirements
Ventilation is a crucial aspect when installing a tankless water heater in a mobile home. These units produce heat and require proper airflow to prevent overheating and maintain efficiency. It is important to follow the manufacturer’s guidelines for ventilation to ensure that the system functions correctly.
Here are a few key points to consider regarding ventilation:
- Ensure that the chosen location has adequate space for air circulation around the water heater.
- Check if there are any specific clearance requirements specified by the manufacturer for ventilation purposes. This information can usually be found in the installation manual.
- Keep in mind that certain materials, such as wood or other combustible materials, should not be in close proximity to the unit as they can pose a fire hazard.
Determining Suitable Mounting Options
Another important factor to consider when choosing the right location for your tankless water heater in a mobile home is the mounting options available. It is crucial to ensure that the unit is securely and properly mounted to prevent any potential issues or damage.
Here are a few tips to help you determine suitable mounting options:
- Check the weight and size of the water heater to determine if the desired location can support it. You may need to reinforce the area if necessary.
- Consider the accessibility of the unit for maintenance and repairs. Select a location that allows easy access to the water heater for any necessary servicing.
- It is also wise to consult the manufacturer’s instructions for specific mounting requirements and recommendations.
Taking the time to carefully consider ventilation requirements and suitable mounting options will not only ensure the longevity of your tankless water heater but also help optimize its performance in your mobile home. By paying attention to these details, you can enjoy a reliable and efficient supply of hot water in your mobile home.
Connecting The Water Supply And Plumbing
When it comes to installing a tankless water heater in a mobile home, connecting the water supply and plumbing is a crucial step. This ensures that the heater will provide hot water efficiently and reliably. In this article, we will guide you through the process of connecting the water supply lines, installing shut-off valves, and securing the plumbing connections, so you can enjoy the benefits of a tankless water heater in your mobile home.
Installing shut-off valves
The first step in connecting the water supply and plumbing is installing shut-off valves. Shut-off valves allow you to easily control the flow of water to the tankless water heater, making maintenance and repairs more convenient. To install shut-off valves, follow these steps:
- Locate a suitable location for the shut-off valves near the water heater.
- Measure and mark the spot where the shut-off valves will be installed.
- Drill holes in the marked spots using an appropriate drill bit.
- Insert the shut-off valves into the holes, ensuring a snug fit.
- Tighten the nuts on the shut-off valves to secure them in place.
Connecting the water supply lines
Once the shut-off valves are installed, you can proceed to connect the water supply lines to the tankless water heater. Follow these steps to ensure a proper connection:
- Measure and cut the necessary lengths of copper or PEX pipes for the water supply lines.
- Deburr the cut edges of the pipes using a deburring tool.
- Apply flux to the ends of the pipes and fittings.
- Use a soldering torch to heat the joints and solder them together.
- Allow the connections to cool down before moving on to the next step.
Securing the plumbing connections
Securing the plumbing connections is essential to prevent leaks and ensure the proper functioning of the tankless water heater. Follow these steps to secure the connections:
- Inspect the soldered connections for any signs of leaks.
- If there are no leaks, use pipe straps or clamps to secure the water supply lines to the walls or ceiling.
- Ensure that the pipes are properly supported and do not exert unnecessary pressure on the tankless water heater.
- Tighten any loose connections using an appropriate wrench or pliers.
By following these steps and adhering to the proper installation guidelines, you can confidently connect the water supply and plumbing for your tankless water heater in your mobile home. Enjoy the benefits of a continuous supply of hot water while saving energy and space!
Installing The Venting System
Understanding Venting Requirements
Before you can install a tankless water heater in your mobile home, it’s crucial to understand the venting requirements. Venting is a vital aspect of the installation process as it helps remove any harmful combustion gases produced by the water heater. Failure to properly vent your unit can lead to a buildup of carbon monoxide, which poses serious health risks. Each tankless water heater model has specific venting requirements, which you should find in the manufacturer’s installation manual or consult a professional plumber to ensure compliance.
Selecting the Appropriate Venting Materials
Once you have a clear understanding of the venting requirements, the next step is selecting the appropriate venting materials. The vent pipe should be made of a material that can withstand high temperatures and is resistant to corrosion. Common venting materials for tankless water heaters include stainless steel, PVC, and CPVC. It’s crucial to choose a material that is compatible with your specific unit and meets the local building codes. Remember, using the wrong venting materials can compromise the efficiency and safety of your tankless water heater.
Installing the Vent Pipe
Installing the vent pipe needs to be done correctly to ensure the safe operation of your tankless water heater. Follow these steps to install the vent pipe:
- Measure the distance between the water heater and the exterior wall to determine the length of the vent pipe needed.
- Choose an appropriate location on the exterior wall for the vent termination point, ensuring it’s away from doors, windows, and any openings that could allow the fumes to re-enter your home.
- Securely attach the vent pipe to the vent collar on top of the water heater using a pipe connector, ensuring it is tightly sealed.
- Extend the vent pipe through the interior wall, ceiling, and up to the termination point on the exterior wall.
- Attach any necessary elbows or fittings to navigate around obstacles, ensuring a smooth and continuous vent pipe run.
- Secure the vent pipe with appropriate brackets and supports to ensure it remains in place.
- Inspect the vent pipe installation for any gaps, holes, or loose connections, and make necessary adjustments to ensure proper airflow.
Remember, improper installation of the vent pipe can result in dangerous situations such as backdrafting, where the combustion gases are drawn back into your living space. It’s always recommended to have a professional plumber or HVAC technician assist with the installation if you’re unsure about any step.
Connecting The Gas Or Electric Supply
Gas: Installing the gas line and regulator
When it comes to installing a tankless water heater in a mobile home, connecting the gas supply is an essential step. The gas line and regulator installation ensures that your tankless water heater is powered efficiently and safely.
Here’s a step-by-step guide to installing the gas line and regulator for your tankless water heater:
- Start by turning off the main gas supply to your mobile home. Safety should always be a priority when working with gas systems.
- Locate the nearest gas line connection point. This could be a gas pipe or a gas line stub-out.
- Measure and cut a section of the gas pipe to connect to the tankless water heater. Use a pipe cutter for a clean and precise cut.
- Attach the gas line to the tankless water heater by using a gas-rated flexible connector. Make sure to properly tighten the fittings using a wrench.
- Install a gas regulator between the gas line and the tankless water heater. This regulator ensures that the gas pressure is regulated and consistent.
- Inspect all connections for leaks. Apply a soapy water solution to the threaded connections and look for bubbles. If you see any bubbles, tighten the fittings further or use a gas-approved sealant.
- Once all connections are secure and leak-free, turn on the main gas supply and check for any gas odors or leaks.
Electric: Connecting the electrical wiring
If you’re opting for an electric tankless water heater in your mobile home, connecting the electrical wiring correctly is vital. Here are the steps to ensure a proper electrical connection:
- Switch off the main power supply to your mobile home before working on the electrical system. Safety should always be the priority.
- Determine the appropriate electrical requirements for your specific tankless water heater model. Refer to the manufacturer’s instructions or labeling on the unit.
- Install a dedicated circuit breaker in your home’s electrical panel to power the tankless water heater.
- Route the appropriate gauge wiring from the breaker panel to the tankless water heater location. Ensure the wiring is securely fixed and protected.
- Connect the electrical wiring to the tankless water heater, following the manufacturer’s instructions and the respective color-coded terminals.
- Double-check that all electrical connections are properly tightened and secure.
- Once the electrical connections are completed, restore power to the main electrical panel and test the tankless water heater to ensure it is functioning correctly.
Installing The Tankless Water Heater Unit
Installing a tankless water heater in a mobile home can provide numerous benefits, including energy efficiency and ample hot water supply. If you’ve decided to make the switch to a tankless water heater, the next step is to install the unit in your mobile home. This section will guide you through the process of mounting the unit securely and connecting the water lines and gas/electric supply.
Mounting the unit securely
The first step in installing a tankless water heater is to mount it securely in your mobile home. Here’s how:
- Choose a suitable location: Select a wall in a well-ventilated area that is close to the water and gas/electric supply lines. Make sure the wall can support the weight of the unit.
- Measure and mark: Use a tape measure to determine the dimensions of the unit and mark the location on the wall.
- Drill pilot holes: Drill pilot holes at the marked spots to ensure easy installation and avoid damaging the wall.
- Attach mounting brackets: Securely attach the mounting brackets to the wall using screws and a screwdriver.
- Mount the unit: Lift the tankless water heater onto the mounted brackets and ensure it is level. Use a level tool to double-check.
- Tighten the screws: Once the unit is properly positioned, tighten the screws on the mounting brackets to secure it in place.
Connecting the water lines and gas/electric supply
After mounting the unit, the next step is to connect the water lines and gas/electric supply. Follow these steps:
- Shut off the water and gas/electric supply: Before connecting any lines, make sure to turn off the main water supply and shut off the gas or electricity to the system.
- Prepare the water lines: Measure and cut the water lines to the appropriate length, keeping in mind the distance from the unit to the water source.
- Attach the water lines: Use appropriate fittings and connectors to attach the water lines to the unit. Ensure a tight and secure connection to avoid any leaks.
- Connect the gas/electric supply: If you have a gas tankless water heater, hire a professional to ensure safe gas line connections. For an electric tankless water heater, consult the manufacturer’s instructions for proper electrical connections.
- Turn on the water and gas/electric supply: Once all the connections are in place, open the main water valve and turn on the gas or electricity as per the manufacturer’s instructions.
- Inspect for leaks: Thoroughly inspect all the connections for any signs of leaks. If leaks are present, tighten the fittings or consult a professional for assistance.
With these steps, you can successfully install a tankless water heater in your mobile home. Remember to carefully follow the manufacturer’s instructions and safety guidelines throughout the installation process for optimal performance and safety.
Checking For Leaks And Proper Functionality
Once you have successfully installed a tankless water heater in your mobile home, it is essential to check for leaks and ensure that the heater is functioning correctly. This step will help you identify any potential issues and ensure that your new water heater operates efficiently and effectively. Here are the key tasks you need to tackle:
Performing a thorough leak test
A thorough leak test is crucial to ensure that your tankless water heater installation is watertight. To perform this test, follow these steps:
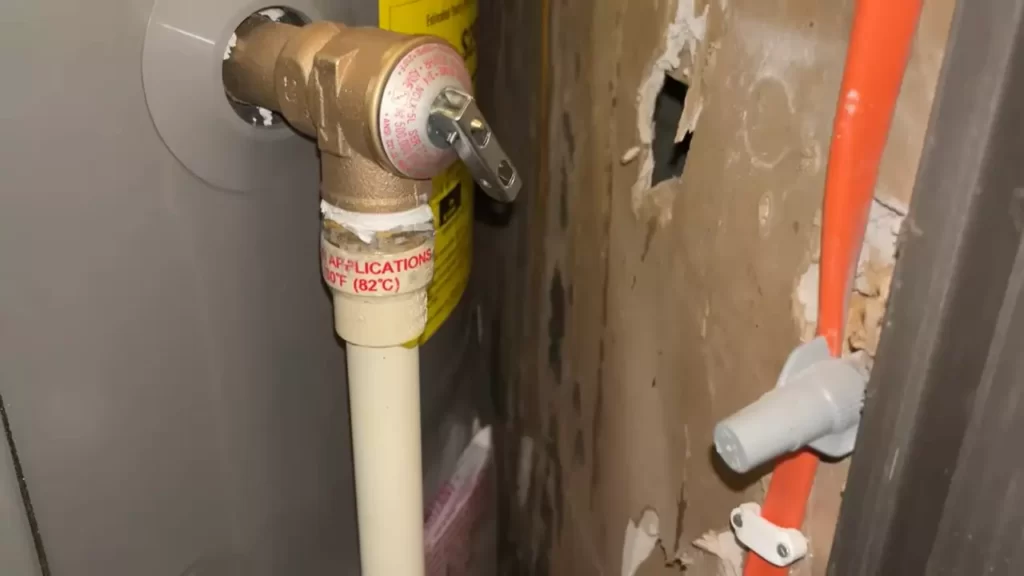
- Inspect all connection points, including the inlet and outlet pipes, as well as the pressure relief valve.
- Using a flashlight, carefully examine the connections to see if any water is seeping out.
- If you spot any signs of leakage, tighten the respective connections or replace faulty parts immediately.
- Once you have inspected all the connections, it’s time to test the system for leaks.
To do this, turn on both the hot and cold water supply and let the water run through the system for a few minutes. Keep a close eye on all the connection points while the water is flowing. If you notice any drips or leaks, address them promptly to prevent any potential damage.
Turning on the water supply and monitoring for leaks
Once you have conducted a thorough leak test, it’s time to turn on the water supply and closely monitor the system for any leaks. Follow these steps:
- Ensure that all the water valves leading to the tankless water heater are fully open.
- Allow the water to flow through the system for several minutes.
- Check all the connection points and observe closely for any signs of leakage.
- If you don’t find any leaks while the water is running, proceed to the next step. Otherwise, identify the source of the leaks and rectify them immediately.
Ensuring the heater is functioning correctly
Once you have checked for leaks, it’s time to verify that your tankless water heater is functioning correctly. Follow these steps:
- Ensure that the power supply to the water heater is switched on.
- Set the desired temperature on the heater and wait for a few minutes.
- While the heater is running, check if the water gets sufficiently hot according to your desired temperature.
- If the water temperature is not reaching the set level, consult the manufacturer’s instructions or contact a professional to troubleshoot the issue.
By performing a thorough leak test and ensuring the proper functionality of your tankless water heater, you can enjoy hot water in your mobile home without any issues. Remember, regular maintenance and periodic checks are essential to keep your water heater in top-notch condition.
Troubleshooting Common Issues
Installing a tankless water heater in a mobile home can provide numerous benefits, including energy efficiency and unlimited hot water supply. However, like any complex system, issues can arise from time to time. In this section, we will discuss some common problems that may occur when using a tankless water heater in a mobile home.
Identifying and Addressing Error Codes
When encountering a problem with your tankless water heater, the first step is to check for any error codes displayed on the unit. Error codes are designed to provide useful information about the issue at hand. By understanding the meaning of these codes, you can quickly diagnose and address the problem.
Here are some frequently encountered error codes and their potential solutions:
| Error Code | Description | Possible Solution |
|---|---|---|
| EC 01 | Flow sensor issue | Check the water flow, clean the filter, or replace the flow sensor if necessary |
| EC 02 | Combustion abnormality | Make sure the gas supply is adequate, ensure proper venting, and check for any obstructions or leaks |
| EC 03 | Ignition failure | Inspect the gas supply, check for spark or flame failure, and clean or replace the ignition parts if needed |
Checking for Proper Water Flow and Temperature
Inadequate water flow or incorrect temperature can be frustrating when using a tankless water heater. Fortunately, troubleshooting these issues can often be straightforward.
To ensure proper water flow:
- Check the water inlet filter and remove any debris or sediment that may be obstructing the flow.
- Inspect the water lines for any kinks or leaks and repair as necessary.
- Verify that the water pressure is within the recommended range for your tankless water heater model.
To verify and adjust the temperature:
- Check the temperature setting on the unit and compare it to the desired hot water temperature.
- If the temperature is too low, increase the setting accordingly. If it’s too high, lower the setting to prevent scalding.
- Confirm that the unit’s temperature sensors are clean and properly functioning.
By addressing these common issues, you can ensure that your tankless water heater in a mobile home operates efficiently and provides the hot water supply you need on demand. Remember to consult the manufacturer’s manual for specific troubleshooting steps and, if necessary, contact a professional for assistance.
Regular Maintenance Practices
Regular maintenance is essential to ensure the optimal performance and longevity of your tankless water heater in a mobile home. By following these simple and effective maintenance practices, you can avoid potential issues and costly repairs down the line.
Flushing the system annually
One of the most important maintenance tasks for your tankless water heater is flushing the system annually. Over time, mineral deposits can accumulate and hinder the efficiency of your unit. Flushing the system removes these deposits and helps your water heater run smoothly.
Cleaning the filter
Another crucial maintenance step is cleaning the filter regularly. The filter prevents debris from entering the heater and causing damage. It is recommended to clean the filter at least once every three months or as needed. Cleaning the filter ensures uninterrupted water flow and optimal performance.
Inspecting for mineral buildup
Mineral buildup can occur over time and affect the efficiency of your tankless water heater. It is important to inspect the unit for any signs of mineral buildup and address it promptly. Regular inspections can help you identify and remove any mineral buildup, ensuring that your water heater functions at its best.
By following these regular maintenance practices, you can extend the lifespan of your tankless water heater and enjoy uninterrupted hot water in your mobile home.
Tips To Prolong The Lifespan Of The Water Heater
Monitoring Water Quality
One of the key factors in prolonging the lifespan of your tankless water heater in a mobile home is monitoring the water quality. Hard water, which is water that contains high levels of minerals like calcium and magnesium, can significantly impact the efficiency and longevity of your water heater. The minerals in hard water can cause mineral buildup and scale inside the heater, leading to decreased performance and potential damage.
To monitor the water quality, you can use a water test kit or consult with a professional water testing service. Testing the water will help you understand its mineral content and whether a water-softening system is necessary. A water softener can help remove the excess minerals, preventing mineral buildup and prolonging the lifespan of your tankless water heater.
Avoiding Sudden Temperature Changes
Another tip to prolong the lifespan of your tankless water heater in a mobile home is to avoid sudden temperature changes. Rapid temperature fluctuations can put stress on the internal components of the water heater, leading to potential malfunctions or even damage.
To avoid sudden temperature changes, make sure to set the temperature of your water heater to a stable and comfortable level and avoid adjusting it frequently. Additionally, insulating the hot water pipes can help maintain a consistent temperature throughout your mobile home, reducing the need for temperature adjustments and minimizing the strain on the water heater.
Proper insulation can be done using foam pipe insulation or heat tape, which helps retain heat and prevents sudden temperature changes in the water flowing through the pipes. By taking these preventive measures, you can ensure the longevity and efficient functioning of your tankless water heater.
Frequently Asked Questions Of How To Install A Tankless Water Heater In A Mobile Home
Can You Put A Tankless Water Heater In A Manufactured Home?
Yes, you can install a tankless water heater in a manufactured home. It is a suitable option for saving space and providing endless hot water supply.
Why Can’t You Use A Regular Water Heater In A Mobile Home?
You can’t use a regular water heater in a mobile home because they have different safety requirements and space limitations. Mobile home water heaters are specifically designed to be compact and incorporate various safety features to prevent accidents.
Is There A Specific Water Heater For Mobile Home?
Yes, there are specific water heaters designed for mobile homes. They are compact, energy-efficient, and compliant with safety regulations for mobile homes. These water heaters are designed to fit in tight spaces and can provide hot water for mobile home residents.
What Size Water Heater Is Best For A Mobile Home?
For a mobile home, the best-size water heater would typically be around 30-40 gallons.
Conclusion
Installing a tankless water heater in a mobile home can provide countless benefits, including energy-efficiency, space-saving, and endless hot water supply. By following the step-by-step instructions provided in this blog post, you can seamlessly integrate this modern appliance into your mobile home.
So go ahead and enjoy the convenience and savings that a tankless water heater has to offer.