To install an expansion tank, you need to first turn off the water supply valve and drain the existing water from the tank, then attach the tank to the water heater using pipe fittings. Additionally, you should ensure that the tank is properly pressurized before turning the water supply back on.
Expansion tanks help regulate the pressure in your water heating system and protect it from damage caused by excessive pressure. By following these simple steps, you can successfully install an expansion tank and improve the performance and longevity of your water heater.
Exploring The Different Types Of Expansion Tanks
When it comes to installing an expansion tank, it’s important to understand the different types available in the market. Each type has its own unique features, benefits, and drawbacks. In this section, we will explore the three most common types of expansion tanks: diaphragm expansion tanks, bladder expansion tanks, and spherical expansion tanks. By gaining knowledge about these different types, you can make an informed decision about which one is best suited for your specific needs.
How Do Diaphragm Expansion Tanks Work?
Diaphragm expansion tanks are designed with a flexible rubber diaphragm that separates the air chamber from the water chamber. As the water expands due to thermal expansion, the diaphragm flexes, accommodating the increased volume of water and preventing pressure buildup in the system.
The diaphragm acts as a barrier, ensuring that the air and water chambers do not mix while allowing the water to expand and contract freely. This type of expansion tank is commonly used in residential and commercial applications due to its simplicity and effectiveness.
Understanding Bladder Expansion Tanks
Bladder expansion tanks operate on a similar principle to diaphragm tanks but with a slight difference. Instead of a diaphragm, these tanks feature a rubber bladder that separates the air and water chambers. As the water expands, the bladder compresses, accommodating the increased volume. Bladder expansion tanks offer greater flexibility in terms of system pressure settings and are often preferred in HVAC systems. They are also less likely to get damaged by contaminants in the water supply, making them more durable and reliable in the long run.
Pros and Cons of Spherical Expansion Tanks
Spherical expansion tanks are a less common but unique option for expansion tank installations. As the name suggests, these tanks have a spherical shape, allowing them to store a large volume of water without occupying much space. One of the main advantages of spherical tanks is their high structural strength, making them suitable for high-pressure applications. However, their spherical design can make them more challenging to install, especially in cramped spaces.
Additionally, their complex structure can sometimes make maintenance and repair tasks more difficult. Despite these drawbacks, spherical expansion tanks are widely used in industrial settings and large-scale HVAC systems where space is a critical factor.
Essential Tools For The Installation Process
An expansion tank is an essential component for maintaining the water pressure in your plumbing system. To ensure a successful installation process, it is important to have the right tools on hand. In this section, we will discuss the essential tools required for installing an expansion tank.
Wrenches and Pliers
One of the most important tools needed for installing an expansion tank is a set of wrenches and pliers. These tools are crucial for tightening or loosening the fittings and connections. When selecting wrenches and pliers, choose ones that are the appropriate size for the fittings on your expansion tank and plumbing system.
Pipe Cutter or Hacksaw
Another essential tool for the installation process is a pipe cutter or hacksaw. These tools are necessary for cutting the pipes to the correct length and ensuring a proper fit. A pipe cutter is recommended for clean and precise cuts, while a hacksaw can be used if a pipe cutter is not available. Remember to measure and mark the pipes accurately before cutting to avoid any mistakes.
Teflon Tape or Pipe Sealant
Teflon tape or pipe sealant is a crucial component for creating watertight seals between threaded connections. Applying a layer of Teflon tape or pipe sealant to the threads helps to prevent leaks and ensures a secure connection. When using Teflon tape, wrap it clockwise around the male threads before assembling the connections. If using pipe sealant, apply a thin layer to the male threads before joining the fittings together.

Required Materials
Before you can install an expansion tank in your plumbing system, you will need to gather a few essential materials. These materials are necessary to ensure a proper and effective installation. In this section, we will discuss each of the required materials in detail.
Expansion Tank
The expansion tank itself is the central component of this installation. It is designed to absorb excess pressure in a closed-loop plumbing system, thereby preventing damage to pipes and fixtures. When selecting an expansion tank, make sure to consider the size and capacity appropriate for your system. You can find expansion tanks in various sizes, typically ranging from 2 to 50 gallons.
Pipe Fittings and Connectors
To connect the expansion tank to the existing plumbing system, you will need an assortment of pipe fittings and connectors. These fittings and connectors come in various sizes and types, such as threaded or soldered connections. Be sure to choose fittings and connectors compatible with the material of your pipes, such as copper, PEX, or PVC.
Here are the common types of pipe fittings and connectors you may need:
- Adapters
- Couplings
- Elbows
- Reducer bushings
- Tees
Pressure Gauge
A pressure gauge is an essential tool for monitoring the pressure in your plumbing system. It allows you to measure and verify the system’s pressure before and after the installation of the expansion tank. This will help ensure that the expansion tank is functioning correctly and addressing any excessive pressure issues.
When purchasing a pressure gauge, opt for one that is compatible with your system’s pressure range. Pressure gauges typically come in a variety of ranges, such as 0-100 psi or 0-200 psi.
By having these required materials ready, you can proceed with confidence to the next step of installing an expansion tank in your plumbing system.
Checking The Pressure And Temperature
Understanding the Optimal Pressure Range for Your System
Before installing an expansion tank, it is important to understand the optimal pressure range for your system. This will ensure that the expansion tank operates effectively and provides the necessary protection for your plumbing system.
Every plumbing system has a recommended pressure range, typically measured in pounds per square inch (psi). The ideal pressure range for most residential systems is usually between 40 psi and 60 psi. However, it is essential to consult the manufacturer’s instructions or a professional plumber to determine the specific optimal pressure range for your system.
Maintaining the correct pressure range is crucial to prevent damage to pipes, fixtures, and appliances. If the pressure exceeds the recommended range, it can put excessive stress on your plumbing system, leading to leaks, bursts, or other costly problems. On the other hand, if the pressure is too low, it can cause inadequate water flow and potential damage to your hot water tank and other components.
Measuring the Water Temperature
In addition to monitoring the pressure, it is also important to measure the water temperature in your system. This is because high temperatures can cause the expansion tank to work harder and potentially fail. Similarly, low temperatures can lead to inefficient operation and reduced performance.
To measure the water temperature, you can use a thermometer specifically designed for plumbing applications. Simply submerge the thermometer in a glass of water and leave it for a few minutes until it reaches the same temperature as the water in your system. Then, remove the thermometer and read the temperature measurement on the display.
Keep in mind that the optimal water temperature can vary depending on your specific system and its intended use. Generally, most residential systems operate within a temperature range of 120°F to 140°F. However, it is crucial to consult the manufacturer’s guidelines or seek advice from a professional plumber to determine the recommended temperature range for your system.
By regularly checking and maintaining the pressure and temperature in your plumbing system, you can ensure that your expansion tank functions optimally and provides the necessary protection. Remember, it is always best to consult a professional if you have any doubts or concerns about your system’s pressure and temperature levels.
Preparing The System
Preparing the system is an essential step in installing an expansion tank. By properly preparing the system, you can ensure a successful and efficient installation process. This section will guide you through turning off the water supply, draining the water from the system, and venting air from the pipes.
Turning Off the Water Supply
To begin the installation of an expansion tank, the first step is to turn off the water supply. This is crucial as it will prevent any water from flowing through the system during the installation process. Follow these steps to turn off the water supply:
- Locate the main water valve in your home. This is typically found near the water meter or where the main water line enters the house.
- Once you’ve located the main water valve, turn it clockwise to shut off the water supply. This will stop the flow of water throughout the entire system.
Draining the Water from the System
After turning off the water supply, the next step is to drain the water from the system. Draining the water will ensure that there is no pressure or residual water in the pipes, making the installation process safer and more effective. Follow these instructions to drain the water:
- Open all the faucets in your home, including sinks, showers, and tubs. This will allow any remaining water in the system to drain out completely.
- Flush all the toilets in your home to remove any water in the tanks and bowls.
- Go to the lowest point in your plumbing system, such as a basement floor drain or an outdoor spigot, and open it to drain out any remaining water.
Venting Air from the Pipes
After draining the water from the system, it’s important to vent air from the pipes. This step ensures that the expansion tank functions properly and eliminates any potential airlock issues. Here’s how you can vent air from the pipes:
- Starting from the highest point in your plumbing system, open each faucet gradually starting from the cold water side. Allow the water to run for a few seconds until all the air has been released.
- Repeat this process for each plumbing fixture in your home, including showers, tubs, and sinks. Ensure that both hot and cold water taps are fully opened to flush out any trapped air.
By turning off the water supply, draining the water from the system, and venting air from the pipes, you’ve now successfully prepared the system for the installation of an expansion tank. With these steps completed, you can move on to the next stage of the installation process with confidence.
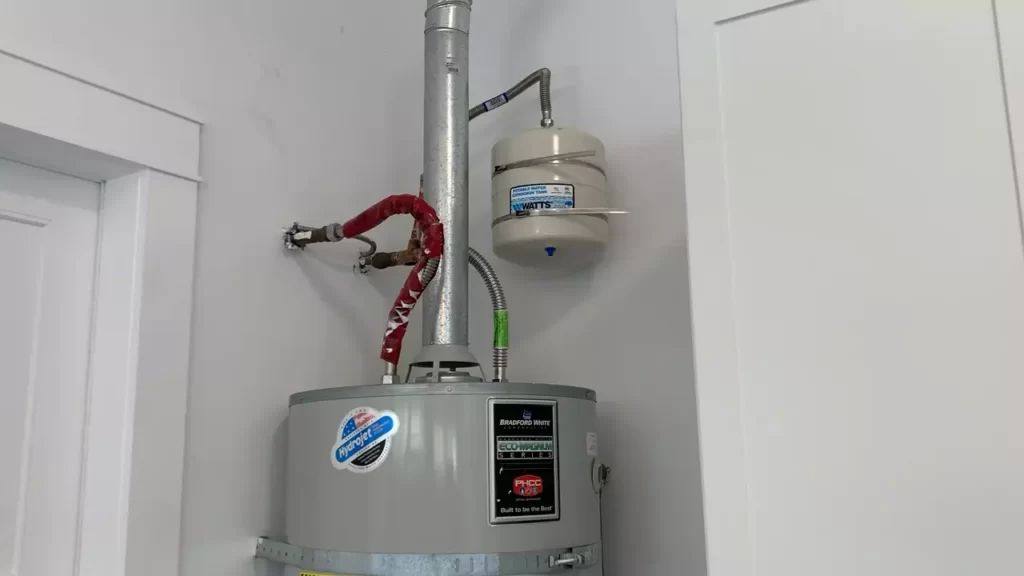
Mounting The Expansion Tank
Once you’ve determined the right location for installing your expansion tank, the next step is to mount it securely to the wall. This step is crucial to ensure the tank remains stable and doesn’t pose any risks. Here’s a guide on how to mount your expansion tank using the following steps: determining the right location for installation and securing the expansion tank to the wall.
Determining the Right Location for Installation
The location where you mount your expansion tank plays a vital role in ensuring its effectiveness and longevity. Here are a few considerations to keep in mind when determining the right location:
- Proximity to water heater: The expansion tank should be installed near the water heater to allow for easy connection and proper functioning. Ideally, it should be installed on the cold water supply pipe, downstream of any check valves or backflow preventers.
- Accessibility: Make sure the location allows for easy access to the tank for future maintenance or repair needs. Avoid mounting it in hard-to-reach or cramped spaces that may hinder accessibility.
- Sturdy support: Ensure that the wall where you plan to mount the expansion tank is strong enough to hold its weight. If needed, reinforce the wall with a plywood backing or use wall anchors for added stability.
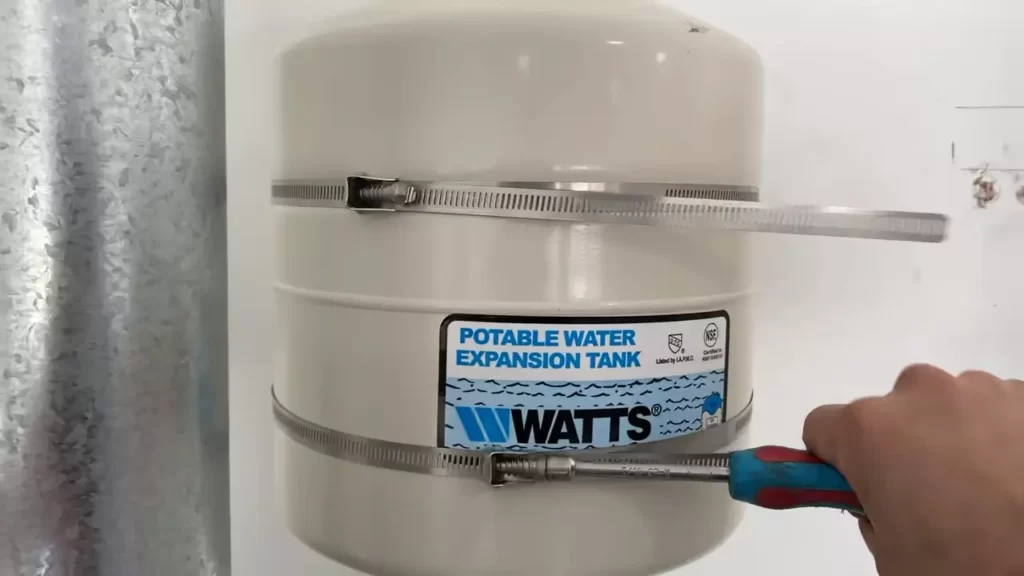
Securing the Expansion Tank to the Wall
Once you’ve determined the right location, it’s time to secure the expansion tank to the wall. Follow these steps to ensure a secure mounting:
- Position the expansion tank: Hold the expansion tank against the wall, aligning it with the desired location. Ensure that the tank is in an upright position.
- Mark the mounting holes: Using a pencil or marker, mark the mounting holes on the wall through the holes provided on the tank’s mounting bracket.
- Drill pilot holes: Use an appropriate-sized drill bit to create pilot holes at the marked locations. Ensure that the pilot holes are slightly smaller than the screws or bolts you’ll be using.
- Attach the mounting bracket: Securely attach the tank’s mounting bracket to the wall using screws or bolts, making sure they are tightly fastened.
- Hang the expansion tank: Lift the expansion tank and hook it onto the mounting bracket. Ensure that it is properly seated and aligned.
- Tighten the bracket: Using a wrench or screwdriver, tighten any adjustable brackets or clamps on the mounting bracket to firmly hold the expansion tank in place.
- Check for stability: Give the tank a gentle shake to ensure it is securely mounted and doesn’t wobble. Make any necessary adjustments to the mounting bracket if required.
Following these steps will help you effectively mount your expansion tank, ensuring its stability and proper functioning. Now that you’ve successfully mounted the tank, you can proceed with the remaining steps in the installation process. In the next section, we’ll cover connecting the expansion tank to your plumbing system.
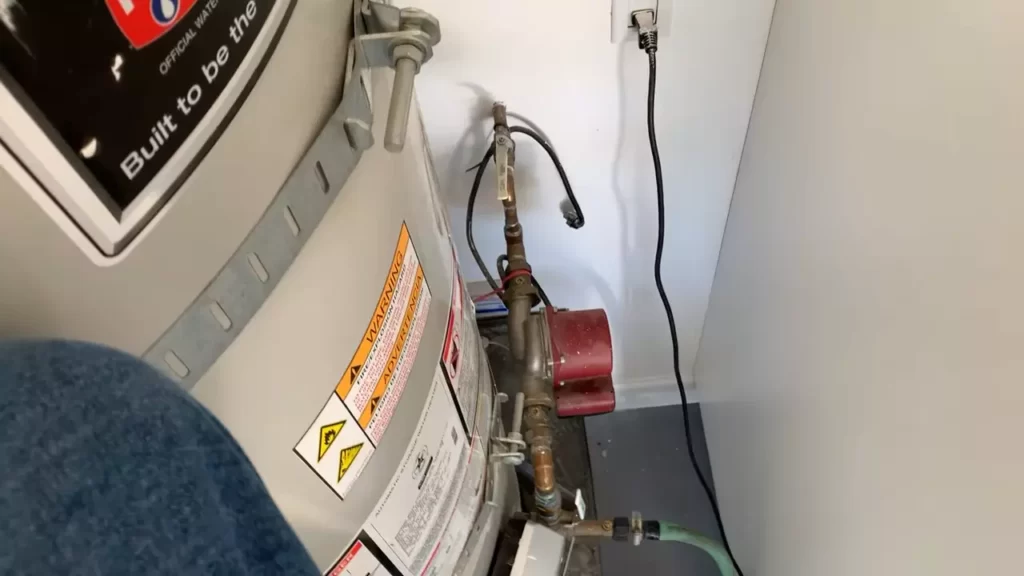
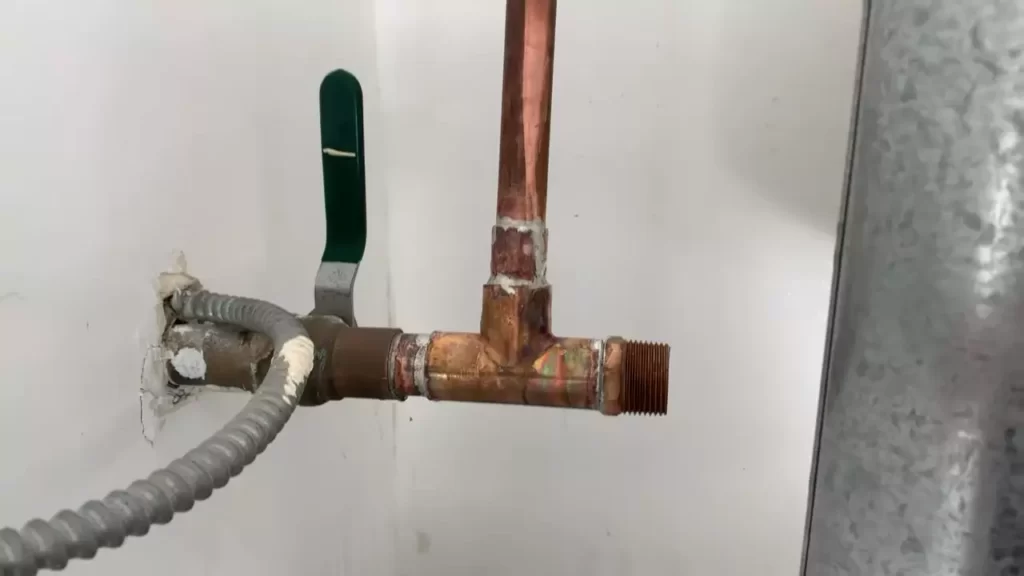
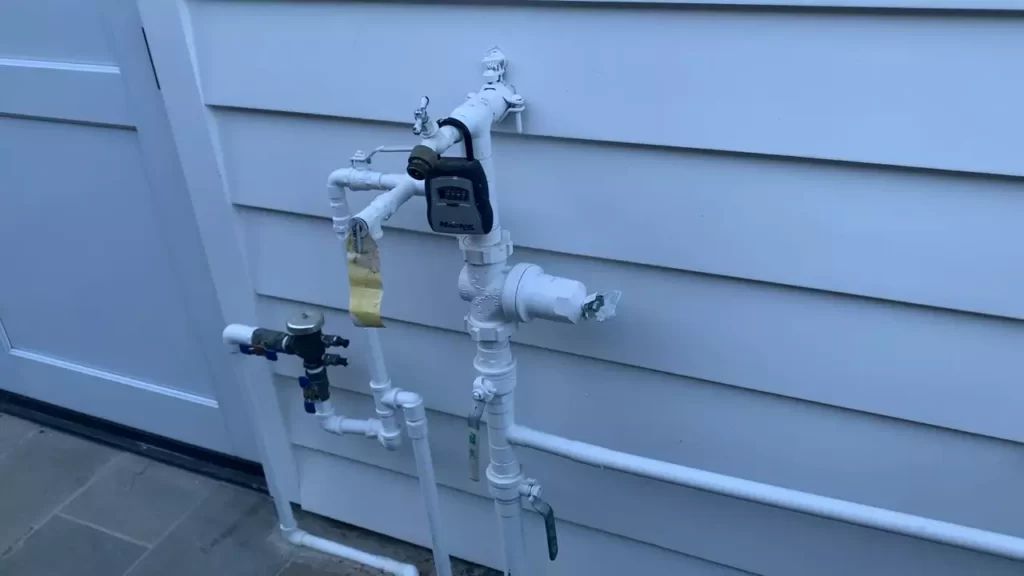
Connecting The Expansion Tank To The Water System
Once you have chosen the appropriate location for your expansion tank, it’s time to connect it to the water system. This step is crucial to ensure the proper functioning of the tank and prevent any leaks or malfunctions. In this section, we will cover the two important aspects of connecting the expansion tank to the water system: choosing the appropriate fittings and connectors, and ensuring a secure and leak-free connection. Follow these guidelines to ensure a smooth installation process.
Choosing the Appropriate Fittings and Connectors
When it comes to connecting the expansion tank to the water system, it is important to choose the right fittings and connectors. This will ensure a secure connection and prevent any potential leaks.
Start by assessing the existing water system and identifying the type of connections it uses. Common types of fittings and connectors include:
| Type | Description |
|---|---|
| Compression fittings | These fittings are easy to install and provide a secure connection by compressing the fitting against the pipe. |
| Sweat fittings | These fittings require soldering to join the pipes together. |
| Push-fit fittings | These fittings are designed for easy installation by simply pushing the pipe into the fitting. |
Once you have determined the type of fittings used in your water system, choose expansion tank fittings that are compatible with the existing connections. This will ensure a proper fit and minimize the risk of leaks or other issues.
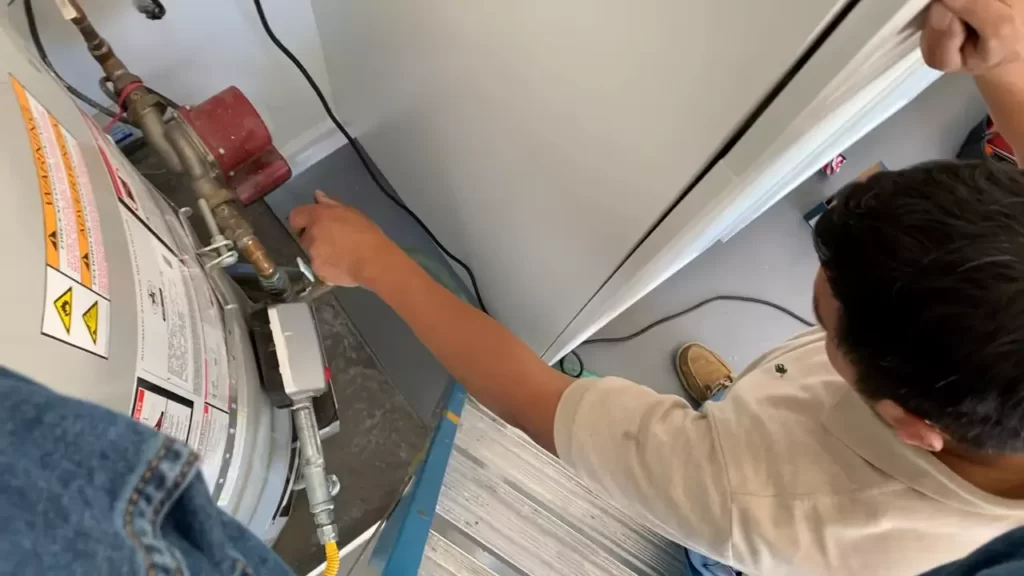
Ensuring a Secure and Leak-Free Connection
After choosing the appropriate fittings and connectors, it is essential to ensure a secure and leak-free connection between the expansion tank and the water system. Follow these steps for a successful installation:
- Start by cleaning the pipe ends and fittings thoroughly to remove any dirt, grease, or debris. A clean surface will ensure a better seal.
- Apply plumber’s tape or thread sealant to the threaded connections to create a watertight seal. This will prevent any leaks from occurring.
- Tighten the fittings using a wrench, ensuring a snug fit. Be careful not to overtighten, as this can damage the fittings or cause leaks.
- Once the fittings are securely tightened, turn on the water supply and check for any leaks around the connections. If you notice any leaks, tighten the fittings further or apply additional plumber’s tape/sealant as needed.
By following these steps, you can ensure a secure and leak-free connection between the expansion tank and the water system. This will help maintain the optimal performance of your expansion tank and avoid any potential issues in the long run.
Testing And Adjusting The Pressure
Filling the System with Water
To begin testing and adjusting the pressure of your expansion tank, you first need to make sure that the system is properly filled with water. Start by shutting off the water supply to the tank and allowing it to cool down. This will prevent any potential risks of scalding or injury during the process.
Once the expansion tank has cooled down, locate the water supply valve and turn it off completely. Next, find the drain valve on the tank and attach a garden hose to it. Place the other end of the hose in a suitable drainage area, such as a floor drain or a bucket, to collect the water.
With the hose securely attached and the drainage area prepared, open the drain valve to release any remaining water from the tank. Allow the tank to empty completely before moving on to the next step.
After the tank is empty, close the drain valve and remove the hose. With the water supply valve still closed, you can now begin filling the system with water. Gradually open the valve to allow water to flow into the tank. Keep a close eye on the pressure gauge and the tank to ensure it doesn’t exceed the recommended maximum pressure.
Once the tank is filled with water, you can proceed to the next step of monitoring the pressure and making any necessary adjustments.
Monitoring the Pressure and Making Adjustments
Monitoring the pressure of your expansion tank is crucial for ensuring its optimal performance. Start by turning on the water supply valve and allowing the tank to pressurize. As the water enters the tank, the pressure will gradually increase. Use a pressure gauge to measure the pressure inside the tank.
It’s important to compare the measured pressure to the recommended pressure range specified by the manufacturer. If the pressure is too low, the tank may not function correctly, while excessive pressure puts unnecessary strain on the tank and the entire system.
If you find that the pressure is below the recommended range, you can adjust it by using the air valve located on top of the tank. Before making any adjustments, turn off the water supply valve and allow the tank to depressurize.
To make adjustments, you’ll need a tire pressure gauge and an air compressor. Attach the tire pressure gauge to the air valve and take a reading of the current pressure level. If the pressure is too low, use the air compressor to add more air into the tank. If the pressure is too high, release air from the tank by gently pressing on the air valve until the pressure is within the recommended range.
After making any adjustments, turn on the water supply valve again and allow the tank to pressurize. Monitor the pressure gauge to ensure that the pressure remains stable within the desired range. If necessary, continue making adjustments until the pressure is optimal.
By regularly monitoring and adjusting the pressure of your expansion tank, you can ensure its longevity and prevent any potential issues. Remember to always follow the manufacturer’s guidelines and consult a professional if you’re unsure about any steps in the process.
Identifying And Fixing Leaks
One common issue that can arise with an expansion tank is water leakage. If you notice water pooling around the tank or dripping from various components, it’s crucial to identify and fix the leaks promptly. Ignoring these leaks can lead to further damage and reduce the effectiveness of your expansion tank. In this section, we will discuss how to inspect for water leakage and provide guidance on repairing or replacing faulty components.
Inspecting for Water Leakage
When it comes to identifying leaks in your expansion tank system, a thorough inspection is necessary. Start by visually examining the tank and its surrounding pipes and valves. Look for any signs of water dripping, pooling, or discoloration. Additionally, check for moisture or rust on the connections and fittings.
Repairing or Replacing Faulty Components
If you discover a leak in your expansion tank system, it’s vital to determine the exact cause and address it promptly. Leaks can occur due to faulty components such as valves, fittings, or the tank itself. Here are some steps to follow when repairing or replacing these components:
- Turn off the water supply to the expansion tank system. This ensures no further leakage or water flow during the repair process.
- Wipe off any moisture or water from the affected area. This allows for a clear and dry work surface.
- Inspect the valves, fittings, and connections for any visible signs of damage or wear. Tighten loose connections using the appropriate tools.
- If the leak persists, consider replacing the faulty component. Refer to the manufacturer’s instructions or consult a professional for guidance on finding the correct replacement part.
- Before installing the new component, make sure to apply the plumber’s tape or sealant to the threads to prevent future leaks.
- Once the new component is in place, carefully turn the water supply back on and check for any leaks. Monitor the system for a period of time to ensure the repair was successful.
By inspecting for water leakage and taking the necessary steps to repair or replace faulty components, you can maintain the efficiency and functionality of your expansion tank system. Remember, addressing leaks promptly not only prevents potential further damage but also ensures your tank operates at its optimal capacity.
Handling Excessive Water Pressure
Excessive water pressure can wreak havoc on your plumbing system, causing leaks, burst pipes, and other costly damage. In order to prevent this, it is important to properly handle and control water pressure within your home. By understanding the causes of high pressure and implementing pressure-reducing measures, you can safeguard your plumbing system and ensure its longevity.
Understanding the Causes of High Pressure
High water pressure can be attributed to various factors, including:
- City Water Supply: Municipal water suppliers often maintain high water pressure in the main supply lines to accommodate multiple users simultaneously. As a result, individual residences may experience excessive pressure.
- Elevation: If your home is situated at a higher elevation, gravity can cause an increase in water pressure.
- Water Heater: Improperly adjusted water heaters can also contribute to high water pressure. Malfunctioning pressure relief valves or thermal expansion can cause pressure spikes.
Understanding the causes of high water pressure is crucial in effectively addressing the issue. Now let’s explore how you can implement pressure-reducing measures to combat excessive pressure.
Implementing Pressure-Reducing Measures
Take control of your water pressure and protect your plumbing system by following these measures:
- Install a Pressure Regulator Valve (PRV): A PRV is a device that reduces the incoming water pressure to a safe and manageable level. It is typically installed near the main water supply entrance of your home. Consult with a professional plumber to ensure the correct installation and adjustment of the PRV.
- Check the Pressure Relief Valve: The pressure relief valve on your water heater should be inspected regularly to ensure it is functioning correctly. A faulty valve can contribute to high water pressure.
- Monitor Thermal Expansion: Thermal expansion occurs when water heats up and expands inside the water heater or plumbing system. This can lead to a significant increase in pressure. Consider installing an expansion tank to absorb the expansion and prevent pressure spikes.
By implementing these pressure-reducing measures, you can effectively control the water pressure in your home and minimize the risk of plumbing damage. Remember to consult with a professional plumber for proper installation and maintenance of the necessary devices.
Dealing With Inconsistent Water Temperature
Are you tired of dealing with inconsistent water temperatures in your home? It can be frustrating to start your day with a cold shower or have scalding hot water unexpectedly. Inconsistent water temperature can be caused by a variety of factors, but one effective way to regulate the temperature is by installing an expansion tank in your plumbing system.
Diagnosing Temperature Fluctuations
Before you can implement an effective solution to regulate water temperature, it’s important to diagnose the root cause of the fluctuations. Here are some common factors that may result in inconsistent water temperature:
- Water pressure issues
- Faulty or aging water heater
- Clogged pipes or valves
- Changes in demand for hot water
By identifying the cause of the temperature fluctuations, you can better address the issue and ensure a stable water temperature throughout your home.
Implementing Effective Temperature Regulation
Now that you have diagnosed the cause of the temperature fluctuations, it’s time to implement an effective solution by installing an expansion tank. An expansion tank works by accommodating the expansion and contraction of water as it heats up and cools down in the water heater.
Here’s a step-by-step guide to installing an expansion tank:
- Locate the cold water supply line connected to your water heater.
- Shut off the water supply to the water heater.
- Drain some of the water from the tank to reduce the pressure.
- Install the expansion tank on the cold water supply line, close to the water heater.
- Connect the expansion tank using the appropriate fittings and ensure a secure connection.
- Turn on the water supply and check for any leaks.
- Adjust the pre-charge pressure of the expansion tank to match the incoming water pressure.
By following these simple steps, you can effectively regulate the water temperature in your home and say goodbye to inconsistent showers.
Remember, if you are unsure about any step of the installation process or need assistance, it’s always recommended to consult a professional plumber. They will ensure that the expansion tank is installed correctly and functioning optimally.
Wrap Up And Final Checks
After successfully installing an expansion tank, it is important to wrap up the process with a series of final checks to ensure that everything is functioning properly. This step is crucial to prevent any potential issues and maintain the efficiency of your plumbing system. In this section, we will discuss two important aspects of the final checks: assessing the installed expansion tank and verifying its proper functionality. Let’s dive into it!
Assessing the Installed Expansion Tank
- Inspect the tank visually to ensure it is installed securely and at the correct height.
- Check for any signs of leaks or damage to the tank.
- Ensure that the tank’s pressure valve is properly installed and functioning.
- Verify that all connections and fittings are tight and free from leaks.
- Confirm that there is an adequate space around the tank for expansion and contraction.
Verifying Proper Functionality
- Turn on the water supply to allow water to enter the tank.
- Observe the pressure gauge and ensure it remains within the recommended range.
- Open a faucet or fixture to create a demand for water.
- Listen for any unusual noises, such as banging or rattling pipes, which could indicate problems with the expansion tank.
- Check if the pressure relief valve releases excess pressure appropriately.
- Monitor the system for a few days and ensure the pressure remains stable under different water usage scenarios.
Remember, these final checks are essential to guarantee the safety and efficiency of your plumbing system. Neglecting these steps can lead to potential issues like bursting pipes, water pressure imbalances, and increased chances of system failure. Take the time to thoroughly assess the installed expansion tank and verify its proper functionality. This small investment of time will go a long way in ensuring the longevity and effectiveness of your plumbing system.
Maintenance Tips For Longevity
In order to ensure the effective functioning and longevity of your expansion tank, regular maintenance is essential. Neglecting maintenance tasks can lead to system failures, leaks, and overall decreased performance. By following these simple maintenance tips, you can keep your expansion tank in optimal condition for years to come.
Regularly Inspecting for Leaks and Damage
Inspecting your expansion tank for leaks and damage is a crucial step to maintain its longevity. Regular visual inspections should be performed to identify any signs of leakage or damage. Start by checking the tank’s fittings and connections, making sure they are tight and secure. Look for any traces of water around the tank, as this could indicate a leak.
If you notice any signs of leakage or damage, it is important to address the issue promptly. Ignoring leaks can result in water damage or even tank failure. Contact a professional plumber to assess and repair the problem as soon as possible.
Flushing and Cleaning the Expansion Tank
Another important maintenance task is flushing and cleaning the expansion tank. Over time, sediment and debris can accumulate inside the tank, affecting its performance and efficiency. Flushing the tank helps to remove these impurities, ensuring smooth operation.
To flush the expansion tank, follow these simple steps:
- Shut off the water supply to the expansion tank.
- Attach a hose to the drain valve at the bottom of the tank.
- Open the drain valve and let the water drain completely.
- Close the drain valve and remove the hose.
- Refill the tank with clean water.
In addition to flushing, regular cleaning of the tank is also important. Use a soft cloth or sponge to wipe the exterior of the tank, removing any dust or debris. Keeping the tank clean not only enhances its appearance but also prevents dirt from entering the system and causing damage.
By incorporating these maintenance tips into your routine, you can ensure the longevity and optimal performance of your expansion tank. Regularly inspecting for leaks and damage, as well as flushing and cleaning the tank, will prevent potential issues and extend the lifespan of your system.
Frequently Asked Questions On How To Install Expansion Tank
What Is The Proper Way To Install An Expansion Tank?
To properly install an expansion tank, follow these steps:
- Shut off the water supply and drain the system.
- Determine the correct location for the expansion tank, usually near the water heater or after the pressure-reducing valve.
- Install the tank, making sure to connect it to the hot water line.
- Secure the tank and adjust the air pressure according to the manufacturer’s instructions.
- Finally, turn on the water supply and check for any leaks.
What Is The Correct Installation Of Expansion Tank For Hot Water Heater?
To correctly install an expansion tank for a hot water heater, follow these steps:
- Turn off the water supply and disconnect the power to the heater.
- Locate a suitable spot on the cold water line for the tank.
- Install the tank on the cold water line, making sure it is plumbed correctly and in the upright position.
- Reconnect the water supply and power to the heater.
- Verify the tank is functioning properly by checking for leaks.
Where Do You Connect An Expansion Tank?
The expansion tank connects to the plumbing system near the water heater.
Does An Expansion Tank Need To Be Pressurized?
Yes, an expansion tank needs to be pressurized. The pressure is necessary to accommodate the changes in the volume of the fluid inside the tank, ensuring that the system functions properly and avoids potential damage.
Conclusion
Installing an expansion tank may seem daunting, but with the right steps, it can be a straightforward process. By carefully following this guide, you can ensure proper installation and maintain the efficiency of your system. Remember to turn off the power, drain the system, and select the right size tank.
With these tips, you’ll be able to successfully install your expansion tank and enjoy hassle-free operation.