To install a wall heater, locate the appropriate spot and mark the position on the wall. Then, drill holes, attach the mounting bracket, and connect the wiring.
Finally, secure the heater to the bracket and turn it on to test the functionality. Welcome to our guide on how to install a wall heater. Are you looking to add some warmth to your space without taking up valuable floor space?
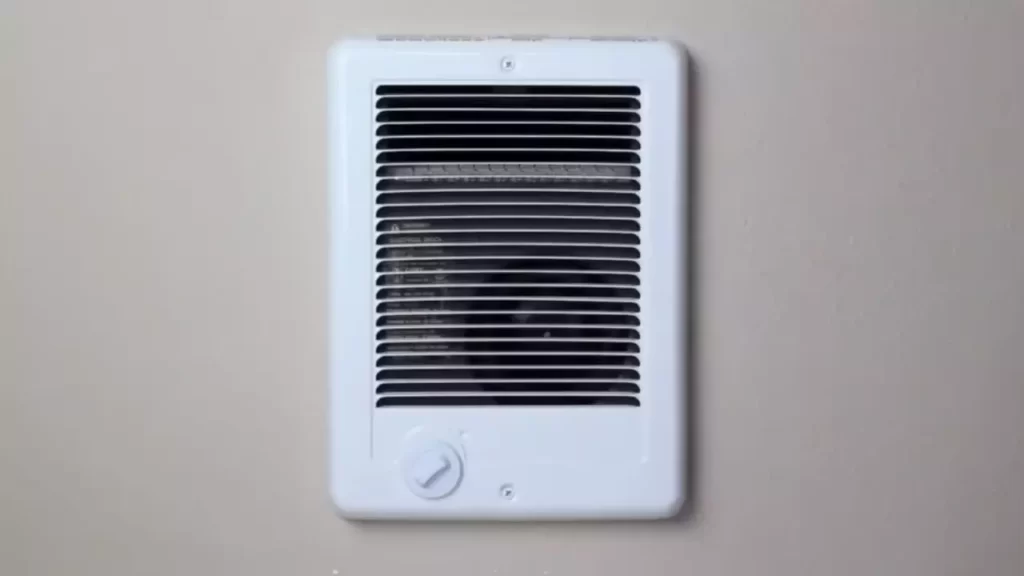
A wall heater is the perfect solution. In this guide, we will walk you through the steps to install a wall heater in your home or office. You don’t need to be a professional to tackle this project, as we will provide you with easy-to-follow instructions. So let’s get started and have your wall heater up and running in no time!
Getting Started With Wall Heater Installation
Installing a wall heater can provide numerous benefits, including efficient heating, space-saving design, and flexibility in positioning. Whether you’re looking to warm up a small room or add supplemental heating to your home, a wall heater can be a valuable addition. Before you begin the installation process, there are a few things to consider, along with a list of tools and materials you’ll need.
In this section, we will discuss the benefits of installing a wall heater, things to consider before installation and gather the necessary tools and materials.
Understanding the Benefits of Installing a Wall Heater
A wall heater offers several advantages that make it a popular choice among homeowners. Here are some key benefits:
- Efficient Heating: Wall heaters provide focused heating, ensuring that the desired area is adequately warmed without wasting energy.
- Space-Saving Design: Unlike traditional heaters, wall heaters are mounted directly on walls, saving valuable floor space.
- Flexibility in Positioning: Wall heaters can be installed at different heights and locations, making it easy to optimize heating for your specific needs.
- Cost-Effective: Wall heaters are generally more affordable than other heating options and offer long-term savings through energy efficiency.
- Quick Heating: Wall heaters heat up rapidly, providing instant warmth when you need it most.
Things to Consider Before Installing a Wall Heater
Prior to installing a wall heater, it’s important to keep the following factors in mind:
- Electrical Requirements: Ensure that your electrical system can handle the power demand of the wall heater. If necessary, consult an electrician to assess and make any necessary upgrades.
- Proper Sizing: Choose a wall heater that is appropriate for the size of the room you intend to heat. A model that is too small may not provide adequate warmth, while one that is too large may consume excess energy.
- Mounting Location: Consider the best position to mount the wall heater for optimal heat distribution and accessibility. Ensure it is away from flammable materials and at a suitable height for easy operation.
- Determine Thermostat Placement: Decide whether you want a built-in thermostat or a separate unit. Placement should be easy to access and free from obstructions.
- Building Codes and Permits: Familiarize yourself with local building codes to ensure compliance. Some jurisdictions may require permits for certain types of installations.
Gathering the Necessary Tools and Materials
Before you start installing your wall heater, gather the tools and materials listed below:
| Tools | Materials |
|---|---|
| Screwdriver | Wall heater |
| Drill | Mounting brackets |
| Stud finder | Anchors and screws |
| Level | Electrical wire |
| Pencil | Junction box |
| Tape measure | Wire connectors |
Double-check that you have all the necessary tools and materials before proceeding with the installation process. Having everything on hand will help ensure a smooth and efficient installation.
Preparing Your Space For The Wall Heater
Measuring the area for the wall heater installation
Prior to installing a wall heater, it’s crucial to measure the designated area to ensure a proper fit. Taking accurate measurements will ensure that the heater fits snugly on the wall and functions effectively. Grab a measuring tape and note down the height, width, and depth of the space where you plan to install the wall heater. Make sure to measure not just the dimensions of the wall but also any obstructions such as light switches, outlets, or furniture that might limit the available space.
Determining the ideal location for the wall heater
Deciding on the perfect spot to install your wall heater is vital for efficient heating and optimal comfort. Consider a location that provides even heat distribution and easy access. Look for areas that are away from high traffic areas and combustible materials. Additionally, make sure the location allows for proper clearance above and around the heater. It’s recommended to consult the manufacturer’s guidelines and adhere to any specific requirements they may have regarding the ideal positioning of the wall heater. Taking the time to determine the ideal location will enhance the performance and longevity of your wall heater.
Ensuring proper ventilation for the wall heater
Proper ventilation is key to ensuring the safe and efficient operation of your wall heater. A well-ventilated space allows for the proper exchange of air, preventing the buildup of harmful gases and maintaining air quality. Check the manufacturer’s instructions to determine the specific ventilation requirements for your wall heater model. Typically, it’s necessary to leave a certain amount of space around the heater to allow for adequate air circulation. This can help prevent overheating and potential hazards. Ensure that there are no obstructions, such as curtains or furniture, blocking the airflow. By providing ample ventilation, you can enjoy the warmth of your wall heater without sacrificing safety.
Installing The Wall Heater Step-By-Step
When it comes to installing a wall heater, following a step-by-step guide can help ensure a successful installation. By carefully marking the position on the wall, drilling holes for the mounting brackets, and connecting the electrical wiring, you can have your wall heater up and running in no time. In this guide, we will walk you through each step in detail, outlining the process from start to finish. Let’s get started with the installation of your wall heater!
A step-by-step guide to mounting the wall heater on the wall
- Marking the position of the wall heater on the wall
- Drilling holes for the mounting brackets
- Attaching the mounting brackets to the wall
- Mounting the wall heater onto the brackets
- Connecting the electrical wiring for the wall heater
- Turning off the power supply
- Running the electrical wires
- Connecting the wires to the wall heater
- Securing the wall heater and performing final checks
- Double-checking the stability and levelness of the wall heater
- Testing the functionality of the wall heater
Marking the position of the wall heater on the wall
To start the installation process, you need to mark the exact position of the wall heater on the wall. Use a tape measure to determine the desired height and width for the heater. Once you have the measurements, use a pencil to mark the position on the wall. Ensure that the marks are level and centrally aligned to achieve a symmetrical look.
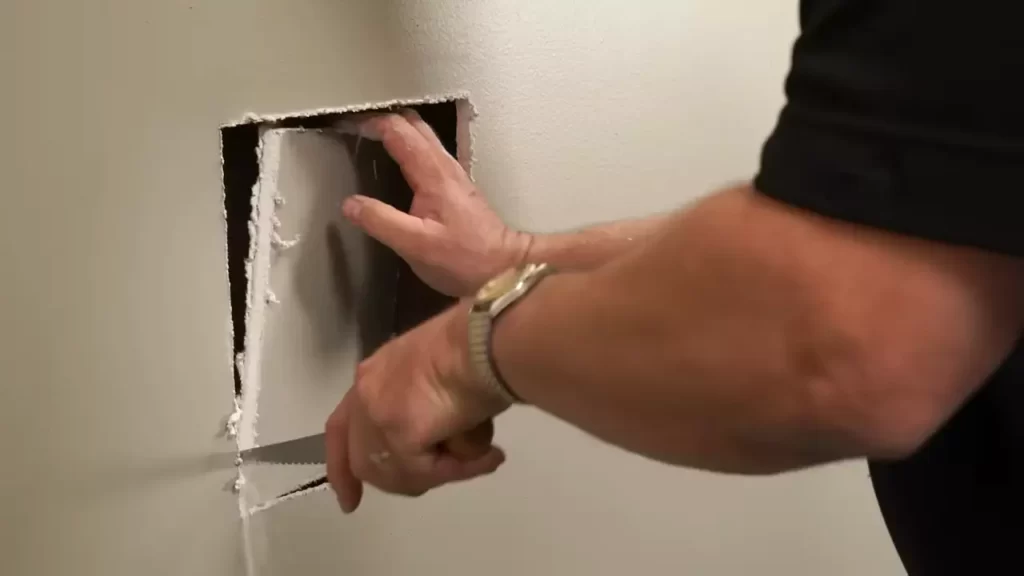
Drilling holes for the mounting brackets
Next, you will need to drill holes for the mounting brackets. Refer to the manufacturer’s instructions to determine the appropriate drill bit size for your specific wall heater model. Use a power drill with the appropriate drill bit and carefully drill the holes at the marked positions. Make sure to drill straight and at the correct depth as instructed.
Attaching the mounting brackets to the wall
Once the holes are drilled, it’s time to attach the mounting brackets to the wall. Position the brackets over the drilled holes and secure them using screws provided with the wall heater. Use a screwdriver or power drill to tighten the screws, ensuring that the brackets are firmly attached for stability and support.
Mounting the wall heater onto the brackets
With the brackets securely in place, it’s time to mount the wall heater onto them. Carefully lift the heater and align its mounting slots with the brackets. Slide the heater onto the brackets until it locks into place. Ensure that the heater is level and centered properly to achieve an aesthetically pleasing look.
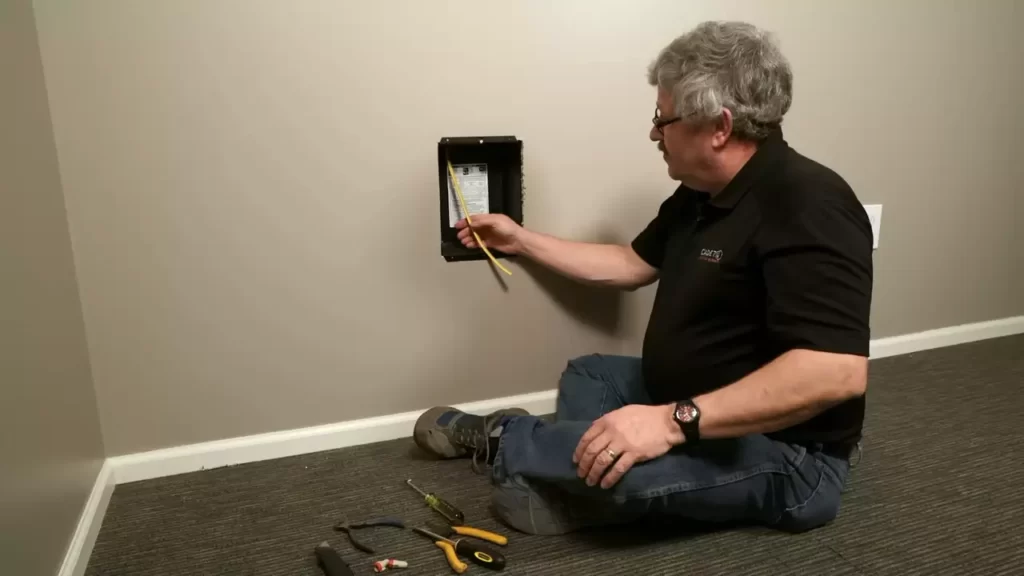
Connecting the electrical wiring for the wall heater
Before dealing with the electrical wiring, it is crucial to turn off the power supply to avoid any accidents or electrical shocks. Locate the breaker or fuse box and switch off the power for the designated circuit. Once the power is turned off, you can proceed with running the electrical wires to the wall heater.
Running the electrical wires
Using appropriate tools, carefully run the electrical wires from the breaker or fuse box to the wall heater location. Be sure to follow local electrical codes and guidelines to ensure the safety and compliance of the installation. Secure the wires properly using cable clips or conduit to prevent any hazards.
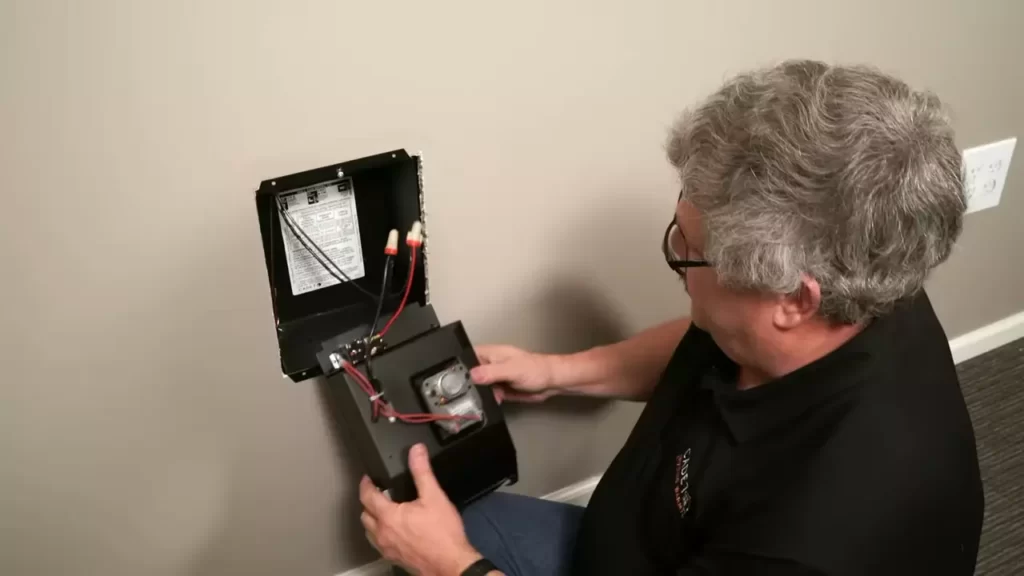
Connecting the wires to the wall heater
Once the wires are properly run, it’s time to connect them to the wall heater. Remove the heater’s access cover to reveal the wiring terminals. Strip the ends of the electrical wires and connect them to the corresponding terminals as specified in the manufacturer’s instructions. Secure the connections tightly and ensure that there are no exposed wires.
Securing the wall heater and performing final checks
After connecting the wires, secure the access cover back in place on the wall heater. To ensure the stability and levelness of the wall heater, double-check that all mounting screws are tight and that the heater is securely fastened to the brackets. Perform a final visual inspection to confirm that the installation is done correctly.
Testing the functionality of the wall heater
Once the installation is complete, it’s time to test the functionality of the wall heater. Turn on the power supply and adjust the temperature settings to verify that the heater is working properly. Pay close attention to any unusual noises or malfunctions that may indicate a problem. If everything is functioning as expected, congratulations – you have successfully installed your wall heater!
Safety Measures And Tips For Wall Heater Installation
Installing a wall heater can be a great way to add warmth and comfort to your home. However, it is important to prioritize safety during the installation process. By taking the necessary precautions and following a few tips, you can ensure a successful and safe installation of your wall heater. In this section, we will discuss important safety measures and provide tips to help you install your wall heater without any hazards.
Ensuring safety while installing the wall heater
When it comes to installing a wall heater, safety should be your utmost priority. By following these safety measures, you can minimize the risks associated with the installation:
- Make sure the installation area is well-ventilated to prevent the accumulation of harmful gases.
- Ensure that there are no flammable materials or other obstacles near the installation area.
- If you have any doubts about the structural integrity of your walls, consult a professional before proceeding with the installation.
Wearing appropriate protective gear
Protecting yourself during the installation process is crucial. Here are some protective gear items you should consider wearing:
- Thick gloves to shield your hands from sharp edges and protect against electrical shocks.
- Safety goggles to safeguard your eyes from any debris or particles.
- A dust mask to prevent the inhalation of dust or other airborne particles.
Following electrical safety guidelines
Since wall heaters are electrical appliances, it is essential to follow electrical safety guidelines to prevent accidents. Here are some guidelines to keep in mind:
- Before starting the installation, turn off the power supply to the area where the heater will be installed.
- Ensure that you are using the appropriate electrical cables and connectors recommended by the manufacturer.
- Avoid overloading circuits and use surge protectors to protect against electrical surges.
- Once the installation is complete, double-check the connections and make sure they are secure before restoring power.
Tips for a successful wall heater installation
Installing a wall heater can be a DIY project, but it’s important to follow these tips for a successful installation:
- Read and follow the manufacturer’s instructions carefully. They provide specific guidelines for installation and usage.
- Measure the installation area accurately to ensure the heater fits properly.
- Prepare the required tools and materials in advance to streamline the installation process.
- If you are unsure about any step of the installation process, do not hesitate to seek professional assistance.
By adhering to safety measures and following these installation tips, you can have a properly installed wall heater that keeps your home cozy and warm during the colder months. Remember, if you are unsure about any aspect of the installation process, consult a professional. Safety should always be your top concern when dealing with electrical appliances.
Maintaining And Troubleshooting Your Wall Heater
Regular maintenance practices, cleaning, and troubleshooting are essential to ensure optimal performance of your wall heater. By following these simple steps, you can prolong the lifespan of your heater and prevent any potential issues from escalating.
Regular maintenance practices for optimal performance
To keep your wall heater running smoothly, it’s important to incorporate regular maintenance practices. These practices will help ensure optimal performance and prevent any major issues from arising. Here are a few simple maintenance tasks you can perform:
- Inspect the heater periodically for any signs of wear and tear.
- Check the air filters and clean or replace them as necessary.
- Remove any dust or debris that may have accumulated on the surface of the heater.
- Verify that the thermostat is functioning correctly and calibrate it if needed.
Cleaning the wall heater regularly
Regularly cleaning your wall heater is an important aspect of its maintenance. Over time, dust, dirt, and other particles can accumulate on the heater’s surface and affect its performance. Follow these steps to keep your heater clean:
- Ensure the heater is turned off and disconnected from the power source before cleaning.
- Use a soft, dry cloth or a vacuum cleaner with a brush attachment to gently remove any loose dust or debris from the surface.
- If the heater has grilles or vents, remove them and clean them separately with a mild detergent and warm water. Rinse thoroughly and allow them to dry completely before reattaching.
- Wipe the exterior of the heater with a damp cloth to remove any remaining dirt or residue.
Checking for any loose connections or damaged parts
Inspecting your wall heater for any loose connections or damaged parts is crucial for ensuring its safe and efficient operation. Here’s how to perform a thorough check:
| Steps: | Description: |
|---|---|
| Step 1 | Turn off the heater and unplug it from the power source for safety. |
| Step 2 | Inspect the power cord and connections for any signs of damage, fraying, or loose connections. |
| Step 3 | Check the wall heater’s housing for cracks or other visible damage. If any damage is found, consult a professional for repair or replacement. |
| Step 4 | Examine the heating element, thermostat, and other internal components for any signs of wear or damage. If necessary, contact a technician to address the issue. |
Troubleshooting common issues with wall heaters
While wall heaters are generally reliable, they can experience common issues that require troubleshooting. Here are a few common problems you may encounter and their solutions:
- Insufficient heat: Check if the thermostat is set to the desired temperature and ensure there are no obstructions blocking the heater’s airflow. If the issue persists, contact a professional for further inspection.
- Loud or unusual noises: This could be due to loose parts or debris within the heater. Turn off the heater, remove the front cover, and carefully clean any loose debris. If the noise continues, consult a technician.
- Frequent cycling: If the heater turns on and off frequently, it might be an indication of a faulty thermostat or internal component. Contact a professional to diagnose and fix the issue.
Identifying and fixing heating problems
If your wall heater is not producing heat or if the heat output is insufficient, there are a few steps you can take to identify and fix the issue:
- Check if the heater is receiving power by ensuring it is plugged in and the circuit breaker or fuse for the heater is not tripped or blown.
- Inspect the thermostat settings and adjust them if necessary. If the thermostat appears to be malfunctioning, consider replacing it with a new one.
- If the heater has a pilot light, ensure it is lit. If it’s not, consult the manufacturer’s instructions for relighting the pilot light.
- Examine the heating element for any signs of damage or corrosion. If the heating element is faulty, it may need to be replaced by a professional.
Resolving electrical or wiring issues
Electrical or wiring issues can pose a safety hazard and may require the expertise of a professional electrician. If you suspect an electrical problem with your wall heater, such as tripped breakers or faulty wiring, it’s best to seek professional assistance. Attempting to fix electrical problems without proper knowledge and training can lead to further damage or injury.
By following these regular maintenance practices, performing necessary checks, and troubleshooting common issues, you can keep your wall heater in optimal condition and enjoy a reliable heat source for years to come.
Frequently Asked Questions Of How To Install Wall Heater
How Are Wall Heaters Wired?
To wire wall heaters, first turn off the power. Attach the black wire from the circuit breaker to the black heater wire and the white circuit wire to the white heater wire. Connect the ground wires together. Finally, secure all connections with wire nuts and cover them with a junction box.
How Do You Install A Wall Mounted Panel Heater?
To install a wall-mounted panel heater, follow these steps:
1. Choose the ideal location on the wall for installation.
2. Securely mount the heater using the provided brackets and screws.
3. Connect the heater to the power supply, following the manufacturer’s instructions.
4. Check that the heater is securely attached and level.
5. Turn on the heater and adjust the settings as desired.
Are Wall Mounted Heaters Expensive To Run?
Wall-mounted heaters are cost-effective to run. They efficiently distribute heat, saving you money on energy bills. Their targeted heating allows you to warm specific areas without wasting energy on unused spaces. With their programmable features, you can further optimize energy usage, ensuring an affordable heating solution.
Where Is The Best Place To Install A Wall Heater?
The ideal location to install a wall heater is a central position on an exterior wall. It should be away from windows, doors, and furniture to ensure efficient heat distribution. Remember to follow the manufacturer’s recommendations and consider the room size and function.
Conclusion
Installing a wall heater may seem like a daunting task, but with the right steps and guidance, it can be a straightforward process. By following this comprehensive guide, you now have the knowledge to successfully install a wall heater in your home.
Remember to prioritize safety, carefully read the manufacturer’s instructions, and consult a professional if needed. With your new wall heater, you can enjoy cozy warmth and comfort all year round. Start your installation today and experience the benefits it brings to your living space.