To install a gas line for an outdoor grill, you will need to connect the grill to your home’s existing gas supply using a flexible gas connector and shutoff valve. Then, ensure that all connections are tightly sealed and test for any leaks using a soapy water solution.
Importance Of Installing A Gas Line For Outdoor Grill
When it comes to outdoor grilling, having a dedicated gas line is essential. It not only ensures convenience but also enhances safety while cooking your favorite BBQ delicacies. In this section, we will discuss the safety measures to consider when installing a gas line and the benefits of having a dedicated line for your outdoor grill.
Safety Measures to Consider
Before you embark on installing a gas line for your outdoor grill, it is crucial to prioritize safety. Taking necessary precautions will help prevent accidents and ensure the longevity of your grill. Here are some essential safety measures to consider:
- Consult a professional: It is highly recommended to consult a licensed professional or a certified gas technician to install the gas line. They possess the expertise and knowledge to handle gas connections and can ensure a safe installation process.
- Location: Choose a suitable location for your grill, keeping it away from flammable materials, walls, and low-hanging branches. Adequate ventilation should also be ensured to avoid the accumulation of potentially dangerous gas fumes.
- Leak detection: Prioritize leak detection by periodically checking the gas connections using a soapy water solution. If you notice bubbles forming on the connections, it indicates a gas leak. Immediately turn off the gas supply and seek professional help.
- Gas shut-off valve: Install a gas shut-off valve near the grill for easy accessibility. This valve allows you to control the gas flow and quickly shut it off during emergencies or when the grill is not in use.
Benefits of a Dedicated Gas Line
A dedicated gas line for your outdoor grill offers numerous advantages. Let’s take a look at some of the benefits:
- Convenience: Having a dedicated gas line ensures a constant and uninterrupted fuel supply to your grill. It eliminates the need for regularly replacing propane tanks or dealing with inadequate gas levels during cooking.
- Cost-effective: While initially, the installation cost of a gas line might seem higher than using propane tanks, in the long run, it proves to be a more cost-effective option. You will no longer need to purchase propane or worry about running out of fuel.
- Reduced environmental impact: Propane tanks contribute to environmental pollution when not disposed of properly. By opting for a gas line, you reduce the number of tanks being disposed of each year, making it an eco-friendly choice.
- Increased cooking time: A dedicated gas line ensures a continuous gas flow, allowing you to cook for extended periods without interruptions. You won’t have to pause grilling to replace empty propane tanks, enabling you to enjoy uninterrupted cooking sessions.
- Enhanced grilling experience: With a dedicated gas line, you can easily control the heat levels, resulting in more precise cooking. This feature is especially beneficial for grill enthusiasts who enjoy experimenting with different recipes and cooking techniques.
By adhering to safety measures and installing a dedicated gas line for your outdoor grill, you not only ensure a safe cooking experience but also enjoy the convenience and benefits it offers. Make sure to consult a professional and follow the necessary guidelines to make the most of your outdoor grilling adventures.
Preparing For Gas Line Installation
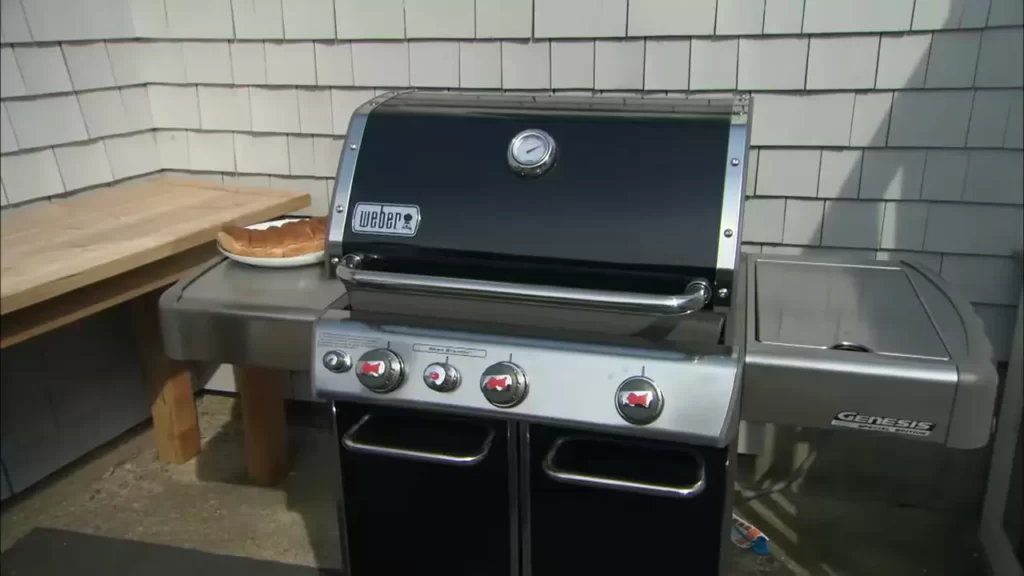
Choosing the Location for Your Outdoor Grill
Choosing the right location for your outdoor grill is crucial for a safe and enjoyable grilling experience. Here are a few things to consider:
- Proximity to the House: Make sure your grill is placed at a safe distance from your house, deck, or any other flammable structures. This will help prevent accidental fires and ensure proper ventilation.
- Clearance: Allow enough space around the grill for easy access and movement. It’s recommended to have at least 10 feet of clearance on all sides.
- Level Ground: Ensure that the area where you plan to install the grill is level and sturdy. This will provide stability and prevent any accidental tipping or wobbling.
- Wind Direction: Consider the prevailing wind direction in your area. It’s best to position the grill in a way that minimizes the impact of wind on the flames and heat distribution.
- Convenience: Choose a location that is convenient for you and your guests. It should be easily accessible from the kitchen and dining area, making it convenient to transport food and utensils.
Determining Gas Line Requirements
Prior to installing the gas line for your outdoor grill, it’s crucial to determine the gas line requirements. Here’s what you need to know:
- Gas Type: Determine whether your grill requires natural gas or propane. This will depend on the availability in your area and the type of grill you own.
- BTU Rating: Check the BTU rating of your grill to determine the gas flow requirements. This information can usually be found in the user manual or on the manufacturer’s website.
- Pipe Sizing: The size of your gas line will depend on the BTU rating and the length of the gas line. Consult a professional or refer to local building codes to ensure proper pipe sizing.
- Gas Pressure: Verify the gas pressure requirements specified by the grill manufacturer. This is important to ensure optimal performance and prevent any damage to the grill.
Gathering the Necessary Tools and Materials
Before you begin the gas line installation process, gather all the necessary tools and materials. Here’s a checklist to help you out:
| Tools | Materials |
|---|---|
|
|
Having all the necessary tools and materials ready beforehand will streamline the installation process and ensure that you have everything you need to complete the job successfully.

Steps To Install A Gas Line For Outdoor Grill
Installing a gas line for your outdoor grill can provide convenience and ensure a steady supply of fuel for your grilling adventures. However, it is crucial to follow the necessary steps to ensure a safe and effective installation. In this guide, we will walk you through each step of the process, from planning the gas line route to connecting it to your grill.
Step 1: Planning the gas line route
The first step in installing a gas line for your outdoor grill is to carefully plan the route. Determine the most direct and efficient path from your main gas supply to your grill’s location. Consider the necessary safety precautions and any potential obstacles such as trees, driveways, or structures that may require you to adjust your route. Once you have a clear route in mind, proceed to the next step.
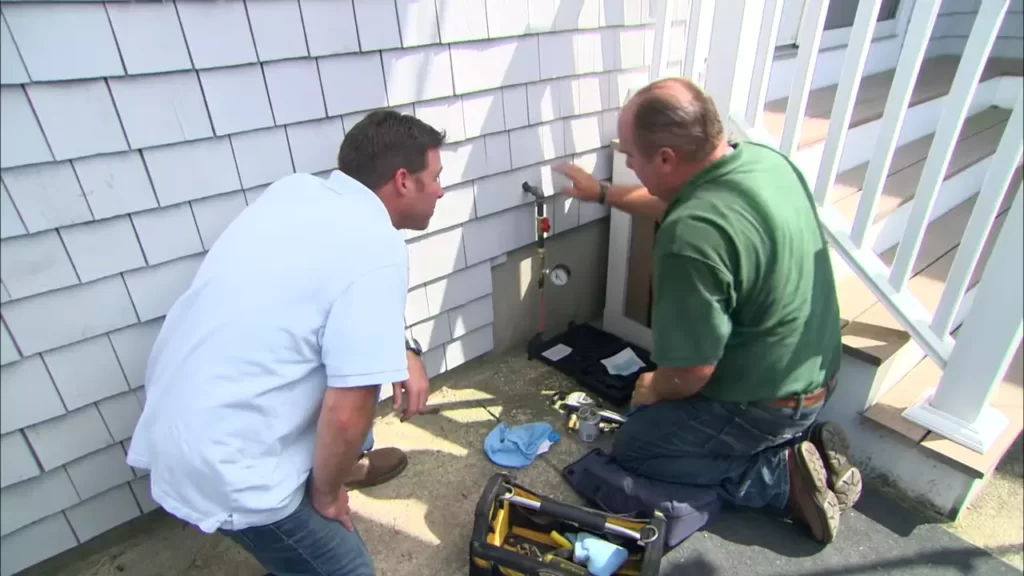
Step 2: Shutting off the main gas supply
Before you begin any digging or installation work, it is crucial to shut off the main gas supply. Locate the gas shut-off valve in your home and turn it off to ensure no gas is flowing through the line. This step is essential for safety and to prevent any gas leaks while working on the installation.
Step 3: Digging the trench for the gas line
Next, you will need to dig a trench along the planned gas line route. The trench should be deep enough to accommodate the gas pipe and allow for proper insulation. Using a shovel, carefully dig the trench, ensuring that it follows the planned route and maintains a consistent depth. Remember to take precautions when digging near utility lines or other underground structures to avoid any accidents or damage.
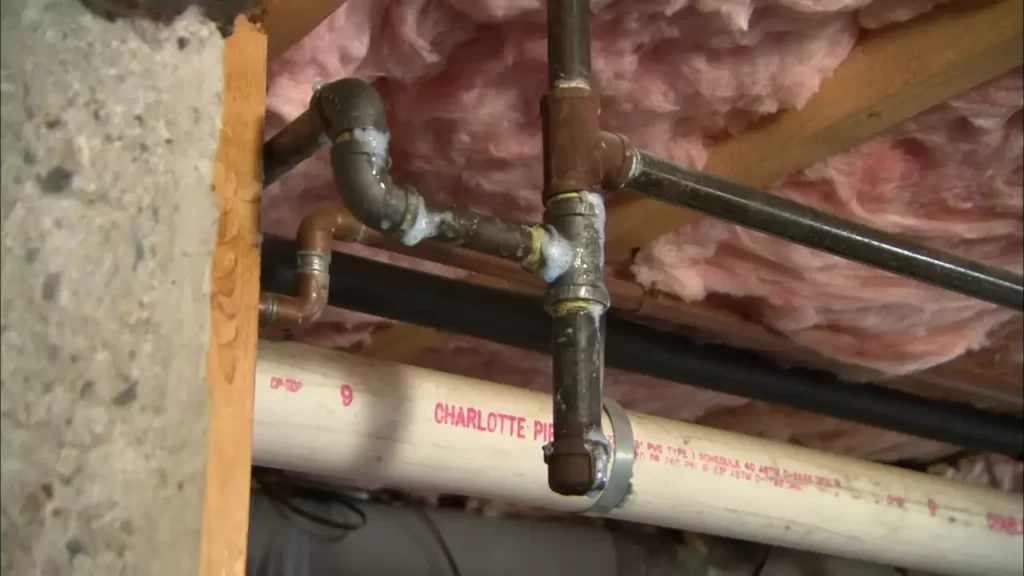
Step 4: Installing the gas pipe
Once the trench is prepared, it’s time to install the gas pipe. A durable and corrosion-resistant pipe, such as black iron or flexible copper, is recommended for gas line installations. Carefully place the pipe inside the trench, ensuring that it is properly supported and protected. Use clamps or duct tape to secure the pipe to any existing structures, such as walls or fences, to prevent it from shifting or moving.
Step 5: Connecting the gas line to the grill
The final step is connecting the gas line to your outdoor grill. To do this, you will need to install a shutoff valve and a gas connection point near the grill. The shutoff valve will allow you to control the gas flow to the grill, while the connection point ensures a secure and leak-free connection. Ensure that all connections are tightened properly and conduct a leak test before using the grill. It is highly recommended to consult a professional or a licensed plumber to ensure the connection is installed correctly and safely.
By following these steps, you can successfully install a gas line for your outdoor grill and enjoy the convenience of a reliable fuel source. Remember to prioritize safety during the installation process and seek professional assistance if needed. Happy grilling!
Safety Checks And Testing
When it comes to installing a gas line for your outdoor grill, safety checks and testing are absolutely crucial. Skipping these steps or neglecting them can lead to serious hazards, such as gas leaks or improper ventilation. Therefore, it is important to follow the appropriate safety measures to ensure the installation process is done properly and safely. In this section, we will cover the key aspects of safety checks and testing, including performing a leakage test, ensuring proper ventilation, and tips for ongoing maintenance and inspection.
Performing a Leakage Test
Before you start using your newly installed gas line, it is essential to perform a leakage test. This test checks for any potential gas leaks that could pose a danger. Follow these steps to conduct a thorough leakage test:
- Make sure all connections are securely tightened. Use a wrench to ensure proper tightness.
- Apply a mixture of soap and water to all connections, including valves and fittings.
- Turn on the gas supply and let it run for a few minutes.
- Inspect all the connections for any bubbles or signs of gas leakage.
- If you notice any bubbles or suspect a gas leak, turn off the gas supply immediately and contact a professional for assistance.
Ensuring Proper Ventilation
Proper ventilation is critical when it comes to the installation of a gas line for your outdoor grill. Inadequate ventilation can lead to a buildup of gas and potentially dangerous situations. Follow these guidelines to ensure proper ventilation:
- Check the manufacturer’s recommendations for the required clearance around your grill, especially in confined spaces.
- Ensure the grill is positioned in an open area, away from any obstructions, such as low-hanging branches or walls.
- If your grill is located in an enclosed space, such as a patio or gazebo, consider installing vents or fans to promote better airflow.
Tips for Ongoing Maintenance and Inspection
Ongoing maintenance and regular inspections play a vital role in ensuring the safety and longevity of your gas line. Here are some tips to keep in mind:
- Regularly inspect the gas line and connections for any signs of wear, damage, or corrosion.
- Clean the grill and its components regularly to prevent grease buildup and blockages.
- Test the gas line for leaks periodically, especially after any repairs or modifications.
- Keep a checklist of inspection dates and any maintenance performed.
- If you ever notice any irregularities, strange odors, or suspect a gas leak, turn off the gas supply and seek professional assistance immediately.
By following these safety checks and testing procedures, you can ensure a safe and reliable gas line installation for your outdoor grill. Prioritizing safety not only protects you and your loved ones but also allows you to enjoy grilling with peace of mind.
Frequently Asked Questions For How To Install Gas Line For Outdoor Grill
How Do You Hook Up A Natural Gas Line To A Grill?
To hook up a natural gas line to a grill, first, consult a professional for safety. Then, gather the necessary tools and materials. Turn off the gas supply, attach the gas hose to the grill valve, and tighten it securely.
Test for gas leaks by applying soapy water to connections. Finally, connect the grill to the gas line and make sure everything is functioning properly.
Can I Hook My Gas Grill Up To My House?
Yes, you can hook your gas grill up to your house.
What Type Of Pipe Is Used For Outdoor Gas Line?
For outdoor gas lines, the commonly used pipe is called polyethylene (PE) pipe. It is durable, flexible, and resistant to corrosion, making it suitable for various weather conditions. PE pipe is designed to safely transport natural gas and is commonly used for residential and commercial outdoor gas lines.
How Do You Hook Up A Propane Line To A Gas Grill?
To hook up a propane line to a gas grill, follow these steps:
(1) Turn off the grill and disconnect the propane tank.
(2) Connect the grill’s regulator to the propane tank.
(3) Check for leaks by applying soapy water to the connections.
(4) Once everything is secure, turn on the grill and ignite it.
(5) Enjoy cooking with your propane-powered gas grill!
Conclusion
Installing a gas line for your outdoor grill is a straightforward process that offers convenience and efficiency. By following the step-by-step guide provided in this blog post, you can successfully set up a gas line for your grill without any hassle.
Remember to prioritize safety and adhere to local regulations when undertaking this task. Soon enough, you’ll be enjoying delicious grilled delicacies in your backyard. Happy grilling!