To install a Rinnai Tankless Water Heater, follow these steps: turn off the electricity and water supply, disconnect the old water heater, mount the Rinnai unit on a wall, connect the water and gas lines, and finally, connect the electrical wiring. Now, let’s get into the details.
Are you tired of running out of hot water or dealing with bulky water heaters taking up space in your home? Look no further than the Rinnai Tankless Water Heater, a sleek and efficient solution to your hot water needs.
But how do you install it? In this guide, we will walk you through the step-by-step process of installing a Rinnai Tankless Water Heater, ensuring you have a continuous supply of hot water without the hassle. So, let’s dive in and get your Rinnai Tankless Water Heater up and running in no time.
What Is A Rinnai Tankless Water Heater?
Are you tired of running out of hot water in your home? Look no further than the Rinnai Tankless Water Heater! In this article, we will explore what a Rinnai Tankless Water Heater is and why it is the perfect solution to your hot water needs.
Brief explanation of the benefits and features of Rinnai tankless water heaters
Rinnai tankless water heaters offer a range of benefits and features that set them apart from traditional water heaters. One of the key benefits is their compact size, allowing for flexibility in installation. With their small footprint, Rinnai tankless water heaters can be installed in a variety of locations, saving you valuable space in your home.
Another major advantage of Rinnai tankless water heaters is their energy efficiency. Traditional water heaters constantly heat and store large amounts of water, resulting in standby energy loss. In contrast, Rinnai’s innovative technology heats water on demand, only when you need it. This not only reduces energy consumption but also lowers your utility bills.
Additionally, Rinnai tankless water heaters provide a continuous supply of hot water. Say goodbye to cold showers and waiting for the water to heat up again after it depletes. With a Rinnai tankless water heater, you’ll have endless hot water at your fingertips, ensuring your showers are always enjoyable and your washing machine is always ready to go.
Introduction to the concept of tankless water heaters and how they work
Tankless water heaters, also known as on-demand water heaters, operate differently from traditional water heaters. Rather than storing and constantly reheating a large amount of water, tankless water heaters heat water instantaneously as it flows through the unit.
This is achieved through a heat exchanger and a high-powered burner inside the Rinnai tankless water heater. When hot water is needed, cold water flows into the unit, where it is rapidly heated by the burner. The hot water then flows out of the unit and to your taps or appliances.
Due to their efficient design, tankless water heaters can provide hot water at a precise and consistent temperature, without the risk of running out. This is particularly beneficial for households with high water demand or larger families.
Another advantage of tankless water heaters is their longevity. With proper maintenance and usage, Rinnai tankless water heaters can have a lifespan of up to 20 years, significantly longer than traditional water heaters. This not only saves you money in the long run but also helps reduce landfill waste.
In conclusion, Rinnai tankless water heaters offer a wide range of benefits and features to enhance your hot water experience. From their compact size and energy efficiency to their endless supply of hot water and longevity, Rinnai tankless water heaters are a smart investment for any home.
Pre-Installation Considerations
Before installing your Rinnai tankless water heater, there are a few important factors to consider. These pre-installation considerations will ensure that you choose the right size and capacity, evaluate the compatibility of your existing plumbing and electrical systems, and determine the proper installation location. By addressing these aspects beforehand, you can ensure a smooth and successful installation process.
Assessing your hot water needs: determining the right size and capacity for your household
When installing a tankless water heater, it’s crucial to assess your household’s hot water needs. This will help you determine the appropriate size and capacity for your Rinnai unit. Consider factors such as the number of bathrooms, the size of your family, and the simultaneous demand for hot water.
To accurately assess your hot water needs, consider the following:
- Number of bathrooms
- Number of family members
- Frequency of hot water usage
- Peak hot water usage times
By considering these factors, you can choose a Rinnai tankless water heater that provides the right amount of hot water for your household’s specific requirements.
Evaluating the existing plumbing and electrical systems for compatibility
Prior to installation, it’s essential to evaluate your existing plumbing and electrical systems to ensure compatibility with the Rinnai tankless water heater. This evaluation will help identify any necessary adjustments or upgrades needed for a seamless installation.
Here are a few key aspects to consider:
- Water pressure: Ensure that your current water pressure meets the requirements of the Rinnai unit. Low water pressure can result in inadequate flow and affect the performance of the tankless water heater.
- Electrical capacity: Check if your electrical system can accommodate the power demands of the tankless water heater. This includes ensuring the appropriate voltage and amperage requirements are met.
- Plumbing connections: Assess the compatibility of your plumbing connections with the Rinnai unit. Adequate pipe size and proper connections are necessary for optimal performance.
If any adjustments or upgrades are needed, it’s recommended to consult a professional plumber or electrician to ensure the installation meets all the necessary requirements.
Ensuring proper installation location: indoor or outdoor, ventilation requirements, and clearance
The installation location of your Rinnai tankless water heater plays a crucial role in its efficiency and safety. Depending on your preference and specific requirements, you can choose between indoor or outdoor installation.
If you decide on an indoor installation, consider the following:
- Ventilation requirements: Proper ventilation is essential to remove any exhaust gases safely. Make sure there is adequate ventilation in the installation area, following the manufacturer’s guidelines.
- Clearance: Ensure sufficient clearance around the tankless water heater for maintenance and servicing purposes. Follow the manufacturer’s recommendations for the required clearance.
If you prefer an outdoor installation, consider the following:
- Protection from the elements: Ensure the tankless water heater is protected from direct sunlight, rain, or extreme temperatures. Choose a location that offers adequate shelter or consider installing a weatherproof cover.
- Clearance: Similar to indoor installations, provide appropriate clearance around the unit for maintenance and servicing purposes.
By addressing these considerations and adhering to the manufacturer’s guidelines, you can select the most suitable installation location for your Rinnai tankless water heater.
With these pre-installation considerations in mind, you can confidently move forward with the installation process, knowing that you have chosen the right size and capacity, evaluated the compatibility of your existing systems, and selected the proper installation location.
Gathering The Necessary Tools And Materials
Before you can begin installing your Rinnai Tankless Water Heater, it’s important to gather all the necessary tools and materials. This will ensure a smooth and efficient installation process. In this section, we will discuss the list of tools required, the materials needed, and the safety equipment essential for installation.
List of tools required for installation
Here is a list of tools you will need to have on hand for the installation:
- Pipe cutters
- Wrenches
- Drill
- Screwdriver
- Tape measure
- Level
- Adjustable pliers
Materials needed
Along with the tools, you will also need to gather the following materials for the installation of your Rinnai Tankless Water Heater:
| Pipes | Fittings | Gas connectors | Venting components |
|---|---|---|---|
| PVC or copper pipes | T-fittings, elbows, couplings | Flexible gas connectors | Proper venting pipes and accessories |
Safety equipment essential for installation
Lastly, it is crucial to prioritize safety during the installation process. Make sure to have the following safety equipment on hand:
- Gloves
- Goggles
- Mask
These safety essentials will protect you from any potential hazards and ensure a safe installation experience.
By gathering all the necessary tools and materials, as well as prioritizing safety, you are well on your way to successfully install your Rinnai Tankless Water Heater. This careful preparation will save you time and hassle, allowing you to enjoy the benefits of your new water heater as soon as possible.
Installation Process
Installing a Rinnai tankless water heater can be a straightforward process if you follow the proper steps. From shutting off the water supply and disconnecting the old water heater to mounting the new unit securely, connecting the necessary pipes and gas line, and venting the unit safely, each step plays a crucial role in ensuring a successful installation. Additionally, if an electrical connection is required, it’s important to ensure proper grounding. Read on to learn more about the step-by-step installation process.
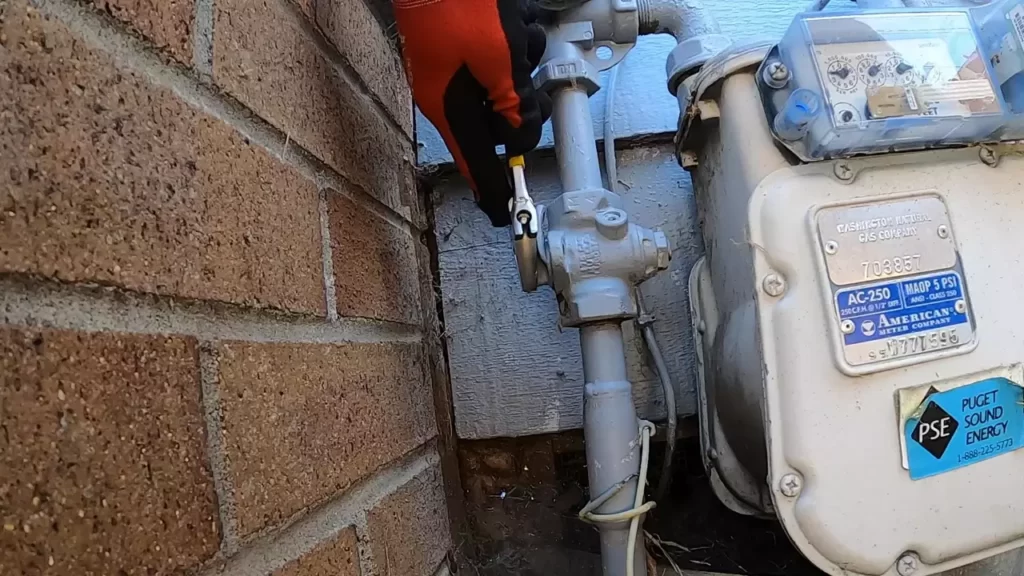
Shutting off the water supply and turning off the electricity or gas to the existing water heater
Prior to starting the installation process, it’s crucial to shut off the water supply and turn off the electrical or gas connection to the existing water heater. This can be done by locating the main water valve and turning it off. For the electrical or gas supply, refer to the specific instructions provided by your local utility company or consult a professional if necessary. Safety should always be a priority.
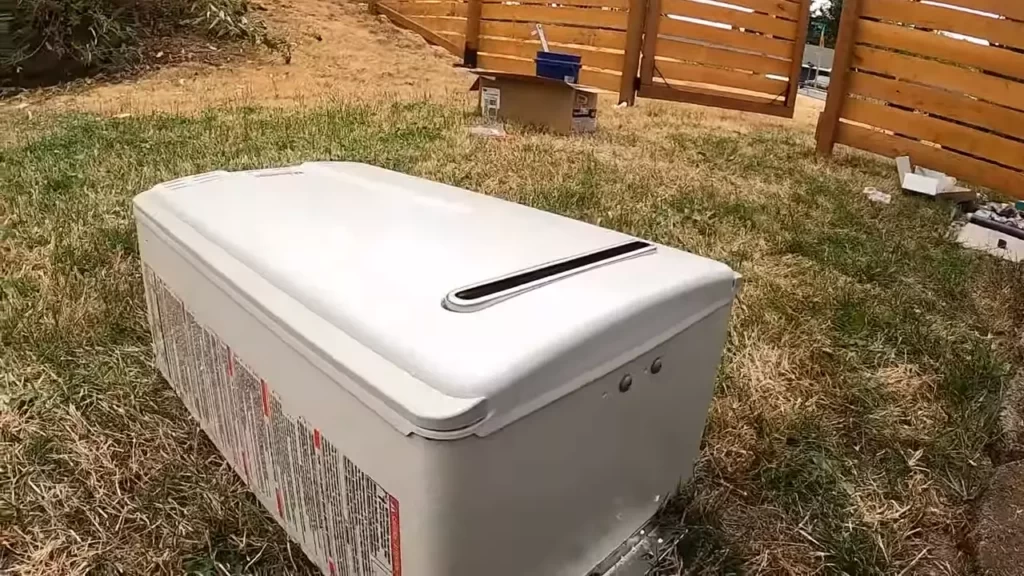
Disconnecting and removing the old water heater
Once the water supply and electricity/gas connection have been turned off, proceed to disconnect and remove the old water heater. Start by turning off any remaining electrical or gas valves and disconnecting the associated wiring or pipes. Carefully drain any remaining water from the tank and remove it from its current location. Proper disposal should be done in accordance with local regulations.
Mounting the Rinnai tankless water heater securely on the wall
After removing the old water heater, it’s time to securely mount the Rinnai tankless water heater on the wall. Locate a suitable spot for installation, ensuring that it meets the manufacturer’s recommended clearances. Mark the spots for mounting brackets or studs, and securely attach the unit using appropriate hardware. Double-check that the unit is level before proceeding to the next step.
Connecting the water pipes and ensuring proper sealing with suitable fittings
With the tankless water heater securely mounted, proceed to connect the water pipes. Ensure that the pipes are the correct size and type for your specific Rinnai model. Use suitable fittings and connectors to create a watertight seal. Apply thread sealant or plumber’s tape to avoid any leaks. Carefully tighten all connections, but avoid over-tightening as it may damage the fittings.
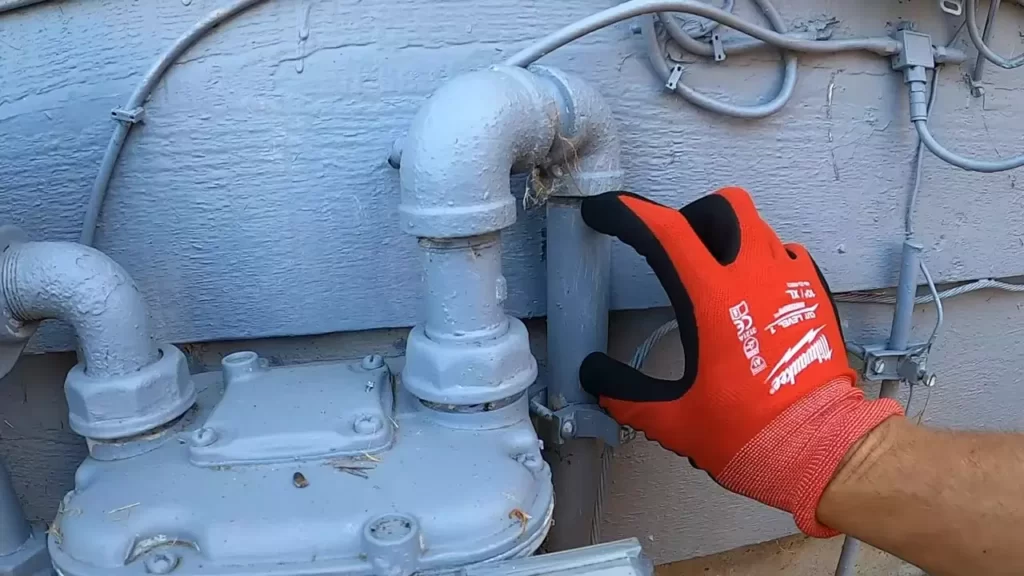
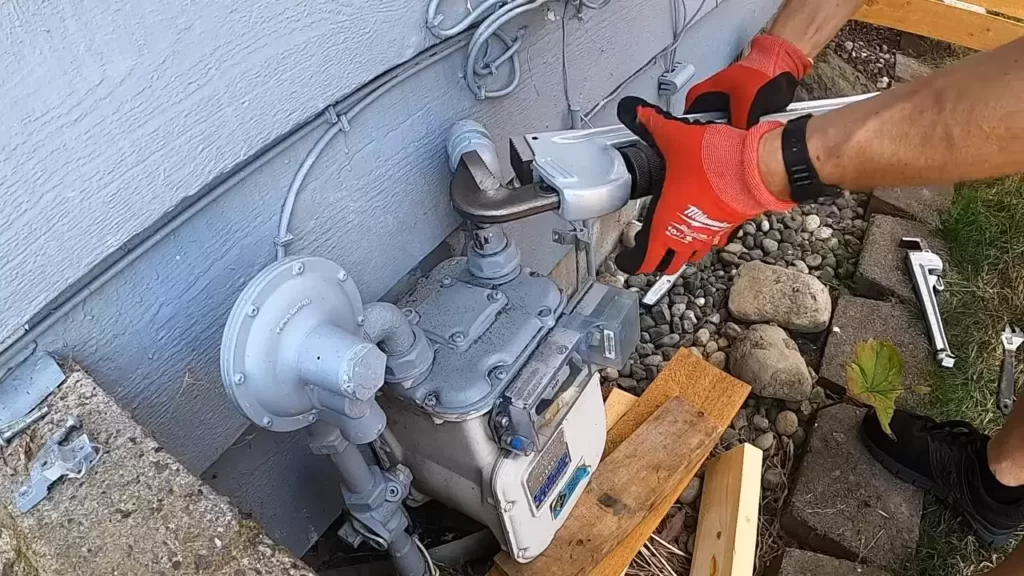
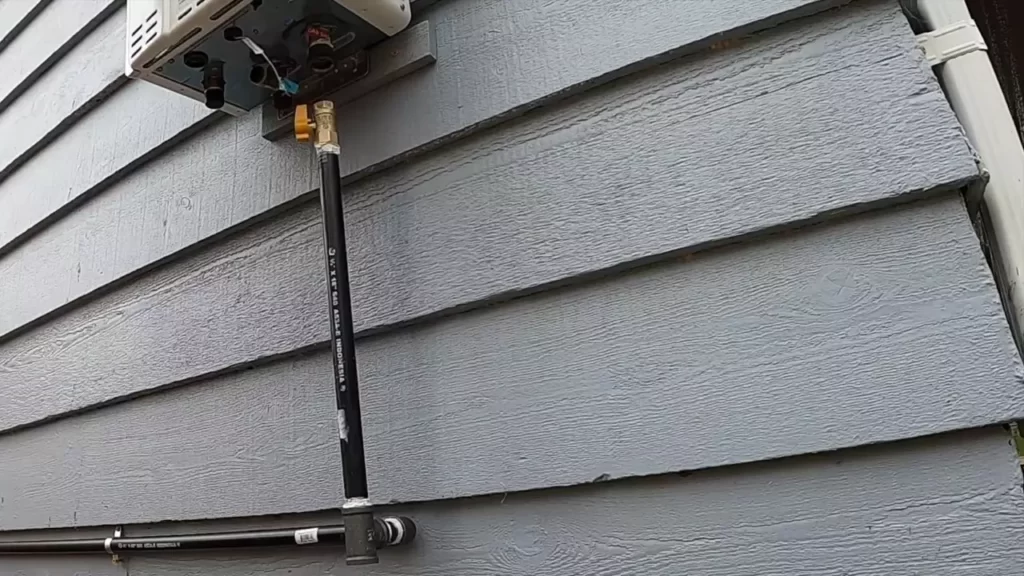
Installing the gas line and ensuring a proper connection
If your Rinnai tankless water heater requires a gas connection, you will need to install the gas line. Consult a professional if you are unsure about the proper procedures for gas line installation. Ensure that the gas line is the correct size and type, following the manufacturer’s specifications. Carefully make the necessary connections, using appropriate fittings and flaring techniques. Always perform a gas leak test before proceeding.
Venting the tankless water heater to remove exhaust gases safely
Venting is a critical step in installing a tankless water heater. Proper venting helps remove exhaust gases safely from the unit. Refer to the manufacturer’s instructions to determine the suitable venting material and configuration for your specific model. Ensure that the venting system meets all local building codes and regulations. Securely attach the venting components, double-checking for any leaks or loose connections.
Connecting the electrical supply, if necessary, and ensuring proper grounding
If your Rinnai tankless water heater requires an electrical connection, ensure proper grounding to minimize the risk of electric shock or malfunction. Consult a qualified electrician if needed. Follow the manufacturer’s instructions for connecting the electrical supply, using appropriate wiring and connectors. Ensure that the power supply matches the unit’s requirements. Double-check all connections and test the electrical supply before fully operating the heater.
Testing And Activation
Once you have completed the installation of your Rinnai tankless water heater, it is crucial to conduct a thorough inspection to ensure all connections and fittings are secure and leak-free. This step is essential to prevent any potential water damage or safety hazards in the future.
Conducting a thorough inspection to ensure all connections and fittings are secure and leak-free
Before proceeding with testing and activation, take the time to examine each connection point carefully. Check for any loose fittings, damaged seals, or signs of leakage. It is paramount to address any issues promptly to ensure the optimal performance of your tankless water heater.
Turning on the water supply and checking for any leaks
With your inspection complete and all connections confirmed to be secure, it’s time to turn on the water supply. Slowly open the main water valve to allow the water to flow into the tankless water heater system. Keep a keen eye out for any leaks or drips that may occur during this process. If you notice any, immediately turn off the water supply and address the issue before proceeding.
Activating the Rinnai tankless water heater and adjusting temperature settings
Once you have confirmed the absence of leaks, it’s time to activate your Rinnai tankless water heater. Locate the power switch or knob and turn it on. This will initiate the heating process, and you will soon start to feel the warmth. Additionally, take a moment to adjust the temperature settings to your desired level. This will ensure a comfortable and efficient flow of hot water throughout your home.
Verifying the proper operation of the water heater and checking for hot water at faucets
After activating the tankless water heater, it’s essential to verify its proper operation. Go to various faucets around your home and check for hot water. Allow each faucet to run for a few minutes to ensure a consistent flow. If you notice any issues such as lukewarm water or inconsistent temperature, consult the user manual or contact Rinnai customer support for further assistance. Ensure that you have hot water at each faucet before considering the installation complete.
Maintenance And Troubleshooting Tips
Maintaining your Rinnai Tankless Water Heater is crucial to ensure it operates efficiently and provides you with hot water whenever you need it. Additionally, understanding how to troubleshoot common issues will help you identify and resolve problems quickly, saving you time and money. In this section, we will discuss the key maintenance tasks and troubleshooting tips for your Rinnai Tankless Water Heater.
Cleaning the tankless water heater periodically to remove scale and sediment buildup
Over time, minerals and sediment can accumulate inside your tankless water heater, causing it to lose efficiency and potentially damage the unit. To prevent this, regular cleaning is necessary. Here’s a step-by-step guide on how to clean your Rinnai Tankless Water Heater:
- Turn off the water supply and gas or power to the unit.
- Locate the service valves on the hot and cold water lines.
- Close both valves to isolate the unit.
- Remove the inlet and outlet caps on the service valves.
- Connect a submersible pump or a bucket with a hose to the cold water service valve.
- Open the cold water service valve and flush the unit with vinegar or a descaling agent.
- Let the solution sit in the unit for at least 60 minutes to dissolve the scale.
- Flush the unit with clean water to remove any remaining residue.
- Reinstall the caps on the service valves.
- Open the service valves and turn on the water supply and gas or power to the unit.
By cleaning your Rinnai Tankless Water Heater periodically, you can remove scale and sediment buildup, ensuring optimal performance and prolonging the lifespan of your unit.
Flushing the system to prevent clogs and maintain optimal performance
In addition to cleaning, flushing the system regularly is essential to prevent clogs and maintain optimal performance. Flushing the tankless water heater removes any debris or particles that may accumulate in the water lines. Follow these steps to flush your Rinnai Tankless Water Heater:
- Turn off the water supply and gas or power to the unit.
- Locate the service valves on the hot and cold water lines.
- Close both valves to isolate the unit.
- Detach the hoses from the service valves.
- Connect a submersible pump or a bucket with a hose to the cold water service valve.
- Open the cold water service valve and let the water flow through the unit for several minutes.
- Repeat the process using the hot water service valve.
- Reattach the hoses to the service valves.
- Open the service valves and turn on the water supply and gas or power to the unit.
Regularly flushing your Rinnai Tankless Water Heater will help prevent clogs, maintain efficient water flow, and ensure optimal performance.
Troubleshooting common issues and potential solutions
Understanding how to troubleshoot common issues with your Rinnai Tankless Water Heater can save you from headaches and inconvenience. Here are some common problems you may encounter and their potential solutions:
| Problem | Solution |
|---|---|
| Error codes displayed on the unit | Refer to the user manual to identify the specific error code and follow the recommended steps to resolve the issue. |
| Inadequate water flow | Check for any obstructions in the water lines, such as closed valves or clogged filters. Ensure proper water pressure and volume. Clean or replace any filters if necessary. |
| No hot water | Check the gas or power supply to the unit. Make sure the ignition system is functioning correctly. If using gas, check the pilot light. If using electricity, check the circuit breaker. |
By troubleshooting common issues with your Rinnai Tankless Water Heater, you can quickly identify and resolve problems, ensuring an uninterrupted hot water supply.
Regular maintenance and troubleshooting are essential to keep your Rinnai Tankless Water Heater running smoothly. By following these tips, you can enjoy reliable hot water and avoid costly repairs. Remember to consult your user manual or contact a professional if you encounter any issues beyond your expertise.
Frequently Asked Questions On How To Install Rinnai Tankless Water Heater
How Do You Hook Up A Rinnai Tankless Water Heater?
To hook up a Rinnai tankless water heater, follow these steps:
1. Turn off the water and gas supply.
2. Connect the cold water inlet and hot water outlet pipes.
3. Attach the gas supply line to the heater.
4. Install a vent pipe to remove exhaust gases.
5. Turn on the water and gas supply. Start enjoying endless hot water!
Can I Install A Tankless Water Heater By Myself?
Yes, you can install a tankless water heater by yourself.
What Are The Electrical Requirements For A Rinnai Electric Tankless Water Heater?
The electrical requirements for a Rinnai electric tankless water heater are typically 240 volts and a dedicated circuit. It is important to consult the model’s instruction manual for specific requirements and to hire a licensed electrician for installation.
How Much Does It Cost To Install A Rinnai Heater?
The cost of installing a Rinnai heater varies depending on factors like location, type of heater, and additional work required. It’s best to get a quote from a professional installer, but generally, installation costs can range from $500 to $2,000.
Conclusion
Installing a Rinnai tankless water heater is a straightforward process that can provide numerous benefits for homeowners. With the detailed steps outlined in this guide, anyone can successfully complete the installation. By choosing a tankless water heater, you can enjoy endless hot water, energy efficiency, and space-saving convenience.
Make sure to follow the manufacturer’s instructions and safety precautions to ensure a smooth and effective installation. Upgrade your home with a Rinnai tankless water heater today and experience the wonders of on-demand hot water.