To install a split AC, start by selecting the desired location, ensuring proper spacing and electrical requirements. Next, install the indoor and outdoor units, connect the refrigerant pipes, and secure the units.
Finally, plug in the AC, test its functionality, and adjust the settings as needed. Proper installation will ensure optimum performance and longevity of the split AC. Installing a split AC can be a simple and effective way to cool your home or office.
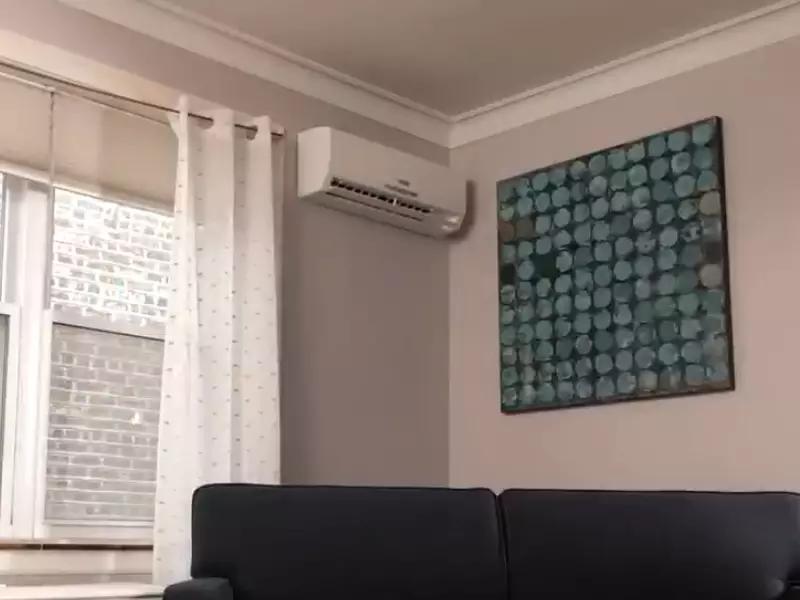
It provides efficient cooling while eliminating the need for bulky window units. However, it’s essential to ensure the correct installation process to maximize its performance and longevity. We will discuss the step-by-step process of how to install a split AC to help you stay comfortable during hot summer months. From choosing the right location to testing the unit’s functionality, we will provide a comprehensive guide to ensure a successful installation. So, let’s dive in and learn how to install a split AC properly.
Understanding The Split AC System And Components
When it comes to cooling your home or office, a split AC system can provide efficient and effective cooling. But what exactly is a split AC system? In this post, we will delve into the world of split AC systems and explore their working principle and essential components.
Explaining the working principle of Split AC systems
A split AC system operates on a simple yet ingenious working principle. It consists of two main units – an indoor unit and an outdoor unit. The outdoor unit, also known as the condenser unit, houses the compressor and the condenser coil. The indoor unit, also called the evaporator unit, consists of the evaporator coil and the blower fan.
Here’s how the split AC system works:
- The compressor in the outdoor unit pressurizes and circulates the refrigerant.
- The refrigerant, in its gaseous state, enters the condenser coil, where it releases heat and transforms into a high-pressure liquid.
- The liquid refrigerant then flows through a series of copper tubes to the indoor unit.
- In the indoor unit, the liquid refrigerant passes through the evaporator coil, where it absorbs heat from the surrounding air and evaporates into a low-pressure gas.
- The blower fan inside the indoor unit circulates the cooled air throughout the room, providing a comfortable and refreshing environment.
Understanding the essential components of a Split AC system
A split AC system consists of several essential components that work together to ensure efficient cooling:
| Component | Description |
|---|---|
| Compressor | The compressor is the heart of the split AC system. It compresses the low-pressure refrigerant gas into a high-pressure gas, increasing its temperature. |
| Condenser coil | The condenser coil is located in the outdoor unit and helps dissipate the heat absorbed from the indoor air. It facilitates the transformation of the refrigerant from a gas to a liquid state. |
| Evaporator coil | The evaporator coil is situated in the indoor unit and helps in the vaporization of the low-pressure liquid refrigerant. It absorbs the heat from the room air and cools it down. |
| Blower fan | The blower fan, located in the indoor unit, circulates the cooled air throughout the room. It ensures that the cooled air reaches every nook and corner, providing uniform cooling. |
In addition to these components, a split AC system also includes a thermostat to control the temperature, a filter to remove dust and pollutants from the air, and refrigerant lines that connect the outdoor and indoor units.
By understanding the working principle and essential components of a split AC system, you can ensure that your installation process goes smoothly. So, stay tuned for our next post on how to install a split AC system!
Room Selection And Preparation
Factors to consider when choosing the appropriate room for installation
When installing a split AC, selecting the right room plays a crucial role in ensuring optimum cooling efficiency. Certain factors need to be considered before finalizing the room for installation.
Room size and layout
The size and layout of the room should be carefully assessed to determine if it is suitable for the installation of a split AC. Consider the following:
- The AC’s cooling capacity should match the room’s dimensions. A smaller AC installed in a large room may struggle to cool the space effectively, while an oversized unit in a small room may lead to excessive energy consumption.
- Observe the room’s layout and arrangement of furniture. Ensure that the AC unit can be installed in a location where it can provide unhindered air circulation throughout the room.
Exposure to sunlight and heat sources
The room’s exposure to sunlight and heat sources can impact the cooling efficiency of the split AC. Consider the following:
- South and west-facing rooms tend to absorb more sunlight and heat, making them warmer. Installing a split AC in such rooms can offset the heat and maintain a comfortable temperature.
- Avoid rooms where heat-generating appliances or equipment are present, such as a kitchen or laundry room, as they can interfere with the AC’s performance. High temperatures in these areas may also result in higher energy consumption.
Accessibility and electrical requirements
Before finalizing the room selection, it is essential to consider the accessibility and electrical requirements for the split AC installation. Take note of the following:
- Ensure easy accessibility to the outdoor unit for maintenance and repair purposes.
- Check if the room has sufficient electrical capacity to support the AC unit. Verify if there are adequate power outlets and if the circuit can handle the AC’s power requirements without overloading.
Tips for preparing the selected room before installing a Split AC
Once you have chosen the appropriate room, it is important to prepare it adequately to facilitate a smooth installation process and optimize the AC’s performance. Consider the following tips:
Clear the area
Ensure that the room is free from any obstacles and clutter that may impede the installation process. Move furniture, decorations, and other items to create ample space for the indoor and outdoor units.
Clean the room
Prior to installation, thoroughly clean the room to eliminate dust, debris, and any potential pollutants. This ensures better air quality and prevents the accumulation of dirt on the AC unit’s filters, improving its efficiency and lifespan.
Provide proper insulation
Apply proper insulation measures to enhance the AC’s cooling performance and energy efficiency. Insulate the room’s windows with blinds, curtains, or shades to reduce heat gain from outside sources. Seal any gaps or cracks in the walls or windows to prevent air leakage.
Ensure proper electrical wiring
Hire a professional electrician to assess and ensure that the room’s electrical system meets the necessary requirements for the split AC installation. This includes verifying the capacity of the circuit breaker, correct wire gauge, and grounding.
By considering these factors and following the tips mentioned above, you can select the appropriate room and prepare it adequately for installing a split AC. These steps will contribute to optimal cooling performance, energy efficiency, and a comfortable living environment.
Necessary Tools And Materials
Listing the tools and materials required for Split AC installation
When it comes to installing a split AC, having the necessary tools and materials on hand is essential. By gathering and organizing everything beforehand, you can ensure a smooth and hassle-free installation process. Let’s take a look at the tools and materials you’ll need:
Tools:
- Drill: A power drill will be required to create holes in the walls for mounting the indoor and outdoor units.
- Screwdriver: Both flathead and Phillips screwdrivers will be needed for various parts of the installation, such as securing the brackets and electrical connections.
- Tape Measure: To accurately measure the distance between the indoor and outdoor units, as well as for positioning the brackets.
- Level: A level tool will help ensure that the brackets and units are aligned correctly.
- Pliers: Pliers will aid in bending and tightening wire connections.
- Wire Stripper: This tool will enable you to safely remove the outer insulation from electrical wires.
- Crimping Tool: A crimping tool is necessary for securely connecting electrical wires.
- Knife: A sharp knife will be required for cutting holes in the walls and removing excess tubing.
- Gloves and Safety Glasses: To ensure your safety during the installation process, it is important to wear protective gloves and safety glasses.
Materials:
- Split Air Conditioner System: This includes both the indoor and outdoor units, as well as the necessary piping and tubing.
- Mounting Brackets: Brackets are used to secure the indoor unit to the wall.
- Pipe Insulation: Insulation is necessary to prevent condensation and maintain optimal cooling efficiency.
- Electrical Wires: These will be needed for connecting the indoor and outdoor units to the power supply.
- Cable Ties: Cable ties help secure the electrical and tubing connections, keeping them organized and neat.
- Electrical Tape: To insulate electrical connections and ensure safety.
- Wall Sleeve: The wall sleeve provides protection and support for the tubing running between the indoor and outdoor units.
- Condensation Drain Line: A drain line is required to remove condensation accumulated during operation.
- Sealant: Sealant will be used to seal any gaps or openings around the units or piping, ensuring proper insulation.
By gathering these tools and materials ahead of time and organizing them effectively, you’ll be well-prepared to install your split AC system efficiently and effectively.
Measuring And Marking
Explaining the importance of accurate measuring and marking before installing a Split AC
Accurate measuring and marking are crucial steps to ensure the successful installation of a split AC unit. By measuring and marking precisely, you can optimize the placement of your AC, which in turn ensures efficient cooling and energy utilization. Taking accurate measurements and marking the positions will make the installation process much smoother, eliminating the need for adjustments later on. In this section, we will guide you through the step-by-step process of measuring and marking for the optimal placement of your split AC.
Step-by-step instructions on measuring and marking for optimal placement
1. Identify the installation location
Before you start measuring and marking, carefully choose the location for your split AC. Ideally, it should be a wall that can support the weight of the unit and provide ample space for proper air circulation. Ensure that there are no obstructions such as furniture or curtains that can impede the airflow. Once you have selected the location, proceed to the next step.
2. Measure the distance from the floor
Using a tape measure, measure the distance from the floor to the desired height of your split AC unit. This measurement will help you determine the position of the mounting bracket. Make sure to consider any architectural features like baseboards or windowsills that might affect the placement. Note down the measurement for reference in the next step.
3. Mark the centerline
Based on the height measurement from the previous step, use a pencil or marker to mark the centerline on the wall. This line will serve as a reference point for the installation process and help you align the mounting bracket accurately. It is best to mark the centerline vertically from the floor to the desired height.
4. Measure the distance from the wall
To ensure proper clearance and optimal air circulation, measure the distance from the wall to the location where the split AC unit will be installed. This measurement will help you determine the required space for the condenser unit. Mark this distance on both sides of the centerline to indicate the outer edges of the AC unit placement.
5. Mark the mounting bracket positions
Based on the distance measurement from the previous step, mark the positions for the mounting brackets on the wall. These brackets will hold the indoor unit in place. Ensure that the brackets are level and at an appropriate distance from the centerline. Mark the screw holes and pre-drill them if necessary.
6. Mark the condenser unit position
Considering the distance from the wall determined earlier, mark the position where the condenser unit will be placed. This unit should be outside the building and should have ample space for proper airflow. Ensure that there are no obstructions in the marked area.
By adhering to these step-by-step instructions for measuring and marking, you can ensure optimal placement for your split AC unit. Remember, accuracy is key to achieving efficient cooling and minimizing any installation issues. Once you have completed these measurements and markings, you are ready to move on to the next phase of installing your split AC.
Drilling And Mounting
Drilling and mounting are crucial steps in the installation process of a split AC. Properly drilling holes in the wall and securely mounting the indoor and outdoor units ensures the AC operates efficiently and effectively. In this section, we will provide step-by-step instructions for drilling holes and installing the mounting plate, ensuring the proper installation of your split AC.
Guidelines for drilling holes in the wall
When drilling holes in the wall for your split AC, it’s essential to follow specific guidelines to ensure proper installation. Here’s a step-by-step guide to help you:
Step 1: Determine the optimal location
Begin by deciding the best location for your AC unit. Keep in mind factors such as the size of the room, placement of furniture, and availability of space on the wall. It’s crucial to choose a location that allows for efficient cooling and easy maintenance.
Step 2: Mark the spot for drilling
Once you have determined the ideal location, use a level and measuring tape to mark the exact spot where the holes need to be drilled. Ensure the markings are accurate to avoid any issues during the mounting process.
Step 3: Choose the right drill bit
Selecting the right drill bit is essential for successful drilling. Use a masonry drill bit suitable for the type of wall you have, whether it’s concrete, brick, or drywall. This will ensure a clean and precise hole.
Step 4: Drill the holes
With the appropriate drill bit and safety gear in place, carefully drill the holes at the marked spots on the wall. Use firm yet gentle pressure, and avoid applying excessive force that might cause damage.
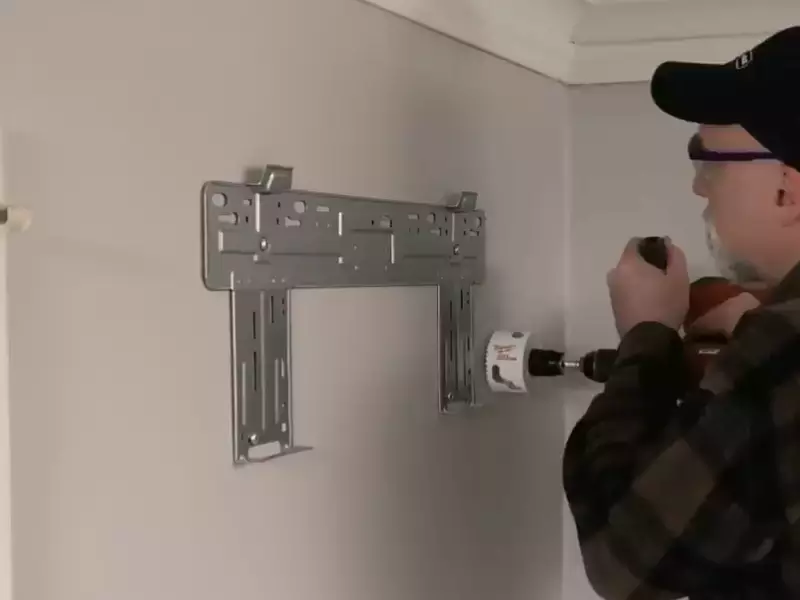
Proper installation of the mounting plate
The mounting plate plays a vital role in securing the indoor unit of the split AC. Follow the steps below to install it correctly:
Step 1: Measure and mark
Measure and mark the position of the mounting plate on the wall. Use a level to ensure it is perfectly horizontal, as a properly leveled mounting plate is crucial for the seamless installation of the indoor unit.
Step 2: Drill pilot holes
Using the appropriate drill bit, create pilot holes at the marked spots for the mounting plate. These pilot holes will act as guides for securing the mounting plate firmly to the wall.
Step 3: Attach the mounting plate
Using screws and a screwdriver, attach the mounting plate to the wall through the pilot holes. Ensure it is securely fastened, providing a sturdy base for the indoor unit.
Step 4: Verify stability
Once the mounting plate is installed, double-check its stability. Gently tug on it to ensure there is no wobbling or movement. If necessary, adjust and tighten the screws to ensure a secure fit.
By following these guidelines for drilling holes in the wall and properly installing the mounting plate, you can ensure a smooth and secure installation process for your split AC. Following these steps will not only help maximize the AC’s performance but also contribute to its longevity and efficiency.
Electrical Connections
Understanding the Electrical Requirements for Split AC Installation
Installing a split AC involves various steps, and one of the critical aspects is making the electrical connections. Understanding the electrical requirements for split AC installation is crucial to ensure a safe and efficient setup. In this section, we will walk you through the step-by-step instructions for making electrical connections, enabling you to complete the installation successfully. Let’s dive in!
Step-by-Step Instructions on Making Electrical Connections Safely and Efficiently
Before you start making the electrical connections, it is essential to ensure that you have the necessary tools and materials, including electrical wires, connectors, a screwdriver, electrical tape, and a junction box. Once you have everything ready, follow these steps:
- Switch off the main power supply: Your safety is of utmost importance. Before you begin any electrical work, switch off the main power supply to prevent any potential accidents.
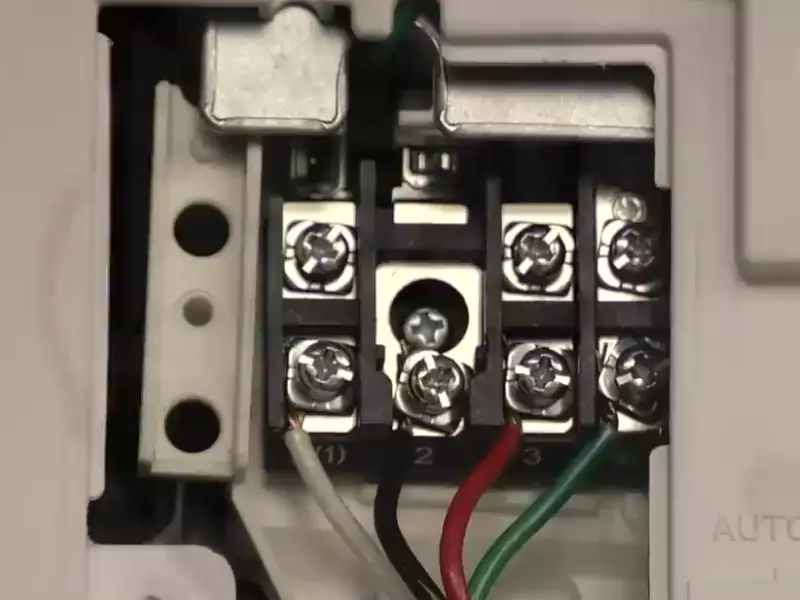
- Identify the electrical wire connections: The split AC unit typically has three different wires – a live wire (also known as the line wire), a neutral wire, and an earth wire. These wires may have different colors, such as red, black, blue, brown, or green.
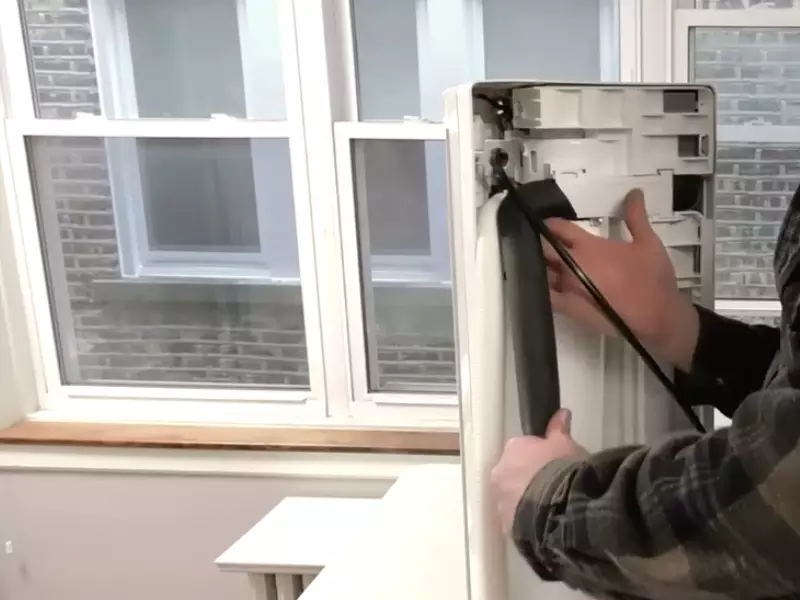
- Make the electrical connections in the indoor unit: Start by opening the indoor unit’s front cover. Locate the terminal block, which is usually situated near the indoor unit’s control board.
- Connect the live wire to the terminal block: Strip the insulation from the live wire, and connect it securely to the corresponding terminal block. Ensure that the connection is tight and secure using a screwdriver.
- Connect the neutral wire to the terminal block: Strip the insulation from the neutral wire and connect it to the appropriate terminal block. Just like the live wire, make sure the connection is tight.
- Connect the earth wire to the terminal block: Strip the insulation from the earth wire and connect it to the designated terminal block. This step ensures the grounding of the split AC unit, providing protection against electrical faults.
- Secure the connections: Once all the wires are correctly connected, use electrical tape to secure the wires and prevent them from accidentally coming loose.
- Test the connections: After securing the connections, switch on the main power supply and test the functionality of the split AC unit. Check if the indoor and outdoor units are working correctly, and there are no electrical issues.
- Cover the terminal block: Once you have verified that the connections are working correctly, close the front cover of the indoor unit, ensuring that the terminal block is adequately covered.
By following these step-by-step instructions, you can make electrical connections safely and efficiently during the installation of a split AC unit. Remember to prioritize your safety, double-check your connections, and consult a professional if you are unsure of any aspect of the process. With proper installation, your split AC will provide efficient cooling and a comfortable environment for years to come.
Refrigerant Charging And Pipe Insulation
Refrigerant charging and pipe insulation are two crucial aspects of installing a split AC. Proper refrigerant charging ensures the system operates efficiently, while pipe insulation helps maintain optimal performance. In this section, we will explain the process of refrigerant charging and its importance in split AC installation. Additionally, we will provide instructions for proper pipe insulation to ensure the best possible performance.
Explaining the process of refrigerant charging and its importance in Split AC installation
Refrigerant charging is the process of adding or removing refrigerant from the split AC system. It is crucial to ensure the refrigerant levels are correct for the system to operate efficiently. Proper refrigerant charging helps optimize cooling performance and energy efficiency. Inadequate refrigerant levels can lead to reduced cooling capacity and increased energy consumption.
The process of refrigerant charging involves the following steps:
- Step 1: Determine the specifications: Before charging the refrigerant, it is important to refer to the manufacturer’s specifications. These specifications will provide guidelines on the type and amount of refrigerant required for the particular split AC model.
- Step 2: Prepare the charging equipment: To charge the refrigerant, you will need a charging hose, a manifold gauge set, and a refrigerant canister. Ensure that the equipment is clean and in good working condition.
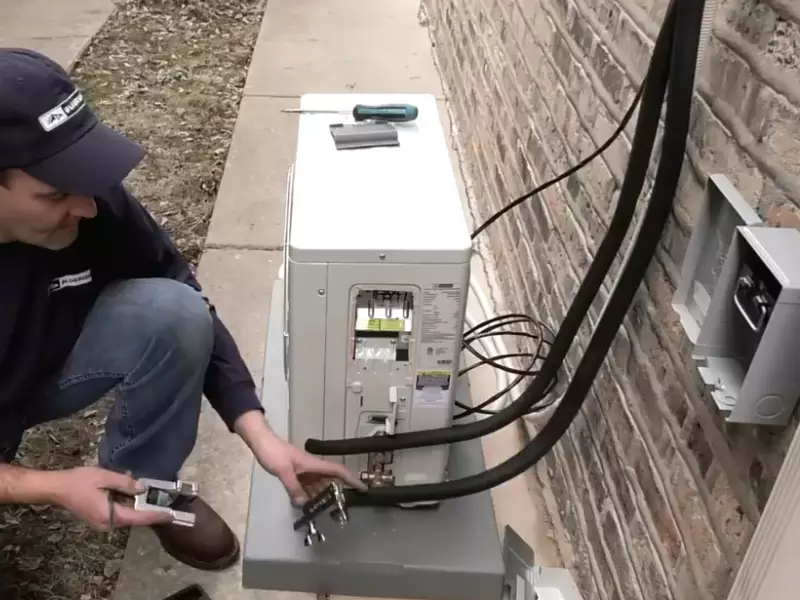
- Step 3: Connect the equipment: Connect the manifold gauge set to the service ports on the indoor and outdoor units of the split AC. Make sure the connections are secure to prevent any leaks.
- Step 4: Evacuate the system: Before charging the refrigerant, it is necessary to evacuate the system. This removes any air or moisture that may be present in the system, which can affect its performance. Use a vacuum pump to pull a vacuum on the system for a specified period, as per the manufacturer’s instructions.
- Step 5: Charge the refrigerant: Once the system is evacuated, it is time to charge the refrigerant. Attach the charging hose to the refrigerant canister, and slowly open the valve to allow the refrigerant to flow into the system. Monitor the pressure readings on the manifold gauge set and adjust the refrigerant flow as necessary to achieve the recommended pressure.
- Step 6: Check for leaks and seal: After charging the refrigerant, it is crucial to check for any leaks in the system. Use a leak detection tool or a soap solution to detect any leaks. If leaks are found, they should be sealed properly to prevent any refrigerant loss.
Proper refrigerant charging is vital for the efficient operation of a split AC. It ensures optimal cooling performance, energy efficiency, and extends the lifespan of the system. It is recommended to have a professional HVAC technician perform the refrigerant charging process to ensure accuracy and safety.
Instructions for proper pipe insulation to ensure optimal performance
Pipe insulation is essential in split AC installation to prevent heat transfer and maintain optimal performance of the system. Insulating the refrigerant pipes helps to minimize heat gain or loss during the refrigerant flow, ensuring efficient cooling and heating.
Here are the instructions for proper pipe insulation:
- Select the right insulation material: Choose an insulation material that is suitable for the split AC refrigerant pipes. Commonly used insulation materials include foam rubber, polyethylene foam, or elastomeric foam, which provide insulation and protect the pipes from external elements.
- Measure and cut the insulation: Measure the length of the refrigerant pipes that require insulation and cut the foam insulation material accordingly. Ensure that the insulation covers the entire length of the pipes for effective heat insulation.
- Fit the insulation: Carefully wrap the insulation material around the refrigerant pipes, ensuring a snug fit. Secure the insulation with adhesive tape or zip ties to prevent it from slipping or coming off.
- Seal the joints: To prevent any air leakage, it is crucial to seal the joints of the insulation where the ends meet. This can be done using insulation tape or mastic, ensuring a tight seal.
- Protective covering: If required, install a protective covering over the insulation to safeguard it from external damage or UV exposure.
Proper pipe insulation plays a significant role in maintaining the efficiency and performance of the split AC system. It helps reduce energy loss, prevents condensation, and increases the overall effectiveness of the cooling and heating process. By following the instructions mentioned above, you can ensure optimal pipe insulation for your split AC installation.
Testing And Finalizing The Installation
Testing and finalizing the installation of a split AC is a crucial step to ensure that the system is functioning optimally and ready for use. In this section, we will discuss some essential tips for conducting necessary tests and the final steps to complete the installation.
Tips for conducting necessary tests to ensure the Split AC is functioning properly
Before finalizing the installation of your split AC, it is important to conduct a series of tests to ensure that the system is functioning properly. These tests will help you identify any issues or malfunctions that might need attention.
Here are some essential tips to help you conduct these tests:
- Check the electrical connections: Ensure that all electrical connections are secure and properly connected. Any loose or faulty connections can cause the AC system to malfunction.
- Verify the refrigerant levels: Check the refrigerant levels in the system using a pressure gauge. Optimal refrigerant levels are vital for efficient cooling. If the levels are low, it might indicate a leak that needs to be addressed.
- Inspect the condensate drain: Make sure the condensate drain is clear of any blockages. A blocked condensate drain can lead to water leakage and damage to the system.
- Test the thermostat: Test the thermostat to ensure that it is able to accurately control the temperature. Make adjustments if necessary and check that the AC responds accordingly.
- Run a performance test: Let the AC run for a while and monitor its cooling performance. Ensure that the air coming out from the vents is cool and consistent. If you notice any fluctuations or inadequate cooling, it might be a sign of a problem with the compressor or the airflow.
Final steps to complete the installation and make the system ready for use
Once you have conducted all the necessary tests and ensured that the split AC system is functioning properly, it’s time to finalize the installation and make the system ready for use. These final steps will ensure that the AC is properly installed and will provide efficient cooling for your space.
Here are the final steps:
- Secure the AC unit: Ensure that the AC unit is securely mounted on the wall, as per the manufacturer’s instructions. This will prevent any vibrations or movements that can lead to damage or reduced performance.
- Seal air leaks: Check for any air leaks around the unit and seal them properly. Air leaks can affect the efficiency of the AC system and lead to energy wastage.
- Clean and tidy up the installation area: Remove any debris or leftover materials from the installation area. A clean installation area not only improves the aesthetics but also reduces the risk of potential damage to the AC system.
- Program the AC settings: Set the desired temperature and other settings on the AC unit or remote control as per your comfort preferences. This will help you achieve the desired cooling effect efficiently.
- Double-check all connections: Before turning on the AC, double-check all the connections, including electrical and refrigerant lines, to ensure that everything is properly secured and tight.
- Test the AC operation: Finally, turn on the AC and verify its operation. Check for any abnormal noises, vibrations, or other signs of malfunctions. If everything appears normal, congratulations! Your split AC installation is now complete and ready for use.
By following these tips and completing the final steps, you can ensure that your split AC is installed correctly and functioning optimally, providing you with efficient cooling for years to come.
Low Cooling Or Inadequate Airflow
Possible causes and solutions for low cooling or insufficient airflow in the Split AC system
If you’ve noticed that your Split AC is not cooling properly or if you’re experiencing inadequate airflow, there could be a few possible causes. Understanding these causes and finding appropriate solutions can help you resolve the issue and enjoy the optimal performance of your AC system.
Possible Causes
- Dirty Air Filters: One of the most common reasons for low cooling or insufficient airflow is dirty air filters. Over time, dust, dirt, and debris can accumulate on the filters, restricting the airflow and reducing the cooling efficiency of your AC.
- Obstructed Condenser Unit: The outdoor condenser unit of your Split AC should be clear of any obstructions such as plants, trash, or debris. If your condenser unit is obstructed, it can restrict the airflow, causing low cooling and inadequate airflow.
- Faulty Fan Motor or Capacitor: A malfunctioning fan motor or capacitor can lead to low airflow in your Split AC system. The fan is responsible for circulating cooled air throughout the room, so any issues with the fan motor or capacitor can hinder its performance.
- Clogged Evaporator Coils: Over time, the evaporator coils in your Split AC can accumulate dirt, dust, and other contaminants, leading to reduced airflow and poor cooling. Clogged evaporator coils can affect the heat exchange process, negatively impacting the cooling efficiency of your AC.
Possible Solutions
- Regularly Clean or Replace Air Filters: To maintain proper airflow and cooling, it’s important to clean or replace your air filters regularly. Check your AC manufacturer’s recommendations for the frequency of cleaning or replacing the filters, and make it a routine maintenance task.
- Keep Condenser Unit Clear: Ensure that the outdoor condenser unit of your Split AC system is free from any obstructions. Regularly remove any debris, plants, or trash that may accumulate around the unit, allowing proper airflow for efficient cooling.
- Inspect and Service Fan Motor and Capacitor: If you suspect a faulty fan motor or capacitor, it is best to call a professional technician to inspect and service the components. They can diagnose the issue and either repair or replace the defective parts, restoring proper airflow in your AC system.
- Schedule Professional Evaporator Coil Cleaning: To remove any stubborn dirt or debris from the evaporator coils, it is recommended to schedule a professional cleaning service. Professional technicians have the expertise and tools to clean the evaporator coils effectively, ensuring optimal airflow and cooling performance.
By addressing these possible causes and implementing the appropriate solutions, you can overcome low cooling or inadequate airflow issues in your Split AC system. Regular maintenance and professional servicing will help keep your AC running smoothly, providing you with a cool and comfortable environment.
Water Leakage
Identifying the Reasons behind Water Leakage during or after Split AC Installation
Water leakage is a common issue that many people experience after installing a split AC. If you notice water dripping from your AC unit, it is essential to identify the cause and take the necessary steps to resolve the problem. Failing to address the issue promptly can lead to further damage to your AC system and result in costly repairs.
There are several factors that can contribute to water leakage. Here are some common reasons:
- Blocked Drainage: One of the main culprits behind water leakage is a blocked drainage system. Over time, debris such as dirt, dust, and algae can accumulate in the drainage pipe, causing a clog. This obstructs the flow of water, resulting in water buildup and leakage.
- Improper Installation: If your split AC is installed incorrectly, it can lead to water leakage. Improper installation can cause a misalignment of the components, including the drain pan and drainage pipe. This misalignment can disrupt the proper flow of condensate water and cause it to leak.
- Faulty Condensate Pump: In some cases, water leakage can be attributed to a faulty condensate pump. The condensate pump is responsible for pumping out water from the AC unit. If the pump malfunctions or stops working altogether, water can accumulate and leak from the AC system.
- Dirty Air Filters: Another cause of water leakage is dirty air filters. When the air filters are clogged with dust and debris, they restrict the airflow, resulting in a drop in temperature. This drop in temperature causes excess condensation, which can then lead to water leakage.
Step-by-Step Troubleshooting Guide to Fix Water Leakage Issues
If you’re facing water leakage problems with your split AC, don’t worry. Here’s a step-by-step troubleshooting guide to help you fix the issue:
- Switch Off the AC: Start by turning off the AC unit and disconnecting it from the power source. Safety should always be the top priority when dealing with any electrical appliance.
- Clean or Replace Air Filters: Check the air filters for dirt and debris. If they are dirty, clean or replace them as necessary. This will help improve the airflow and prevent excess condensation.
- Check the Drainage System: Inspect the drainage pipe for any blockages. If you find any debris, use a pipe cleaner or a small brush to clear the clog. Ensure that the drain pan is properly aligned with the drainage pipe.
- Inspect the Condensate Pump: If your AC has a condensate pump, check if it is working correctly. Remove any accumulated dirt or debris and test the pump to ensure it is functioning properly. If the pump is faulty, consider getting it replaced by a professional.
- Remove Excess Water: If water has accumulated inside the AC unit, use a wet-dry vacuum or towels to remove the excess water. It is crucial to remove the water to prevent further damage to the AC system.
- Seek Professional Help: If the troubleshooting steps mentioned above do not resolve the water leakage issue, it is recommended to seek professional help. An experienced technician will be able to diagnose the problem accurately and provide the necessary repairs or replacements.
By following these troubleshooting steps, you can effectively address water leakage issues in your split AC. Remember to schedule regular maintenance for your AC system to prevent future complications. Taking proactive measures will not only extend the lifespan of your AC unit but also ensure efficient cooling during hot summer months.

Noisy Operation
Providing solutions to address noise-related problems in a Split AC system
Noisy operation can be a common problem with split air conditioning (AC) systems. Not only can it be annoying, but it can also disrupt your daily activities and degrade the overall comfort of your living space. In this section, we will discuss some practical solutions to help you eliminate or minimize the noise produced by your split AC system.
Inspecting the outdoor unit
One of the major sources of noise in a split AC system is the outdoor unit. It houses the compressor and condenser fan, both of which can generate considerable noise. To address this issue, it’s essential to inspect the outdoor unit and check for any loose parts or components. Ensure that all screws and bolts are tightened properly. If you notice any damaged or worn-out parts, consider replacing them to reduce the noise levels significantly.
Installing vibration pads
Vibrations can also contribute to the noise produced by a split AC system. By installing vibration pads, you can effectively dampen the vibrations and minimize noise transmission. These pads act as shock absorbers and isolate the unit from the mounting surface. Simply place the vibration pads beneath the outdoor unit, ensuring that it is leveled properly. This will help reduce the noise caused by vibrations and create a quieter environment.
Soundproofing the AC enclosure
If the noise persists even after inspecting and optimizing the outdoor unit, you can consider soundproofing the AC enclosure. Soundproofing materials, such as mass-loaded vinyl or foam panels, can be applied to the walls of the enclosure to absorb and reduce noise. Additionally, adding insulation to the enclosure can help improve sound insulation. Be sure to follow the manufacturer’s guidelines and consult a professional if necessary when soundproofing your AC enclosure.
Regular maintenance
Regular maintenance is crucial for keeping your split AC system in optimal condition and minimizing noise-related problems. Ensure that you schedule regular inspections by a qualified technician who can clean and lubricate the components, such as the fans and motor, to prevent excessive noise. Additionally, check and clean the air filters regularly, as dirty filters can restrict airflow and lead to increased noise levels. Don’t overlook the importance of maintenance to maintain a quieter and more efficient split AC system.
By implementing these solutions and practicing regular maintenance, you can address and resolve noise-related problems in your split AC system. Remember, a quieter AC system not only enhances your comfort but also adds value to your overall living environment. Stay cool, calm, and quiet with a well-functioning and noise-free split AC system.
Electrical Problems And Safety Measures
When it comes to installing a split AC, it is essential to be aware of the electrical problems that may arise during the process. Dealing with electrical components requires caution and certain safety measures in order to avoid any mishaps. In this section, we will discuss the common electrical issues that can occur during split AC installation and the safety measures you need to follow to ensure a smooth and safe installation process.
Common electrical issues that may occur during Split AC installation
- Faulty wiring: One of the most common electrical issues during split AC installation is faulty wiring. This can lead to several problems such as tripping of circuits, short circuits, or even damage to the unit. It is important to carefully check the wiring connections and ensure that they are properly connected and secured. Any loose connections should be tightened, and damaged wires should be replaced promptly to prevent any electrical hazards.
- Inadequate power supply: Another common issue is an inadequate power supply. Split AC units require a dedicated electrical circuit with sufficient power to function effectively. Insufficient power supply can result in the unit not cooling properly or even not running at all. It is crucial to ensure that the power supply meets the requirements specified by the manufacturer. If needed, consult an electrician to install the appropriate electrical circuit for your split AC.
- Incorrect voltage: Split AC units operate on specific voltage requirements. If the voltage supplied to the unit is too high or too low, it can cause damage to the compressor or other electrical components. It is important to check the voltage requirements specified by the manufacturer and ensure that the voltage supplied is within the acceptable range. Using a voltage stabilizer can help regulate the voltage and protect the split AC from any potential damage.
- Grounding issues: Proper grounding is crucial for the safe installation and operation of a split AC unit. Inadequate or faulty grounding can lead to electrical shocks, equipment damage, or even fires. It is essential to ensure that the unit is grounded properly by connecting it to a grounding rod or an existing grounding system. Checking the grounding connection and verifying its effectiveness is necessary to avoid any grounding-related electrical problems.
- Insufficient ventilation for electrical components: Split AC units have various electrical components that generate heat during operation. It is important to provide adequate ventilation to prevent overheating of these components. Lack of ventilation can result in overheating, which may lead to electrical failures or other issues. Ensure that the unit is installed in a well-ventilated area and that there are no obstructions blocking the airflow around the electrical components.
Safety measures and precautions to follow when dealing with electrical problems
Dealing with electrical problems during split AC installation requires adherence to certain safety measures and precautions to ensure the safety of both the installer and the unit. Here are some guidelines to follow:
- Switch off the power supply: Before starting any work on the split AC unit, ensure that the power supply is switched off. This will prevent any electrical shocks or accidents during the installation process. Only work on the unit when you are confident that there is no power supply.
- Wear protective gear: When dealing with electrical components, it is important to wear appropriate protective gear such as insulated gloves and goggles. This will provide protection against any potential electrical hazards and ensure your safety while working on the unit.
- Use proper tools: Use only appropriate and well-maintained tools for handling electrical components. Using damaged or incorrect tools can lead to accidents or damage to the unit. Follow the manufacturer’s instructions or consult an electrician if you are unsure about the tools required for the installation process.
- Secure connections: Double-check all electrical connections to ensure they are properly secured. Loose connections can lead to electrical failures or hazards. If necessary, use appropriate connectors or terminal blocks to ensure a secure connection.
- Avoid water contact: Water and electricity do not mix well. Keep the installation area dry and avoid any water contact with electrical components. This includes limiting moisture exposure during the installation process and ensuring that there are no water leaks near the unit.
- Consult a professional if needed: If you encounter any complex electrical problems or are unsure about any aspect of the installation process, it is always advisable to seek the help of a professional electrician. They have the expertise and knowledge to handle electrical issues safely and efficiently.
By being aware of common electrical issues and following the necessary safety measures, you can ensure a smooth and safe installation process for your split AC unit.
Frequently Asked Questions Of How To Install A Split Ac
Can I Install A Split AC unit Myself?
No, it is not recommended to install a split AC unit yourself. It requires technical knowledge and could lead to improper installation and potential damage. It is best to hire a professional to ensure proper installation and avoid any future complications.
Is It Difficult To Install Split AC?
Installing a split AC is not difficult. It can be easily done by a professional technician. The process involves selecting the right location, fixing the indoor and outdoor unit, connecting the pipes and cables, and testing the AC for proper functioning.
How Much Does It Cost To Install An AC Split?
The cost of installing an AC split varies depending on factors like brand, size, location, and installation complexity. On average, installation costs range from $1,500 to $3,000. It’s best to consult an HVAC professional for an accurate estimate based on your specific needs.
Does Split Ac Need a Hole In Wall?
Yes, a split AC requires a hole in the wall for the installation of the outdoor unit. The hole allows for the passage of refrigerant pipes, electrical wiring, and drainage hoses that connect the indoor and outdoor units.
Conclusion
To summarize, installing a split AC can be a straightforward process with the right knowledge and guidance. By following the step-by-step instructions provided in this blog post, you can ensure a successful installation and enjoy the comfort of your air conditioner in no time.
Remember to prioritize safety, seek professional assistance if needed, and regularly maintain your AC for optimal performance. Stay cool and enjoy the benefits of your newly installed split AC!