To install a portable AC, first, choose a suitable location near a window. Next, place the exhaust hose through the window and secure it tightly.
Factors To Consider When Selecting A Location
Installing a portable air conditioner is a great way to beat the summer heat and stay comfortable indoors. However, if you want to maximize the efficiency and effectiveness of your unit, it’s important to choose the right location for installation. Here are two key factors to consider when selecting a location for your portable AC:
Room size and layout
The first factor to consider is the size and layout of the room where you plan to install your portable AC. This will help determine the cooling capacity you need. Portable AC units come in different sizes and models, each designed to cool a specific area. To ensure that your unit can effectively cool your space, measure the room’s dimensions and refer to the manufacturer’s guidelines regarding recommended cooling capacities. A larger room may require a higher BTU (British Thermal Unit) rating for optimal performance.
Furthermore, consider the layout of the room. If you have a more open floor plan, the air from your portable AC will be able to circulate more freely, resulting in more efficient cooling. On the other hand, if you have multiple rooms or partitions, you may need to strategically place the unit to ensure the airflow reaches all areas effectively.
Access to a power source
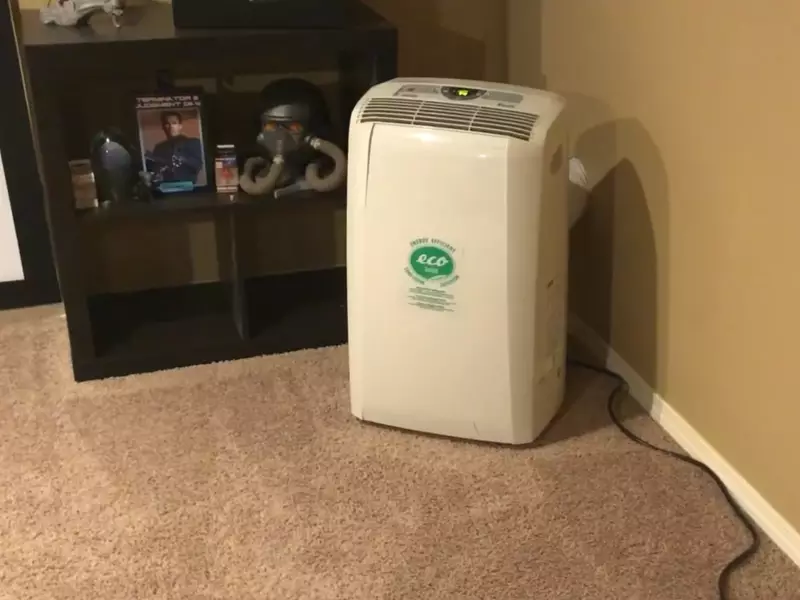
An important factor to consider when selecting a location for your portable AC is its proximity to a power source. These units require electricity to operate, so you’ll need to have a nearby power outlet available. Make sure to choose a location that allows you to easily plug in the AC unit without the need for extension cords, which can pose safety hazards. If necessary, consider hiring a professional electrician to install additional outlets or modify existing ones for your convenience.
Additionally, take into account the power requirements of the unit. Portable AC units typically have wattage specifications mentioned in their product descriptions. Ensure that the power source in your preferred location can handle the necessary wattage without overloading the electrical circuit.
Proximity to windows or vents
Lastly, when choosing a location for your portable AC, consider its proximity to windows or vents. Portable AC units expel hot air through a vent or window kit, so it’s crucial to position the unit near a suitable opening. Many units come with adjustable window kits that can fit various window sizes or vent attachments that can be used for venting through walls.
An ideal location is near a window or vent that allows for easy attachment of the exhaust hose or window kit. This ensures efficient removal of hot air from the room and prevents heat buildup. Avoid placing the unit near obstacles that could obstruct the airflow or obstruct the opening of windows.
By considering these factors when selecting a location for your portable AC, you’ll be able to enjoy the cool comfort it provides while optimizing its performance. Keep in mind room size and layout, access to a power source, and proximity to windows or vents to make the most of your portable AC installation.
Clearing The Space
Before you start installing your new portable AC, it is essential to clear the space properly. This step not only ensures that there is enough room for the unit, but also helps optimize its performance. In this section, we will discuss two important aspects of clearing the space: removing furniture and obstacles, and cleaning the area.
Removing furniture and obstacles
Begin by assessing the area where you plan to install your portable AC. Take a look at the room and identify any furniture or obstacles that may hinder the proper operation of the unit. It is important to create a clear and unobstructed path for the airflow.
Start by moving any large furniture pieces that are blocking the intended location of your portable AC. Heavy items such as sofas, shelves, or cabinets should be temporarily relocated to another part of the room or a different room altogether.
As you remove the furniture, take the opportunity to wipe down any dusty or dirty surfaces. This not only ensures a clean installation area but also improves the air quality in your home. Additionally, make sure to remove any small decorative items or clutter that may limit the airflow around the portable AC.
If there are permanent fixtures like wall-mounted shelves or paintings in the vicinity of the installation area, consider temporarily taking them down. This will prevent any potential damage during the installation process and ensure the unit is properly and securely placed.
Cleaning the area
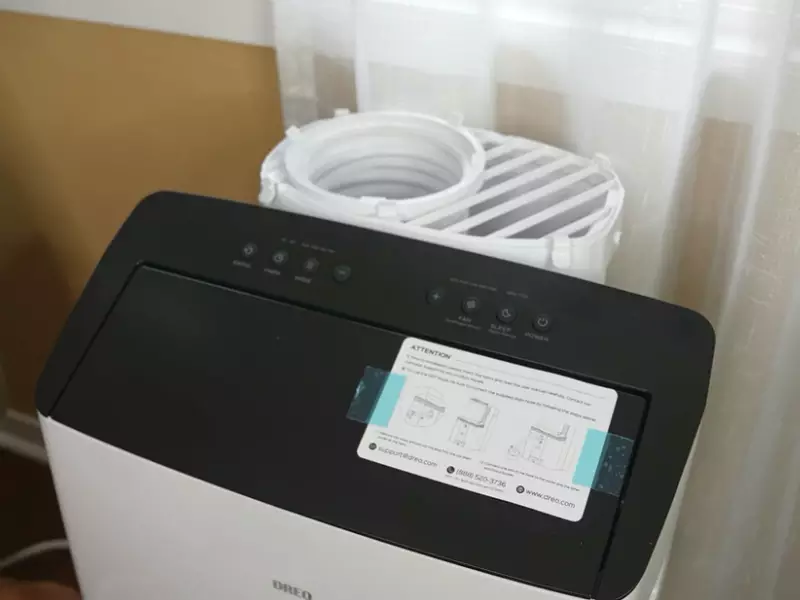
Once furniture and obstacles have been removed, the next step is to clean the area thoroughly. Dust and debris can accumulate over time, and these particles can affect the performance and efficiency of your portable AC.
Start by vacuuming the entire room, paying special attention to the area where the unit will be installed. This will remove any loose dirt or dust that may have accumulated on the floor or carpet.
Next, use a damp cloth or an appropriate cleaning solution to wipe down the surfaces around the installation area. This includes walls, windowsills, and baseboards. Be careful not to use excessive moisture, as it can damage the walls or flooring.
If you notice any mold or mildew in the installation area, it is essential to address this issue before proceeding with the installation. Use a suitable mold and mildew cleaner to eliminate the growth and ensure a clean and healthy environment.
By clearing the space properly and cleaning the area beforehand, you can ensure a smooth installation process and maximize the performance of your portable AC.
Planning For Ventilation
Determining the exhaust hose length
Before installing a portable AC unit, it is crucial to determine the length of the exhaust hose. This hose is responsible for venting hot air out of the room and maintaining a cool indoor environment. A too-short hose will restrict the airflow, while a too-long hose may lead to reduced efficiency and poor cooling performance.
To determine the exhaust hose length, start by measuring the distance between the unit and the window or vent where you will be installing it. Measure the height difference as well if applicable. Make sure to add extra length to accommodate any bends or curves in the hose.
It’s important to note that longer exhaust hoses may require an additional kit to ensure proper installation. Be sure to check the manufacturer’s guidelines for the specific portable AC unit you are installing.
Identifying the window or vent for proper installation
Once you have measured the exhaust hose length, the next step is to identify the window or vent through which the hot air will be expelled. This is crucial for the efficient functioning of the portable AC unit. Whether you are using a window or vent, it should be easily accessible and have enough space to accommodate the exhaust hose.
In the case of a window installation, ensure that the window is the appropriate size and can be securely sealed. Window installation kits are often included with the portable AC unit, providing the necessary accessories such as window panels and seals. These kits are designed to ensure a tight fit, preventing any hot air from entering the room.
If you are opting for a vent installation, make sure to locate a vent that leads directly outside. It should have enough clearance and be free from any obstructions. Check the vent opening size to ensure compatibility with the exhaust hose diameter.
Properly identifying the window or vent for installation will not only enhance the cooling efficiency but also prevent any leaks or issues with the portable AC unit.
Setting Up The Exhaust Hose
When installing a portable AC, one of the crucial steps is setting up the exhaust hose. This component is responsible for venting out hot air from the room, ensuring efficient cooling. Let’s dive into the process of connecting the hose to the AC unit and extending it to the designated window or vent.
Connecting the hose to the AC unit
The first step in the setup process is connecting the exhaust hose to the AC unit itself. This is usually a straightforward task that requires no special tools. Follow these simple steps to ensure a secure and proper connection:
- Locate the exhaust vent on the back of the AC unit. It is typically square-shaped and clearly labeled.
- Align the connection end of the exhaust hose with the vent on the AC unit.
- Ensure a tight fit by gently twisting the hose clockwise until it locks into place. This prevents any air leaks that could compromise the cooling efficiency.
- Double-check the connection to make sure it is secure. A loose connection can lead to air leakage, reducing the effectiveness of the portable AC unit.
Remember: A proper and secure connection at this stage is crucial to ensure the efficient functioning of the portable AC unit.
Extending the hose to the designated window or vent
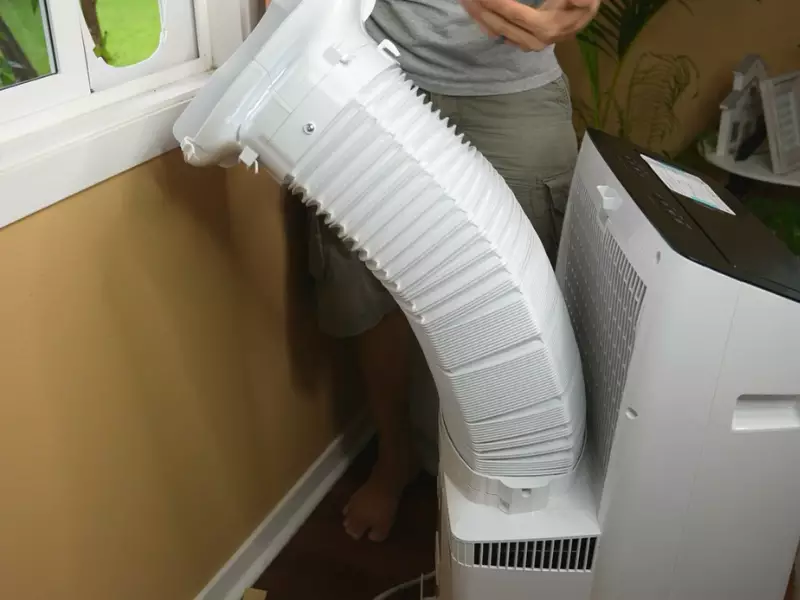
With the hose securely connected to the AC unit, the next step is to extend it to the designated window or vent. This allows the hot air to be expelled outside the room. Here’s how you can do it:
- Identify the window or vent through which you want to exhaust the hot air. Ideally, this should be a nearby window or a vent specifically designed for this purpose.
- Measure the distance from the AC unit to the window or vent. This ensures you have the correct length of the exhaust hose needed.
- Extend the hose gently without any sharp bends or kinks. Smooth, straight airflow is essential for optimal cooling and efficiency.
- If needed, use a hose extension kit to reach the window or vent without compromising the performance of the portable AC unit.
- Secure the hose in place using adjustable window brackets or tape. This prevents the hose from slipping out or causing any obstructions.
Pro tip: To further improve the effectiveness of the portable AC, try to minimize the length of the exhaust hose and avoid any unnecessary twists or turns.
By following these steps, you can confidently set up the exhaust hose for your portable AC unit, ensuring efficient cooling and a comfortable indoor environment.
Powering Your Ac
One of the essential steps to installing a portable AC unit is to properly power it. Without a reliable and stable power source, your AC won’t be able to cool down your space effectively. In this section, we will guide you through the process of plugging in the unit to the power source and ensuring that the voltage and amperage are appropriate for your AC’s requirements.
Plugging in the unit to the power source
To get started, locate a power outlet near the area where you intend to install your portable AC unit. The outlet should be easily reachable and in close proximity to the unit. It is important to note that using extension cords may not be ideal as they may not provide enough power, leading to decreased performance of the AC unit.
Ensure that the plug on the AC unit matches the type of outlet you have. Most portable AC units come with a standard 3-prong plug that fits into a regular household outlet. Make sure the plug is inserted securely into the outlet to establish a proper connection.
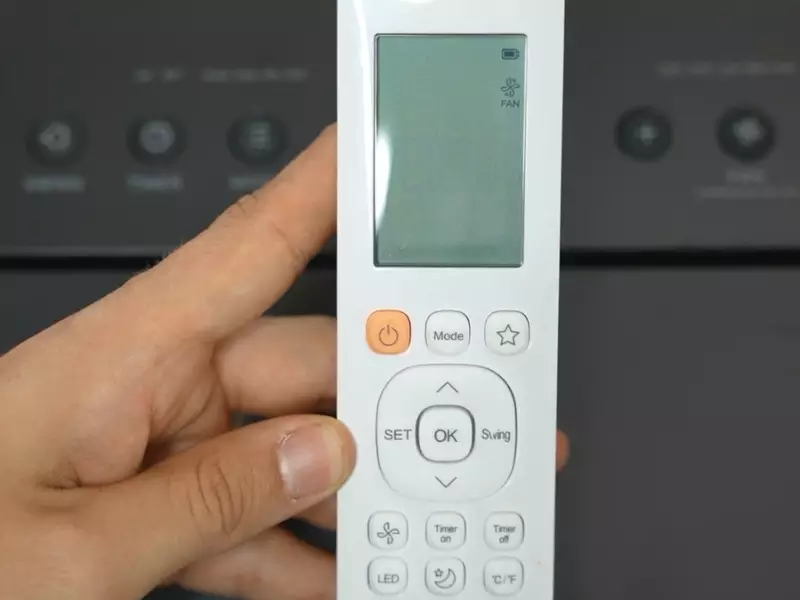
Once the AC unit is plugged in, you can turn on the power switch and start setting the desired temperature. Keep in mind that it may take a few moments for the unit to start cooling the air, so be patient.
Ensuring proper voltage and amperage
Before plugging in your portable AC unit, it is crucial to ensure that the outlet provides the correct voltage and amperage. This information can usually be found in the user manual or on the label attached to the AC unit itself.
Here’s a quick guide to determine the voltage and amperage requirements:
- Check the voltage requirement: AC units typically operate on standard household voltage, which is 120 volts in most cases. However, some units may require 240 volts. Verify the voltage requirement of your AC unit to make sure it matches the voltage provided by the power outlet.
- Determine the amperage requirement: The amperage requirement of your AC unit can vary depending on the model and capacity. It is usually specified in amps (A) or watts (W). Ensure that the power outlet can supply the necessary amperage without overloading the circuit. If you are unsure about the amperage capacity of the outlet, consult a qualified electrician.
Keep in mind:
- Using an outlet with the wrong voltage or insufficient amperage can cause the AC unit to malfunction or trip the circuit breaker.
- Do not attempt to modify the plug or use adapters that alter the voltage or amperage. This can be dangerous and may damage the AC unit.
- If you are uncertain about the suitability of your power outlet, it is always recommended to seek professional assistance.
By following these guidelines, you can ensure a safe and efficient power connection for your portable AC unit, enabling it to keep your space comfortably cool during hot summer months.
Venting The Hot Air
Installing Window Kit or Venting Adapter
Proper venting is crucial when installing a portable air conditioner to ensure efficient cooling. One of the most common methods of venting the hot air is by using a window kit or venting adapter specifically designed for this purpose.
When setting up your portable AC unit, start by choosing a location near a window or any other suitable venting mechanism. This will make the installation process much easier. Ensure that the location is within reach of a power outlet as well.
Next, open the window or vent you wish to use for venting. Depending on the type of window, you may need to adjust the window opening to fit the window kit or venting adapter properly.
If you have a sliding window, you may need to use a sliding window kit to create a seal and prevent hot air from leaking back into the room. On the other hand, if you have a double-hung or casement window, a venting adapter may be necessary to secure the exhaust hose properly.
It’s essential to follow the manufacturer’s instructions when installing the window kit or venting adapter. This will help ensure a proper fit and maximize the cooling efficiency of your portable AC unit. Some window kits may require additional accessories, such as foam insulation strips, to create an airtight seal.
Adjusting the Window or Vent Opening to Fit Properly
Once you have the window kit or venting adapter in place, it’s important to adjust the window or vent opening to fit properly. This adjustment is necessary to prevent any gaps or leaks that could compromise the effectiveness of your portable AC unit.
Start by securing the window kit or venting adapter in the window or vent opening. Depending on the design, you may need to adjust the window panel vertically or horizontally to ensure a snug fit. This step may require some trial and error to find the best position for a tight seal.
Once you have achieved a proper fit, double-check the seal to ensure there are no gaps or openings. These gaps can contribute to the entry of hot air from outside and decrease the cooling efficiency of your portable AC unit.
If necessary, use additional sealing materials like weather stripping or adhesive foam to fill any gaps between the window kit or venting adapter and the window frame. This will further enhance the insulation and prevent any heat exchange between the indoor and outdoor environments.
By taking the time to adjust the window or vent opening properly, you can ensure the hot air is effectively vented outside, allowing your portable AC unit to cool your space efficiently.
Cleaning And Maintaining Your Portable Ac
Regular cleaning and maintenance of your portable AC is crucial in order to ensure its optimal performance and longevity. By keeping the unit clean and checking for any leaks or damages, you can prevent potential issues and extend the lifespan of your device. In this section, we will guide you through the necessary steps to clean and maintain your portable AC.
Regular Filter Cleaning
The filters in your portable AC are responsible for trapping dust, dirt, and other particles from the air. Over time, these filters can become clogged, reducing the efficiency of the unit and decreasing the quality of the air it circulates. It is recommended to clean the filters every two weeks or as needed, depending on the usage and the environment.
To clean the filters, follow these steps:
- Switch off and unplug the portable AC.
- Locate the filter compartment, usually positioned on the back or side of the unit.
- Depending on the model, the filters might be washable or replaceable. If they are washable, gently remove them.
- Rinse the filters under running water to remove any dirt and debris.
- For stubborn stains or grime, you can use a mild detergent and a soft brush to clean the filters.
- Allow the filters to air dry completely before reinserting them into the unit.
- Finally, switch on the portable AC and make sure the filters are properly installed.
Checking for Leaks or Damages
Leaks or damages in your portable AC can lead to poor performance and even potential safety hazards. Regularly inspecting the unit for any signs of leaks or damages is essential to ensure its proper functioning. Here’s what you need to do:
- Switch off and unplug the portable AC.
- Remove the access panels or covers of the unit to have a clear view of the internal components.
- Check for any visible signs of leaks, such as water dripping or moisture accumulation.
- Inspect the hoses, connectors, and fittings for any damages or cracks.
- If you notice any leaks or damages, it is recommended to contact a professional technician for further assessment and repairs.
- Ensure that all access panels or covers are securely fastened back in place before using the portable AC.
By regularly cleaning and maintaining your portable AC, you can enjoy cleaner and cooler air while ensuring the longevity of your unit. Incorporate these simple steps into your routine, and your portable AC will continue to provide efficient and reliable cooling for years to come.
Common Issues And Solutions
Installing a portable AC unit can offer a convenient way to cool down your space during the hot summer months. However, there are some common issues that you may encounter during the installation process. In this section, we will discuss some of these problems and provide simple solutions to help you troubleshoot and resolve them.
Poor Cooling Performance
One of the most frustrating issues that you may face is poor cooling performance from your portable AC unit. If you notice that the air coming out of the unit is not as cold as expected, there are a few things you can check and address:
- Make sure that the unit is placed in a well-ventilated area. Adequate air circulation is essential for the unit to function effectively.
- Clean or replace the air filters regularly. Dirty filters can restrict airflow and hamper cooling performance.
- Check the settings on the unit to ensure that the fan and cooling modes are properly selected.
- Inspect the exhaust hose for any kinks, twists, or blockages. A clear and unobstructed exhaust hose is necessary for efficient cooling.
Noisy Operation
A noisy portable AC unit can be a major disturbance, especially when you are trying to sleep or concentrate. Here are some steps you can take to minimize noise:
- Place the unit on a stable surface to reduce vibrations. Unstable surfaces can amplify the noise produced by the unit.
- Ensure that the exhaust hose is properly connected and secured. Loose connections can result in rattling noises.
- Clean the fan blades and remove any debris that may be causing the noise.
- If the noise persists, consider using a soundproofing material or placing a sound barrier around the unit.
Unit Not Turning On
If your portable AC unit fails to turn on, it can be frustrating and may indicate an underlying issue. Here are a few troubleshooting steps you can take:
- Check the power supply and ensure that the unit is properly plugged into a functioning outlet.
- Inspect the power cord for any damage or frayed wires. If any issues are found, replace the cord immediately.
- Reset the unit by unplugging it and waiting for a few minutes before plugging it back in. This can help resolve any temporary electrical glitches.
- Refer to the user manual for specific troubleshooting steps related to your model of portable AC unit.
By addressing these common issues and following the suggested solutions, you can ensure optimal performance and longevity of your portable AC unit. If you continue to experience problems, it may be necessary to consult a professional technician for further assistance.
Frequently Asked Questions Of How To Install Portable Ac
Do All Portable Air Conditioners Have To Be Vented Out A Window?
Yes, all portable air conditioners need to be vented out a window. Venting helps to remove the hot air and humidity from the room, allowing the AC to cool effectively. Make sure to properly install the venting kit to ensure efficient operation of the portable air conditioner.
Is Portable AC Hard To Install?
Portable AC units are easy to install. They don’t require any complex installation procedures, making them a convenient choice. All you need to do is follow the provided instructions, which typically involve connecting the exhaust hose and securing the unit in place.
It’s a straightforward process that anyone can handle.
Do Portable Air Conditioners Need To Be Vented Outside?
Yes, portable air conditioners need to be vented outside to expel hot air. Venting is necessary for proper cooling operation and to maintain efficient performance. It allows the unit to remove heat from the room and release it outside.
How Do Portable AC Units Work?
Portable AC units work by pulling in warm air from the room, and passing it over evaporator coils containing a refrigerant, which absorbs the heat and cools the air. The cooled air is then circulated back into the room, while the hot air is expelled through an exhaust hose.
Conclusion
Installing a portable AC unit is a straightforward process that can provide comfort and relief during the sweltering summer months. By following these step-by-step instructions, you can ensure a seamless installation experience. From choosing the right location to connecting the exhaust hose and adjusting the settings, each step plays a crucial role in maximizing the unit’s effectiveness.
With proper care and maintenance, your portable AC can help create a cool and enjoyable environment in your home or office. Stay cool, and beat the heat with your newly installed portable AC unit.
